As a blogger, I’m always searching for eye-catching imagery that I can use on my websites and with the birth of AI image generators, it’s never been easier. So with that in mind, in this post, I’m going to show you how to use Adobe Firefly AI Image Generator to create your own stunning images from scratch.
I use several AI Image generators but Adobe Firefly is up there as one of my favourite ones and it’s super easy to use even if you’re a complete beginner who’s never ventured into the AI image-generating world.
What’s even better is that since it came out of beta, it’s now available to use commercially so you could cover your site from head to toe with Adobe Firefly AI images if you wanted to and it wouldn’t be a problem.
There’s also a free plan so you can generate quite a few images per month without having to pay a penny as well as getting access to Adobe Express in the process.
So, although you can access Firefly through several of the Adobe apps, we’re going to look at the web version so let’s take a look at the web version of Adobe Firefly and see what it can do.
How To Use Adobe Firefly AI
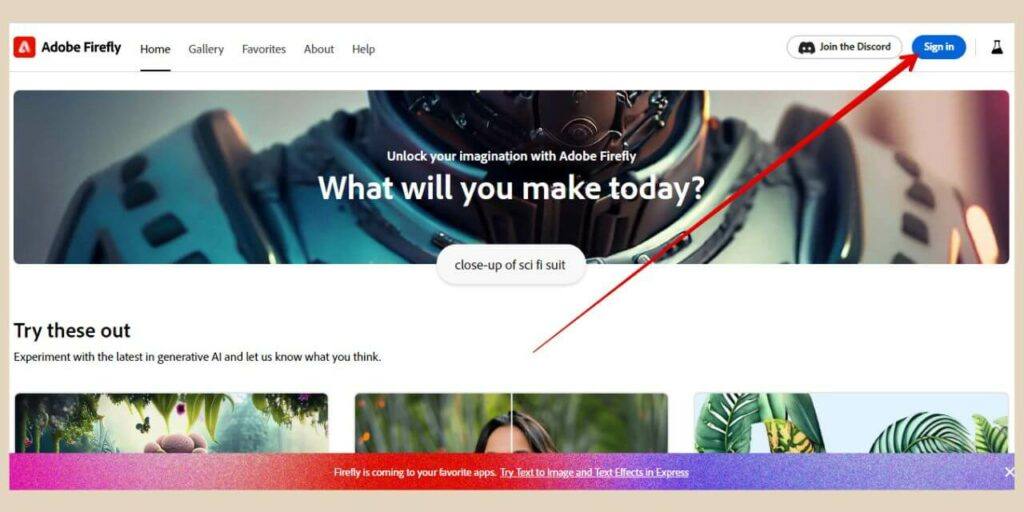
To get started with Adobe Firefly using the web version, head over to the Adobe Firefly site and click the Sign in button.
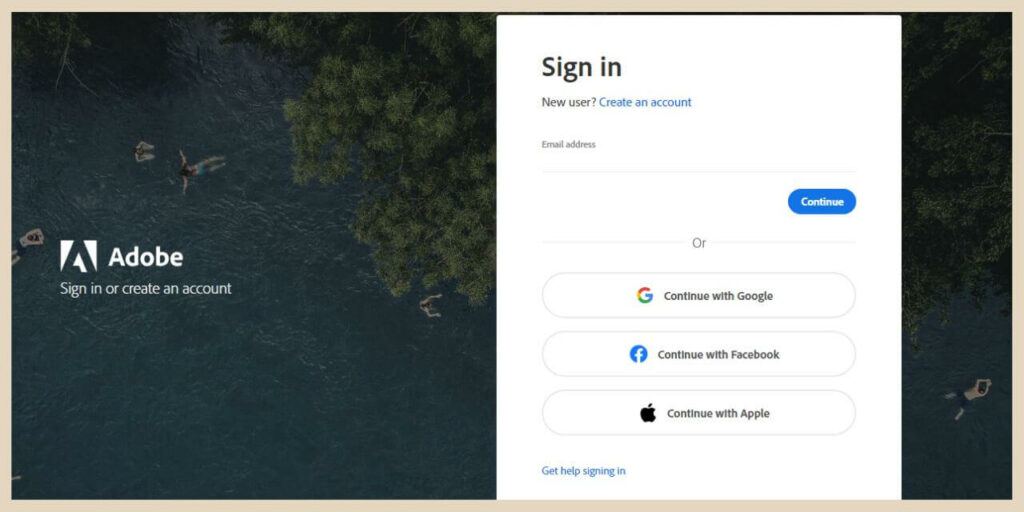
If you don’t already have an account, you can use your Google, Facebook or Apple account to sign up for a free account to get started.
With a free account, you’ll get 25 generative credits per month and one credit will generate 4 images. With a paid account, you’ll get anywhere between 100 to 1000 generative credits per month depending on the plan you choose.
I will quickly mention that the free account does leave an Adobe Firefly watermark on all of your downloaded images whereas a paid account allows you to download your images without the watermark so that is one slight downside to the free account.
The Adobe Firefly AI Tools
Once you’ve signed in/signed up and you’re ready to start exploring Adobe Firefly, you’ll have 4 different tools that you can play around with and they are:
- Text to Image – Image-generating tool.
- Generative Fill – Remove objects or add new ones to an image.
- Text Effects – Apply textures or styles to text.
- Generative Recolour – Generate colour variations of your vector artwork.
I’ll start with the Text to Image tool because this is the one I’ve had the most amount of fun playing around with and the tool I actually use the most.
How To Use The Adobe Firefly Text To Image Tool
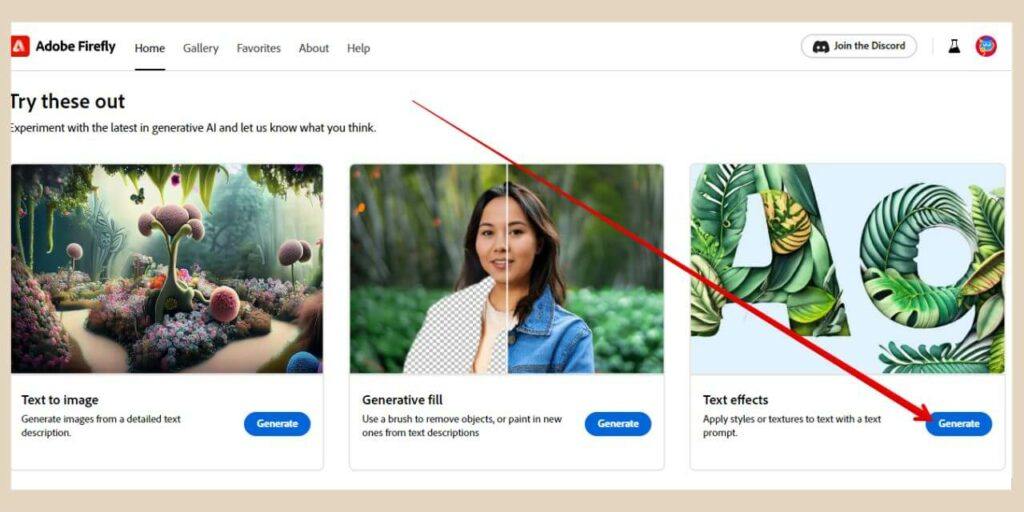
To use the Text to Image tool, scroll down the homepage slightly until you see the “Try These Out” heading.
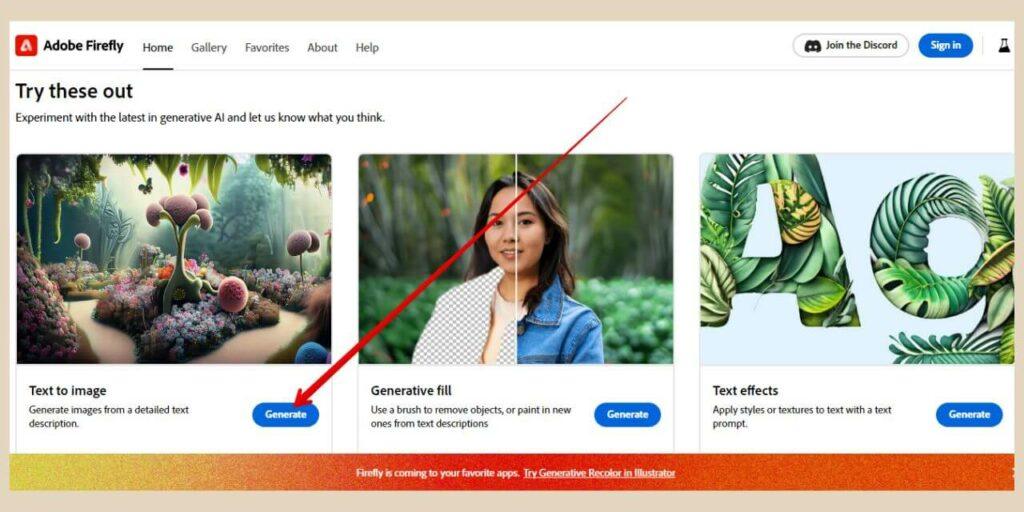
Directly below this, you’ll see a selection of tools with the first one being the Text to Image tool so click the Generate button within the Text to Image box and that will take you to a new page.
From here, you’ll see a selection of sample images and a text box (prompt box) at the bottom of the screen so you’ll have two options here to generate images.
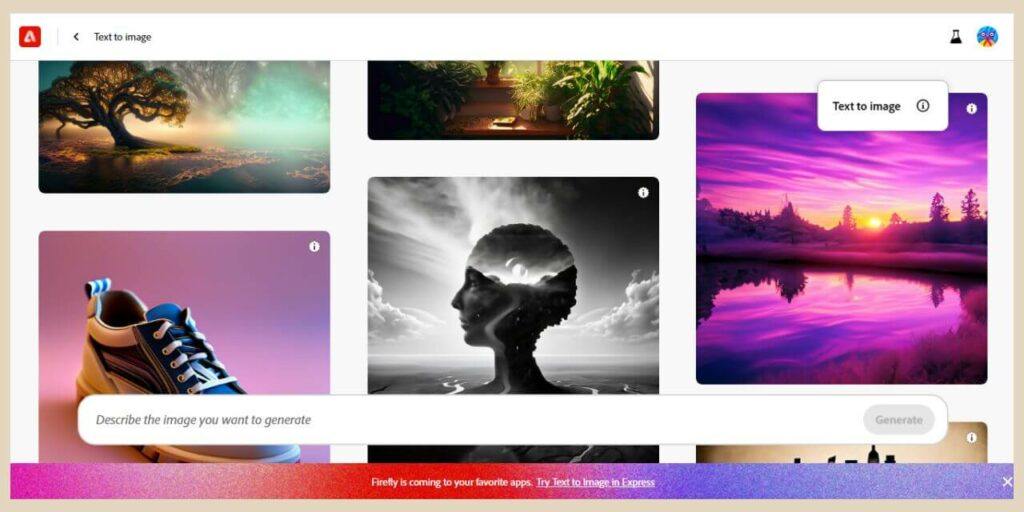
The first option is to type the description of the image you’d like to create into the prompt box followed by clicking the Generate button.
The second option is to select one of the sample images which you can then edit and customise to your own liking.
You’ll also be able to see the prompts used to create the sample images by hovering over them if you need some inspiration or help with your prompts.
Accessing The Text To Image Editor
Choosing either one will take you to the Text to Image editor page where 4 images will be generated based on the sample image or your prompt.
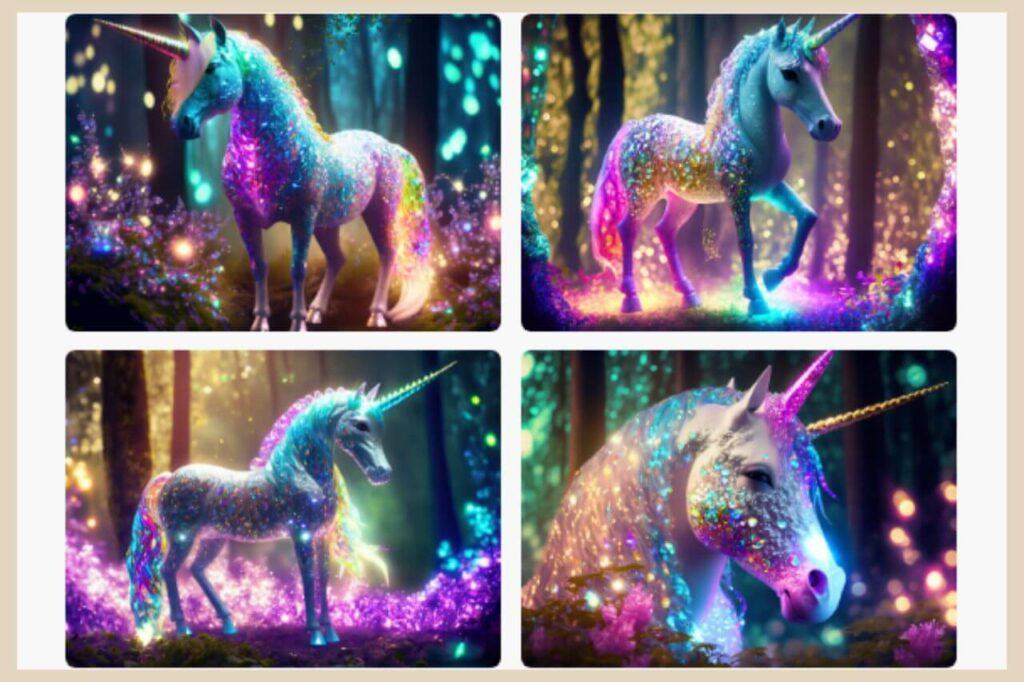
From here you’ll be able to customise the image even further by changing the aspect ratio, style, etc which I’ll get into in a moment.
However, there is one little thing that I want to mention first before I go any further. If you use the first option of using the prompt box, there are no other setting options here so you can’t set any preferences until you’re in the editor.
This means that by default the very first set of images that you’ll generate will be 1:1 square images in an art content type and this will use up 1 of your credits.
Don’t Waste Your Credits
I’m always looking for either landscape images that I can use to create images for my blog posts or portrait images that I can use to create Pinterest Pins.
So rather than wasting 1 credit on a square image that I know I don’t want just to access the editor, I tend to start by selecting a sample image instead.
Choosing a sample image will still take you to the edit page but it won’t cost you 1 of your credits to get there.
Doing it this way will allow you to choose the aspect ratio, styles, content type, etc right from the get-go and because there’s a prompt box here at the bottom of the screen, you can just type your image description here instead.
So, with that in mind, choose any old sample image to get you to the edit page and then use the prompt box at the bottom of the screen to describe the actual image you want to create.
Changing The Setting To Create Different Image Results.
On the right-hand side of the edit page, you’ll have several settings that you can use to change the type of images that are generated.
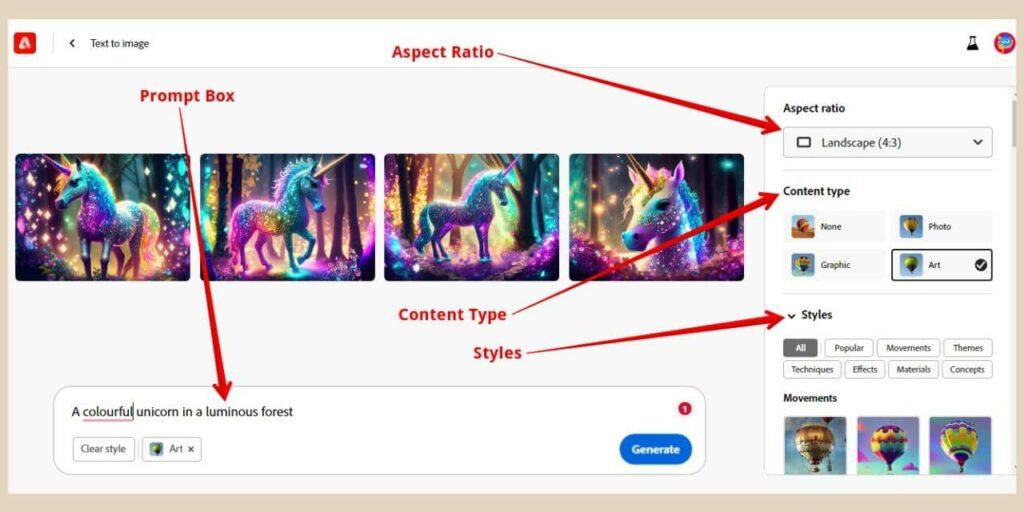
The very first one is the aspect ratio where you can choose between Landscape (4:3), Portrait (3:4), Square (1:1) or Widescreen (16:9).
The next option will be the content type where you can choose between Art, Photo, Graphic or None and these options make a big difference to the types of images that’ll be created.
Beneath this, you’ll find the styles section and this will also help you create very different images by selecting the different style options.
Adding Different Styles To Your Creation
There are numerous styles to choose from here ranging from Oil Painting to Hyper Realistic to Cartoon and you can actually add as many of these as you want to your design.
You’ll also notice a selection of boxes just under the styles heading that include Themes, Effects, etc.
You can use these to either select the individual style types to see the options available for each one or you can just select All which will display every style option available.
As I mentioned, you can select several of these at once and if you look at the prompt box, you’ll notice them added underneath the prompt.
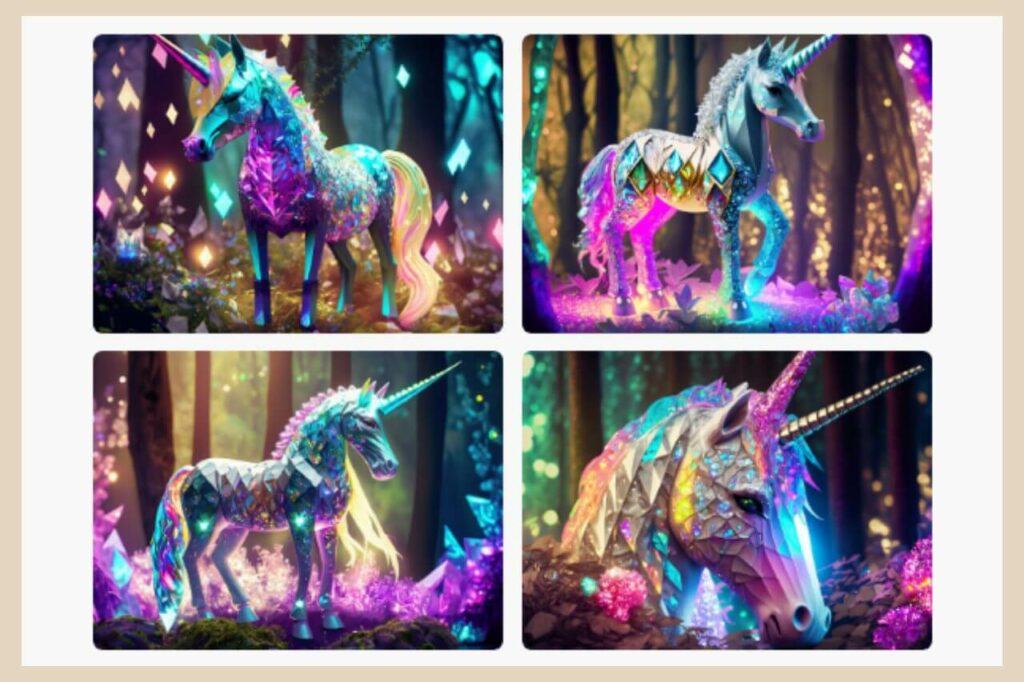
This is what Firefly generated when I added the Hyper Realistic, Steampunk, Graffiti and Origami styles to the mix and as you can see, it generated some pretty interesting results.
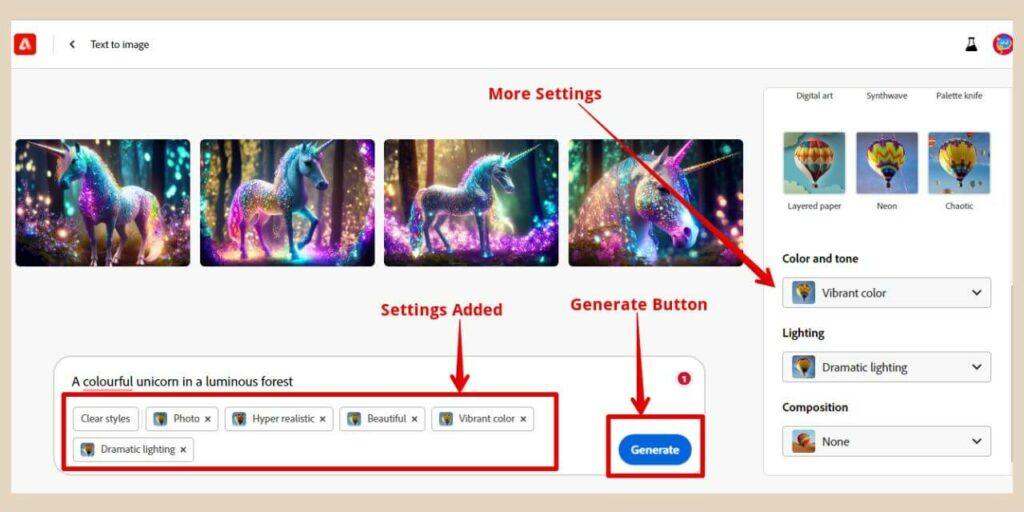
Underneath the Styles options, you’ll find 3 more options that you can change to alter the image results further and they are Colour and Tone, Lighting and Composition.
Additional Style Options
With colour and tone, you can choose between several options that include Vibrant Colour, Black and White, Cool Tone, etc.
The lighting options allow you to choose between several lighting styles including Backlighting, Studio Lighting, Dramatic Lighting, etc.
The composition options allow you to choose between several compositions including Close Up, Wide Angle, Shot From Above, etc so you can really change the look of the images generated.
So, use the dropdown menu to make your selection if you want to change any of these. By default, everything here will be set to none and again, if you select any of these, you’ll see them added just under the prompt.
If for any reason, you want to change everything back to none, you can simply click the Clear Styles button underneath the prompt and all of the styles you’ve added will be removed.
Generating The Results
To see the results of your prompt and settings choices, click the Generate button on the right-hand side of the prompt box and 1 credit will be used to generate 4 images based on your prompt and the settings you’ve chosen.
If you’re not happy with the results, just click the Refresh button (which was the Generate button) and another credit will be used to generate 4 more new results.
If you want to make any changes to the settings or your prompt, you’ll need to click the Refresh/Generate button again to generate 4 brand new images to see any of these changes and this will cost you 1 credit every time you do it.
By the way, unlike a lot of other AI image generator tools, these images are not saved by default so you won’t find a previous generations area here.
If you click the Refresh/Generate button again, the existing images displayed will be replaced with brand new ones and the previous results will be gone and they’re not retrievable.
You’ll need to save any images that you like first before generating new ones otherwise they’ll be gone forever and I’ll show you how to do that in a moment.
Editing And Saving Your Images
Once you’ve found an image that you like, you can click on it to see a larger version.
You’ll also have some other options here which you’ll see if you hover over the image both when it’s small or enlarged (except for “Use As Reference Image” which you’ll only see when you hover over the small images).
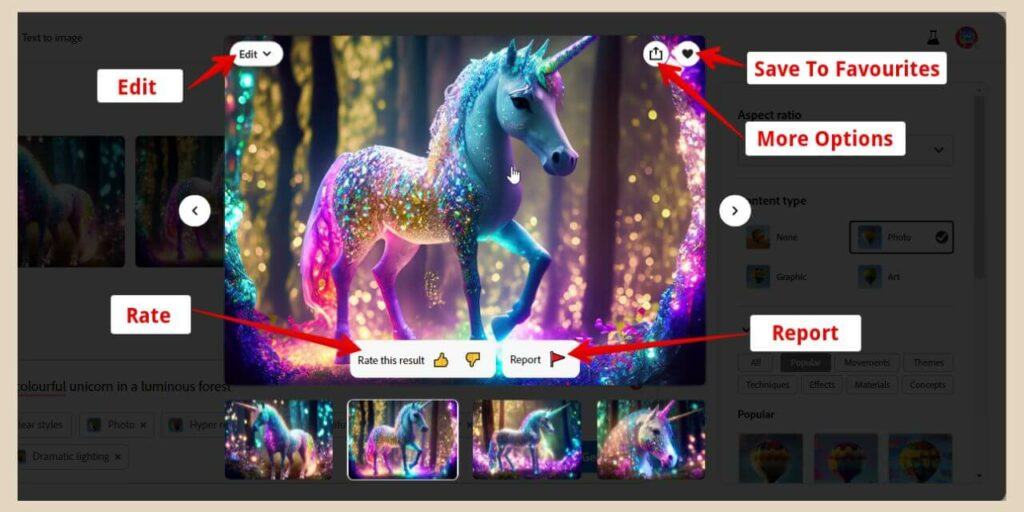
You can choose to rate the image if you like with a thumbs up or a thumbs down or you can report the image if something inappropriate has been generated from your prompt.
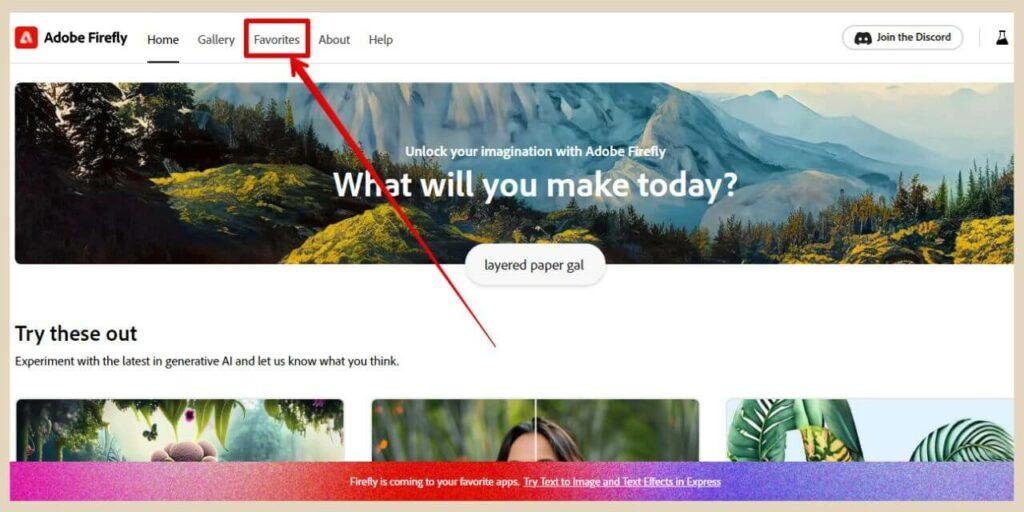
If you click the heart icon, this will save the image to your favourites which you can access from the favourites tab in the main menu on the Adobe Firefly homepage.
If you click the More Options button, a small menu will appear where you’ll be able to choose a few more options.
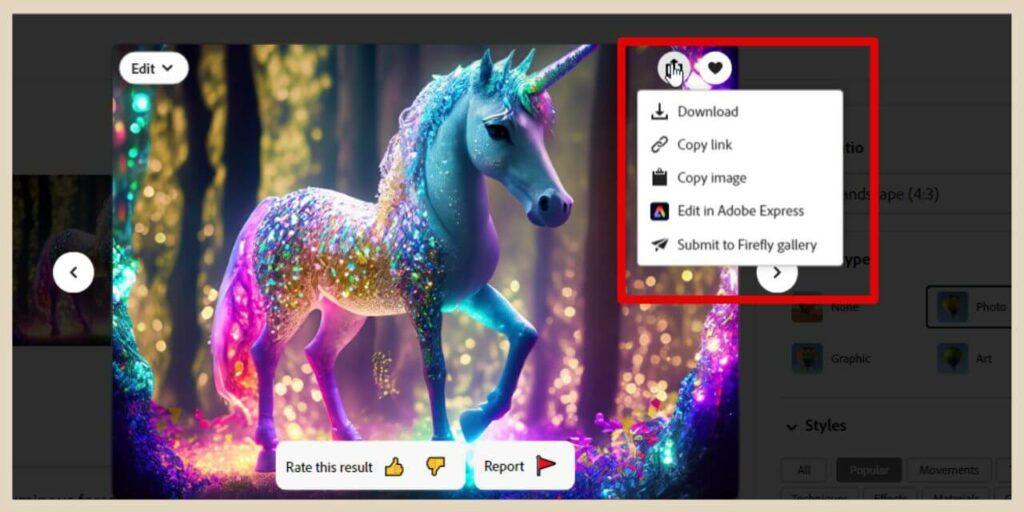
You’ll have the option to download the image, copy the link, copy the image, edit the image in Adobe Express or submit the image to the Firefly gallery.
The Edit Button
The final option here is the Edit button which will give you 6 different editing options. The first one is Generative fill which is another one of Adobe Firefly’s AI tools which will let you remove or add new objects to your image (more on that further down).
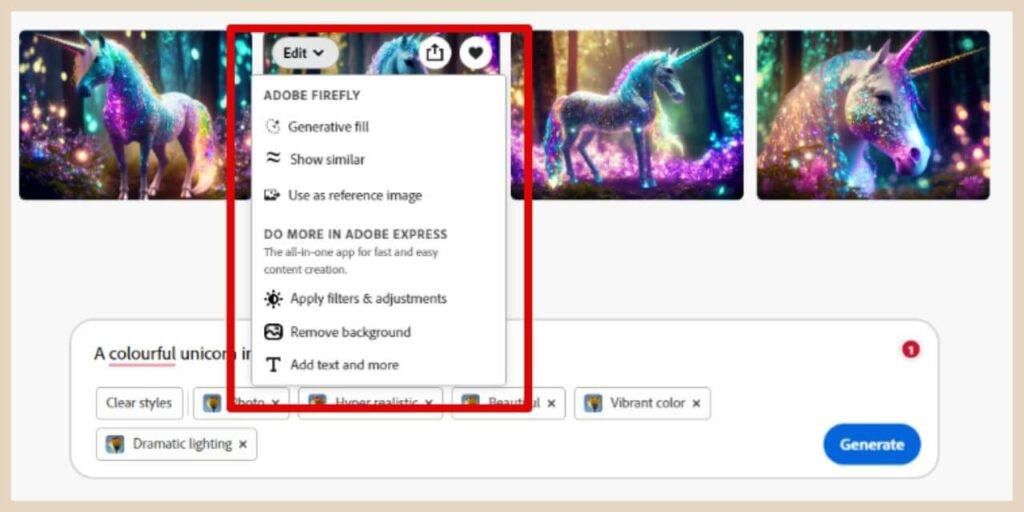
Show Similar is the next option and this will generate similar results to the image you have selected but this will cost you a credit as you’re generating new images.
Again the existing images will be replaced so if there are any that you want to keep, make sure you download, save to favourites or send over to Adobe Express first.
Using A Reference Image
The next option here is Use As Reference Image and this will add the image to the prompt box and use it as a reference for all future prompts.
Clicking this option will automatically use 1 credit to generate 4 new images using the selected image as a reference.
You should also see a reference box above the thumbnail of the image in the prompt box (click the reference image in the prompt box if you don’t see it).
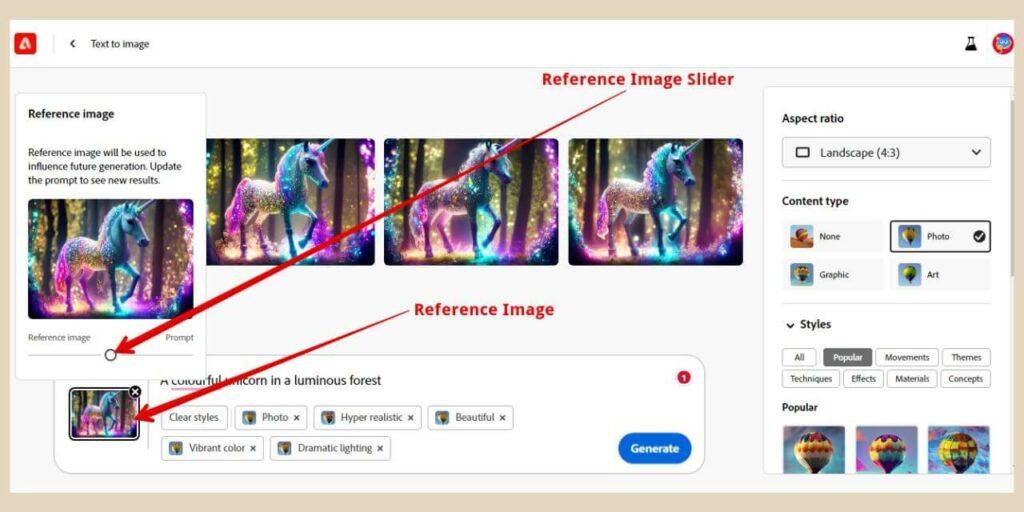
You can use the slider here to adjust how much you want the next images to look more like the reference image or more like the prompt description.
To stop using the image as a reference simply click the x in the top right corner of the image in the prompt box and it will be removed.
Sending Your Images To Adobe Express
The last 3 options here are all about editing the image in Adobe Express and you can select either Apply filters and adjustments, remove background or add text and more.
To be honest, it doesn’t really matter which one you select here because you’ll just be sent to the Adobe Express editor where you can edit your chosen image in any way you please regardless of which options you click on to get there.
As I mentioned earlier, even as a free user, you get access to Adobe Express which is a little similar to Canva.
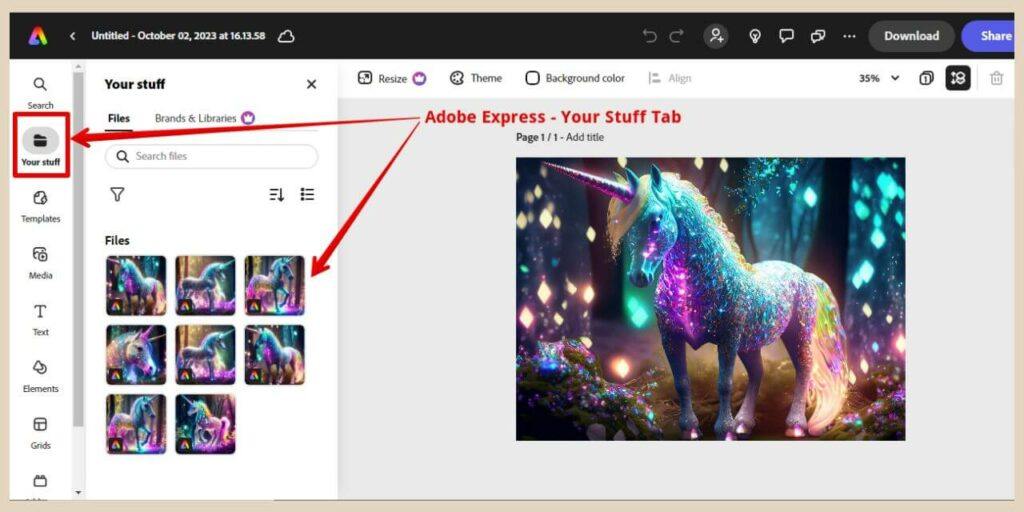
When you bring your images across to edit them in Adobe Express, they’re automatically saved in a tab called Your Stuff so it’s a great way to save your generated images without having to download them.
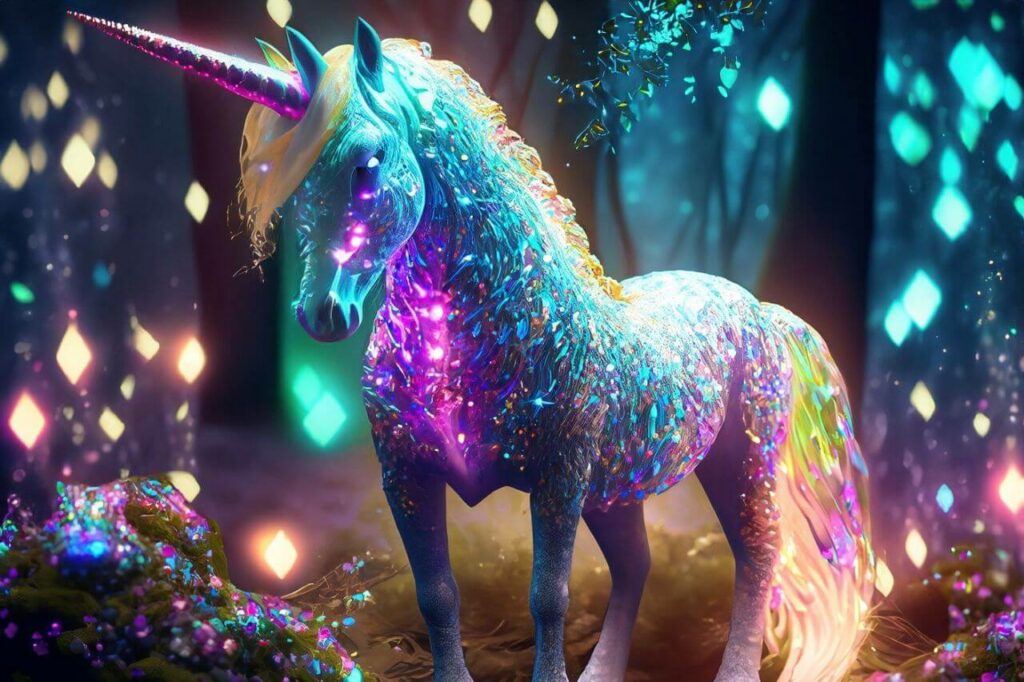
So, after playing around with the Text To Image tool for a bit, this is one of the images that Adobe Firefly generated with the prompt, “A colourful unicorn in a luminous forest”.
I wasn’t thinking about my 10-year-old daughter when I (and by I, I mean Firefly) created this but she just saw it and apparently it’s everything she’s ever dreamed of and she wants it printed out and hung up on her bedroom wall ?.
So, I guess by that, Adobe Firefly does a pretty good job with its AI images and it’s up there with some of my favourite free AI image Generators but generating AI images isn’t the only thing it can do. Let’s have a look at some of its other tools starting with its Generative Fill tool.
How To Use Adobe Firefly Generative Fill
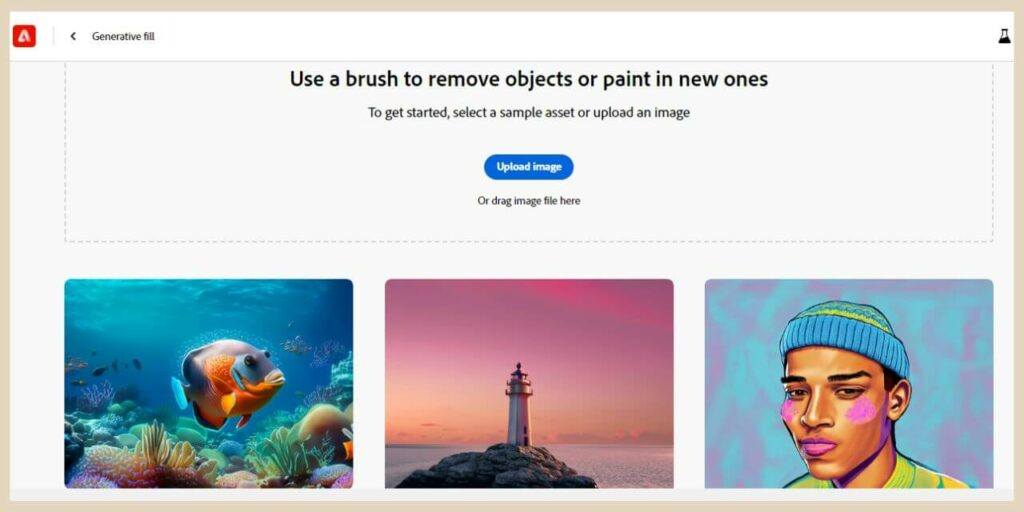
Adobe Firefly’s Generative Fill is a tool that will allow you to remove or add new objects to your image and you can access it in 2 different ways.
The first way is by scrolling down on the homepage and clicking the Generate button in the Generative Fill box which is right next to the Text To Image box.
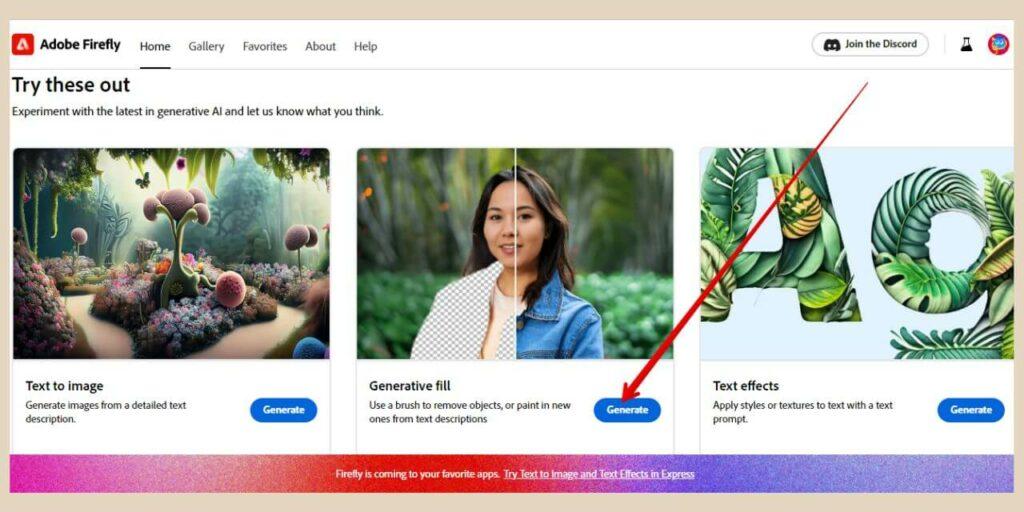
This will take you to a page where you can either upload an image or use a sample image to get you into the Generative Fill editor.
The second way is by hovering over a generated image in the Text to Image editor and clicking the edit button followed by the Generative Fill option that I mentioned earlier.
Using the Generative Fill Tools
Once you’re on the Generative Fill editor page, you’ll see 2 toolboxes which you can use to do several different things to your chosen image.
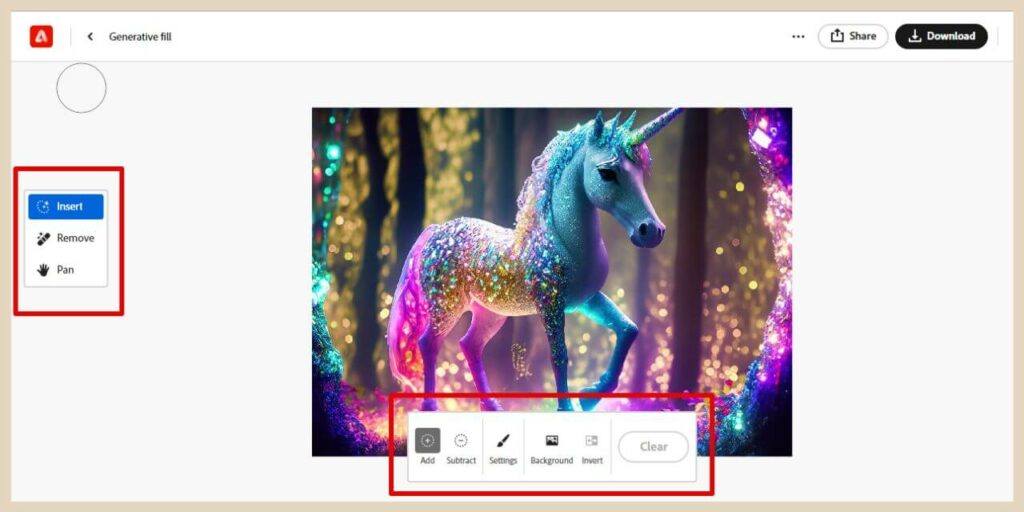
The first toolbox on the left-hand side of the page will have 3 options that will allow you to do the following.
- Insert – Add new objects to the image.
- Remove – Remove objects from the image.
- Pan – Move your image around the canvas.
The second toolbox at the bottom of the page beneath the image will have a few more options that you can use to do the following.
- Add – Erase an area within your image and add something different to replace it.
- Subtract – Erase an area within your image.
- Settings – Change the settings for the brush used to select areas of your image (size, hardness, opacity).
- Background – Remove the background from your image.
- Invert – Inverts the area selected.
- Clear – Clears all settings.
As an example, I wanted to add a gemstone necklace to the unicorn in my image so to do that I started by selecting the insert tool. Next, I selected the area within the image where I wanted to add the necklace.
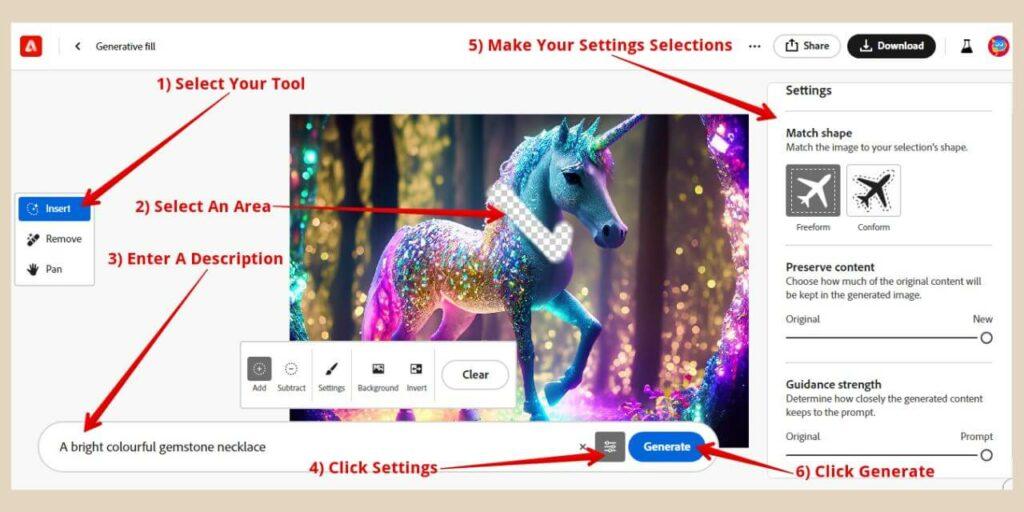
I then typed in the descriptions of the object I wanted to add to the image and then clicked the settings button which is on the far right of the prompt box just before the Generate button.
Using The Generative Fill Settings
This opened a new area on the right of the page where I could make 3 more selections.
The first selection was Match Shape and I chose Freeform here rather than Conform because I wanted the necklace to fill the area I had selected rather than conform to the shape of the area I had selected.
Preserve Content is the next selection and here I choose to move the slider all the way to New rather than Orginal because I wanted Firefly to generate a new image based on my prompt rather than based on the original image.
The last selection here is Guidance Strength and again I moved the slider all the way to Prompt rather than Original because I wanted Firefly to keep to the prompt as closely as possible.
Generating The Results
Once I’d finished with all these settings, I went ahead and clicked the Generate button and this is what Firefly came back with.
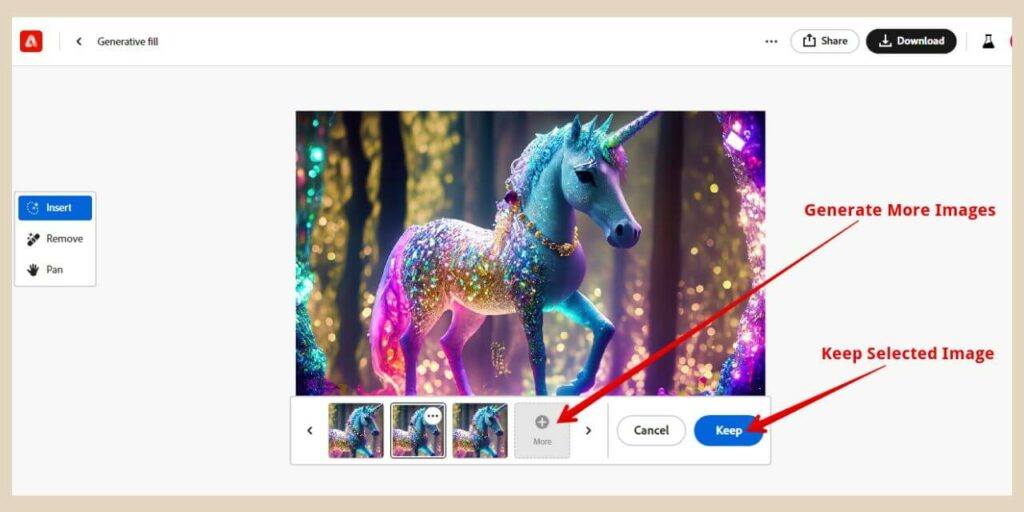
Again, Adobe Firefly will use 1 credit to generate a new set of images based on your instructions but if you don’t like any of the results, you can click the More button and use another credit to generate a new set of images.
If you find an image that you like amongst the images, simply select it and click the Keep button.
All the other images will be discarded and you can now either make more changes to it with the Generative Fill tool or save/share it using one of the three options at the top of the page.
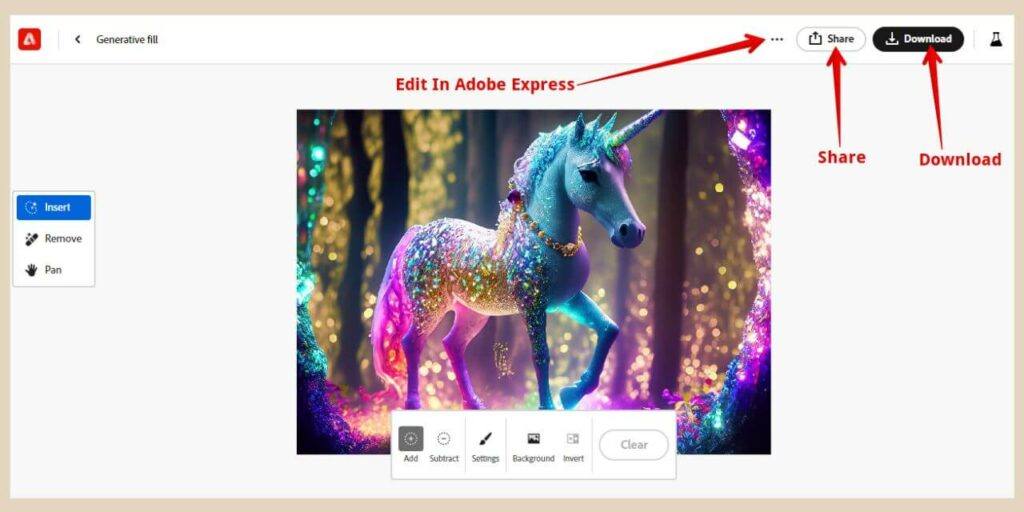
You can click Download to download your image, click Share to share your image or click the 3 dots and select one of the Adobe Express options that appear to send it over to Express where you can edit it further.
How To Use Adobe Firefly Text Effects
The next Firefly tool you can try is Text Effects which will allow you to create some very cool effects with the text of your choice.
You can access it from the Firefly homepage by scrolling down to the Text Effects box which is to the right of the Generative Fill box and clicking the Generate button.
From here, you’ll land on a page where once again you can choose to either enter a prompt of your own (uses 1 credit) or choose a sample image (doesn’t use a credit) to get started and access the Text Effects editor.
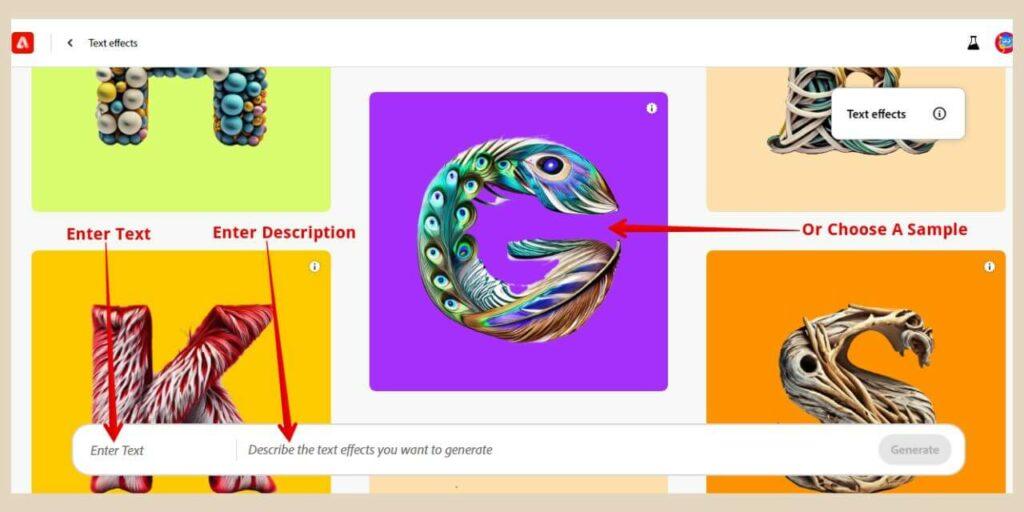
Again, I tend to use a sample so I don’t waste a credit but once you’re in the Text Effects editor, you’ll have a few different options that you can use to change the design you’re creating.
On the far left of the prompt box, you can type the text you want to use in your design. The remainder of the prompt box is where you can describe the type of effects you’d like to add to the text.
Using The Text Effect Settings
On the right of the page, you’ll find some other styling options starting with Sample Prompts and you can click the See All link to view the full selection (there are quite a few of them).
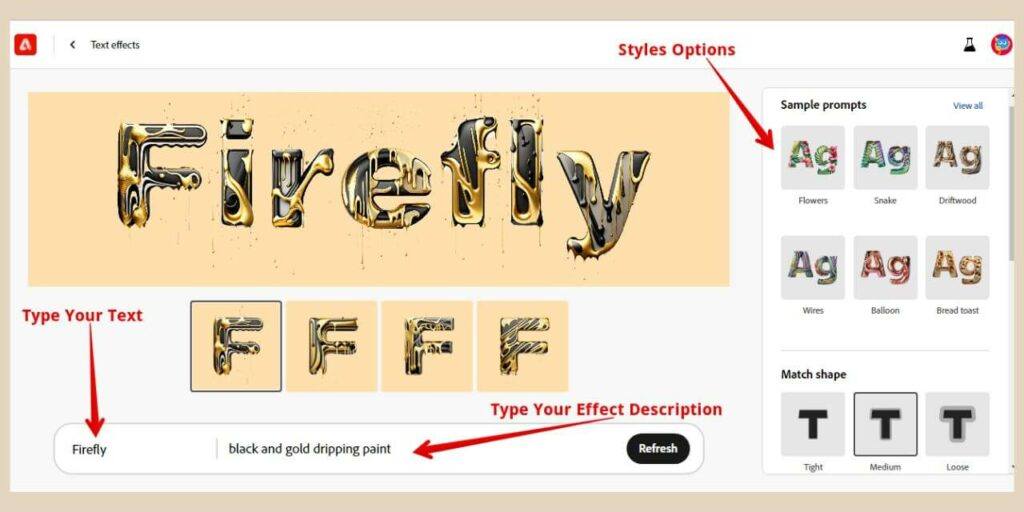
The next option is the Match Shape option which will allow you to choose how tight or loose the text effect is to your letters. If you scroll further down, you’ll also see some Font options where you can change the font to your liking.
And the last option underneath fonts is Colour where you can change both the background colour behind the text and the colour of the text itself.
Again, once you’re ready and you click the Generate button, 1 credit will be used to generate 4 designs based on your instructions.
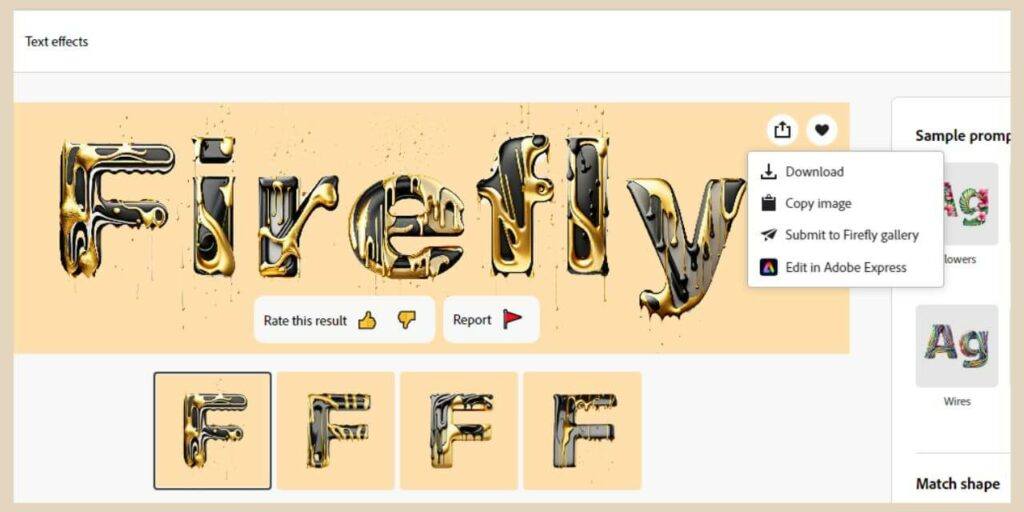
If you like one of the designs generated, simply hover over it and you’ll have the ability to rate it, report it, save it to Favourites or use the more options button to download it, copy it, submit it to the Firefly gallery or edit it in Adobe Express.
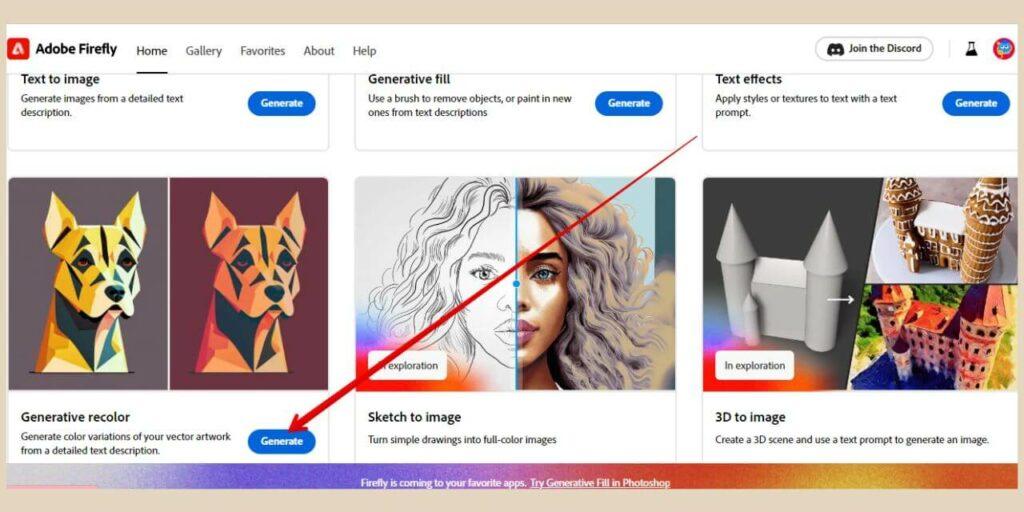
How To Use Adobe Firefly Generative Recolour
The Adobe Firefly Generative Recolour is the last tool on the list and it lets you generate colour variations of your vector artwork.
To access the Generative Recolour tool, scroll down on the homepage and click the Generate button in the Generative Recolour box which is directly underneath the Text To Image box.
On the next page, either upload your own SVG file or choose one of the sample designs to access the Generative Recolour editor.

Once you’re on the editor page, you can use the prompt box at the bottom of the screen to describe the colour variations you’d like to use.
Settings Inside The Editor
You also have the option to upload an SVG file on the editor page by using the upload box on the top right of the page if you used a sample design to access the page.

There are also some style options here under the upload area where you can choose between a variety of sample prompt styles, harmony options and colour options that you can use to add additional colours to your prompt.
Much like every other Adobe Firefly tool, it will cost you 1 credit to generate the results which again will give you 4 design options.
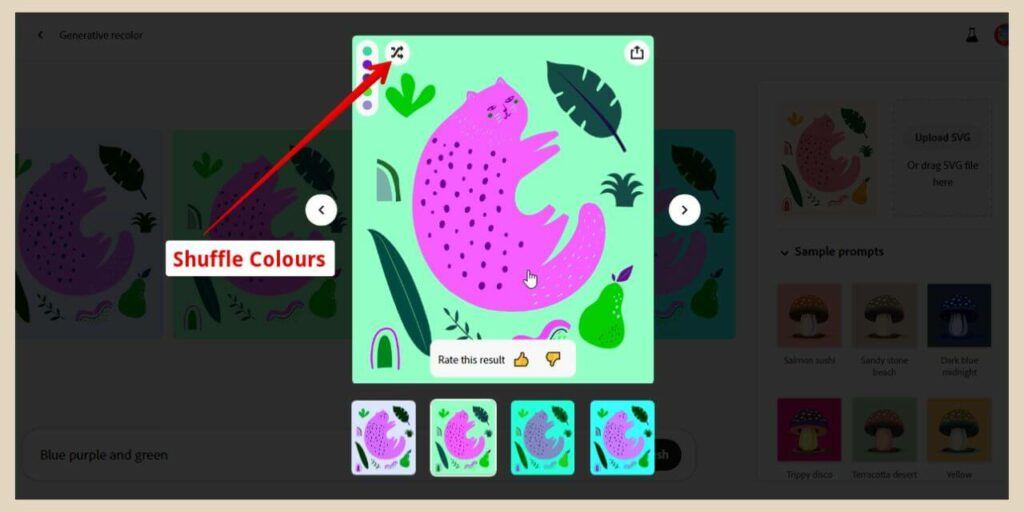
If you hover over one of the results, you’ll get the rate and more options buttons as before but this time you’ll also see a list of the prominent colours used in the variation as well as a Shuffle Colours button which will shuffle the colours within the design.
Once you’re happy with one of the results, just hover over the image and click the More Options button where you’ll be able to choose to download, copy image or edit in Adobe Express.
Let’s Get Creative With Adobe Firefly AI
And there you have it, a very cool and creative tool for all your imagery needs. Whether that’s creating images from scratch, altering images you already have or creating unique text effects, Adobe Firefly has you covered.
So, why not head over to Adobe Firefly and try it out for yourself? You’ll be amazed at the types of creations you can generate with nothing more than a simple prompt.
As always, I hope you’ve found this post helpful and if you feel like sharing your own Adobe Firefly stories, please feel free to share them in the comments below. I’d love to hear all about them.
Happy Firefly AI Image Creating!

Helpful Guides to Read Next
These beginner-friendly guides will help you keep building your blog step by step.
- The Best Free AI Image Generators for Bloggers and Creators
- Why Bloggers Love Leonardo AI for Image Creation
- Generate High-Quality AI Images with OpenArt
- How to Create Better Graphics Faster with Canva AI
- How to Create Professional Blog Graphics with Canva for Free
Ready to Scale Your Digital Footprint?
Publishing content is only half the battle. If you’re ready to amplify your reach, visit my Grow Hub for actionable deep dives on search engine optimisation, email list building, creating better content and graphics and sustainable traffic strategies.

Jessie
Founder, nomorerush.com
Hi, I’m Jessie — founder of No More Rush. I help beginners build profitable, beginner-friendly blogs without the overwhelm or unrealistic expectations you see online. Everything here is built around simple, structured steps so you always know what to do next.


Hey thank you for this post!
It is good to know that AI is quite easy to use since for beginners it can be a little daunting especially if they are unaware of what is going on.
Really appreciate how you have stated step by step of how to grasp the basics. The images help create a visual memory and make it much easier to do it ourselves.
Thanks again and have a great day!
Thanks, Sariya
I’m glad you found it helpful.
Thanks so much for all the info on Adobe Firefly! To tell you the truth, I’ve kind of ignored AI image generation because I’m an artist and I like to do a lot of stuff myself. But I really enjoyed going through your explanations and pictures on how to use it. I do like to play in digital art but have only liked Procreate these days. But I would like to try playing in Firefly and see what I end up coming with, especially since through your screenshots, it is much more simple than I anticipated. I was afraid AI generation would be super complicated, especially if you only had a free account, because most places seem to want you to pay to have more creative options.
Hi Nicki
I’m glad you enjoyed the post. I was actually surprised when Firefly came out of beta that they offered a free plan because, well, it’s Adobe and they tend to charge for almost everything!
Especially considering the quality of the images I was getting from it when it was in beta. I was convinced it was going to go the same route as Midjourney and DALL-E so it’s great that it didn’t.
And I agree about the free account AI image generators. Some of them are extremely limited or produce really poor-quality results but there are a small handful that are excellent and Adobe Firefly is definitely one of them.
Wow! This article provides a wealth of information! Thank you so much for your detailed instructions on how to use Adobe Firefly. It looks amazing and I really can’t wait to try it out in my own blog. I love the creative process of it all and my only concern will be that I’ll enjoy creating so many images, I’ll forget about my blog!!
Seriously though, I found your step-by-step instructions so easy to follow and I’ve bookmarked the page so I can use it once I sign in to Adobe Firefly. Thanks!
Hi Elaine
I’m glad you enjoyed the post. Generating AI images is so addictive. I know I for one spend way too long playing around with them although, in my defence, I’m writing a whole series on them (any excuse).
I actually can’t remember the last time I used stock images. Every single one of my featured images for the last few months has been AI-generated and when it’s not a screenshot, my in-content ones tend to be too.
In fact, many of my featured image designs are AI-created but that’s a whole other tool that I must write a post about.
Either way, have fun in Adobe Firefly, it’s almost impossible not to!