There’s a lot you can do in Adobe Illustrator, but how about using an image as a fill for your text to create uniquely fancy text designs? It’s one of my favourite things to do, and today I’m going to show you exactly how to fill text with an image in Adobe Illustrator.
I love creating blog graphics in Adobe Illustrator, and I also love adding cool effects to text, but there’s something really snazzy about image-filled text that adds a whole new look to even the most basic of designs.
It’s an easy and quick design technique but the results are seriously cool and eye-catching so let’s take things up a notch with your text designs and learn how this cool effect is created.
How To Fill Text With An Image In Adobe Illustrator
In order to create image-filled text in Adobe Illustrator, you’ll need to use something called a clipping mask. A clipping mask essentially lets you create a frame around an image with any shape you please and that includes text too.
This will leave you with a design where only the part of the image that’s within the shape or text will be visible and everything else on the outside of it will be hidden.
There are several different ways in which you can create a clipping mask from using single shapes to multiple combined objects which I’ve covered in another tutorial but for today let’s look at how to do it using text.
Choosing The Right Font
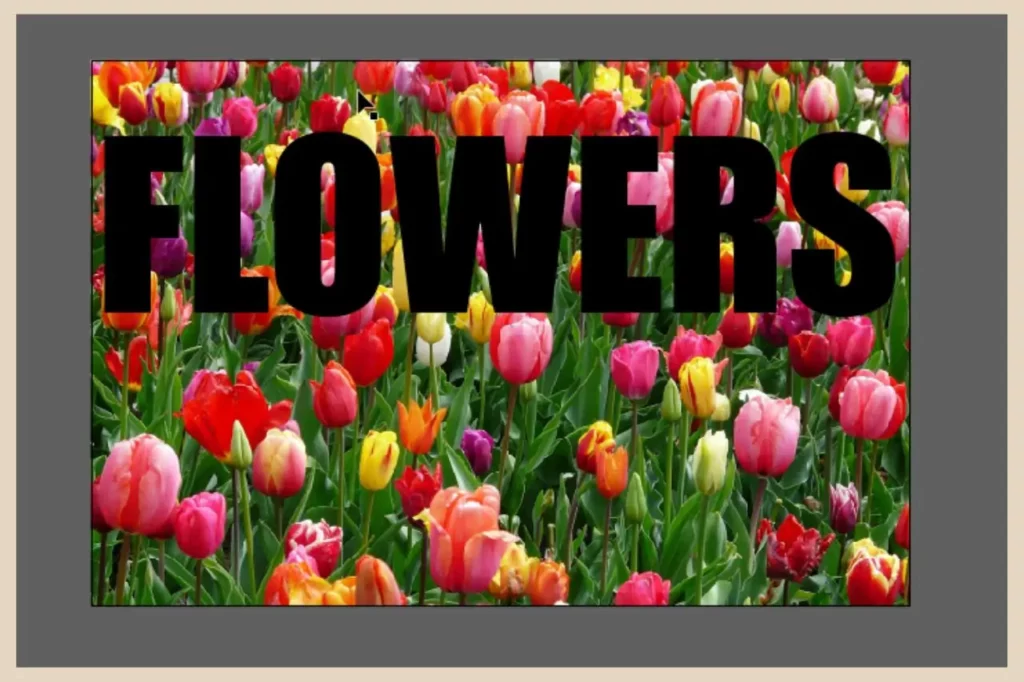
First things first, in order to get the best results, you’ll need text that’s thick enough to be able to see the image within it so try out a few different fonts for your chosen text until you find one that fits the bill (I’m using the Impact font for this tutorial).
Once you’ve settled on a font, have your text typed and have your image of choice placed in the design, it’s now time to put them together.
For this tutorial, I’ve typed the word Flowers, made the text as big as I can within the artboard and added an image of flowers that I’d like to use as the fill.
Before we go ahead and create a clipping mask, it’s important to note the position of your objects in the layers panel.
This is because when you’re creating a clipping mask, only one object can be used as the frame and it will always be the top item selected in the layers panel with all the other objects selected beneath it becoming the fill (the fill can contain as many objects as you like).
So, if you’re clipping mask ever goes wrong and turns into something you weren’t expecting, it may have something to do with the order of your selected items in the layers panel.
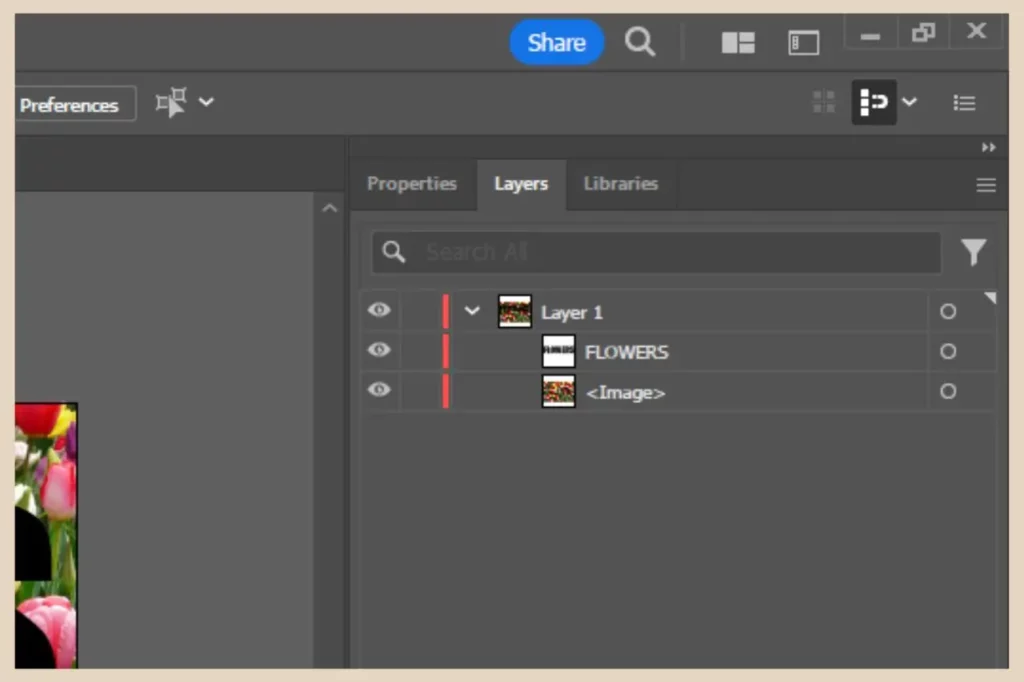
In this particular instance, I need the flower text to be the top item so that it becomes the frame and the flower image to be beneath it so that it becomes the fill.
Using The Clipping Mask
Once you’re happy that your objects are ordered correctly, make sure that you select all the objects that you want to include in your clipping mask, then click on Object from the main menu.
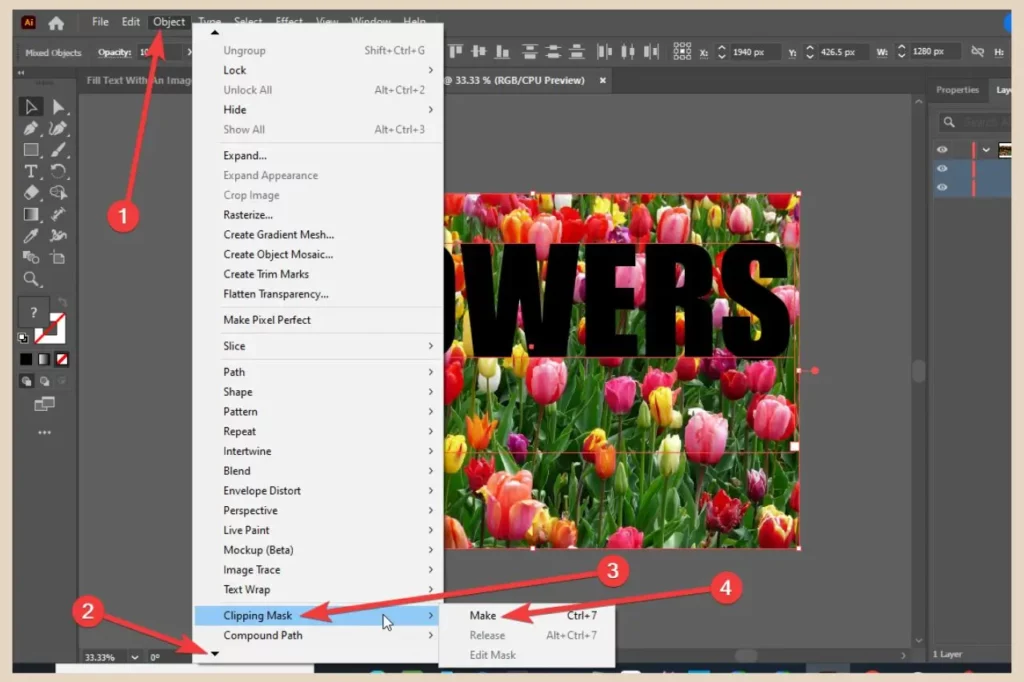
You’ll need to scroll down the menu to find the clipping mask so click on the small arrow at the bottom of the menu to scroll down further. Once you see the Clipping Mask option, hover over it and then click Make from the flyout menu that appears.
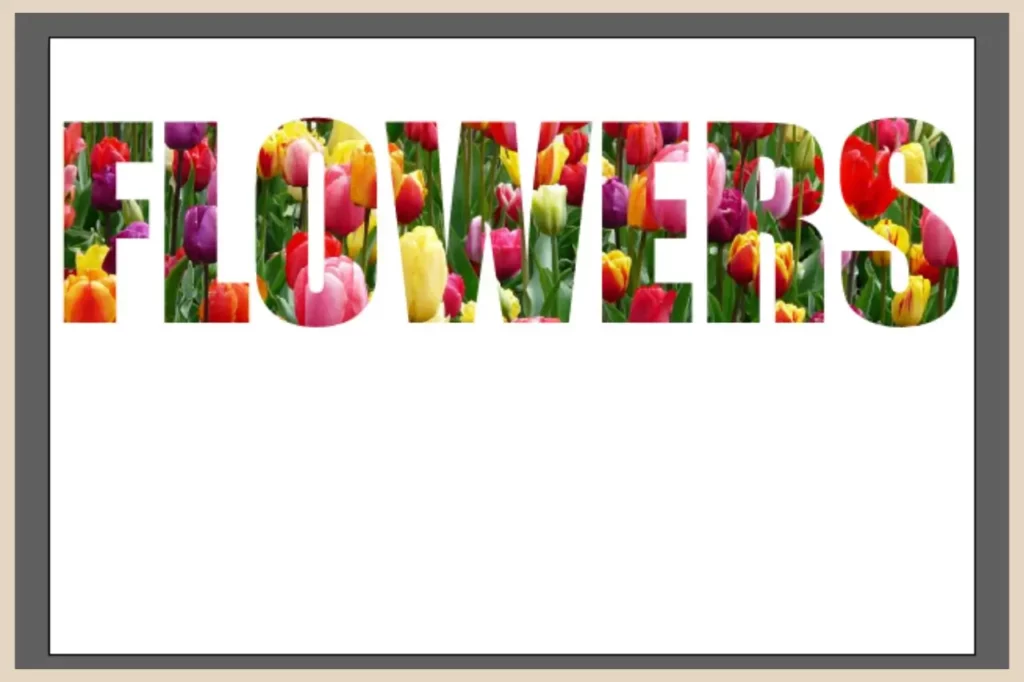
And voila, you’ve just filled your text with an image using the clipping mask and it should look something like the screenshot below.
If you’re not happy with the section of the image that’s showing, you can adjust it by clicking back on the Object menu and then Clipping Mask but this time click Edit Contents instead of Make.
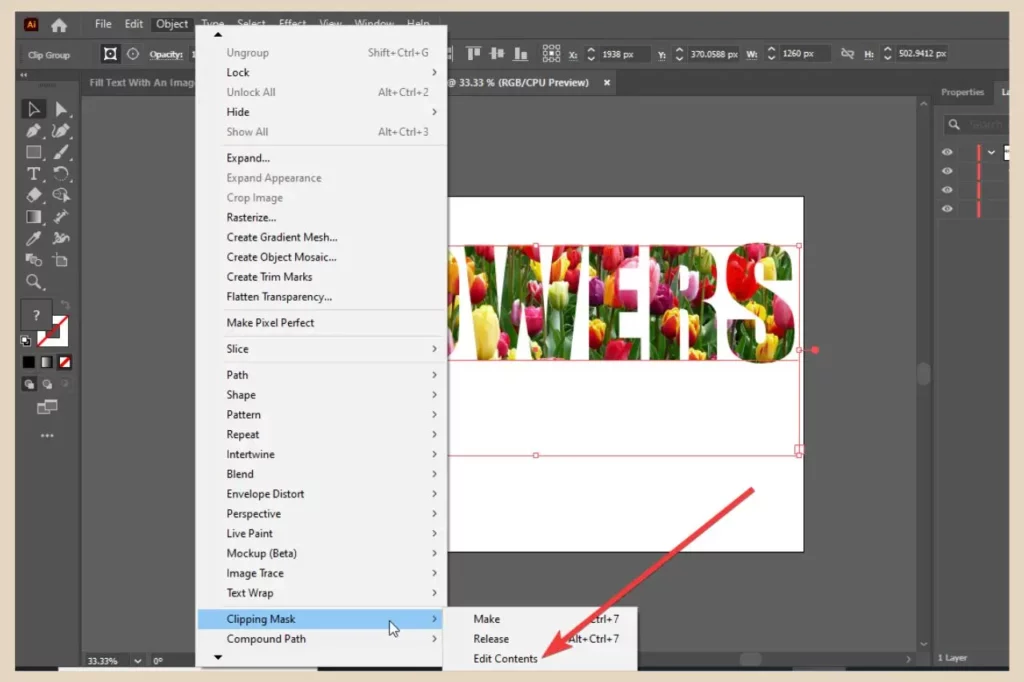
This will now allow you to move the background image around to change which part of it is showing through the text. Once you’ve adjusted it to your liking, simply click anywhere away from the artboard to finish.
Changing Text Into Graphics For More Control
If you want to have even more control over the size of your text, you can convert your text into graphics and although this will add a few more steps to the process, sometimes it’s worth it to get better results.
advertisement
For instance, with the example above, I’d like to make this text taller so that you can see even more of the flower image within it once I make the clipping mask and for that, I’ll need to convert it into graphics first so that I can alter its shape.
Unfortunately, once you’ve converted text into graphics, each letter will become its own individual object and you’ll no longer be able to edit it so make sure there are no spelling mistakes before you convert it because you won’t be able to correct them afterwards.
Converting Your Text
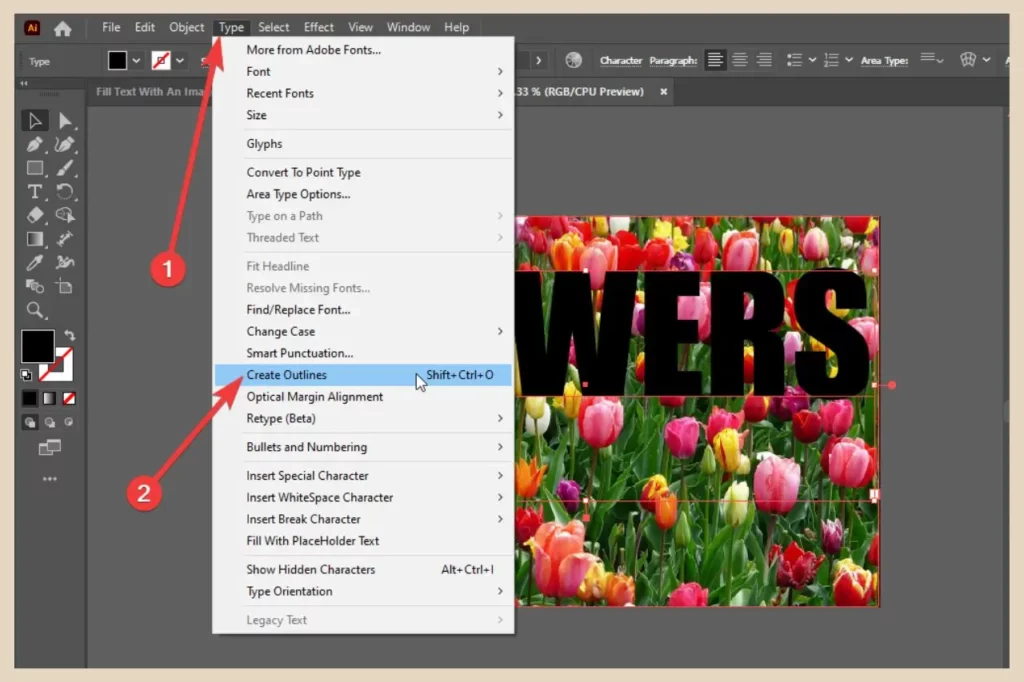
To convert your text into graphics, select your text and then click Type from the main menu. From here, click Create Outlines from the options that appear.
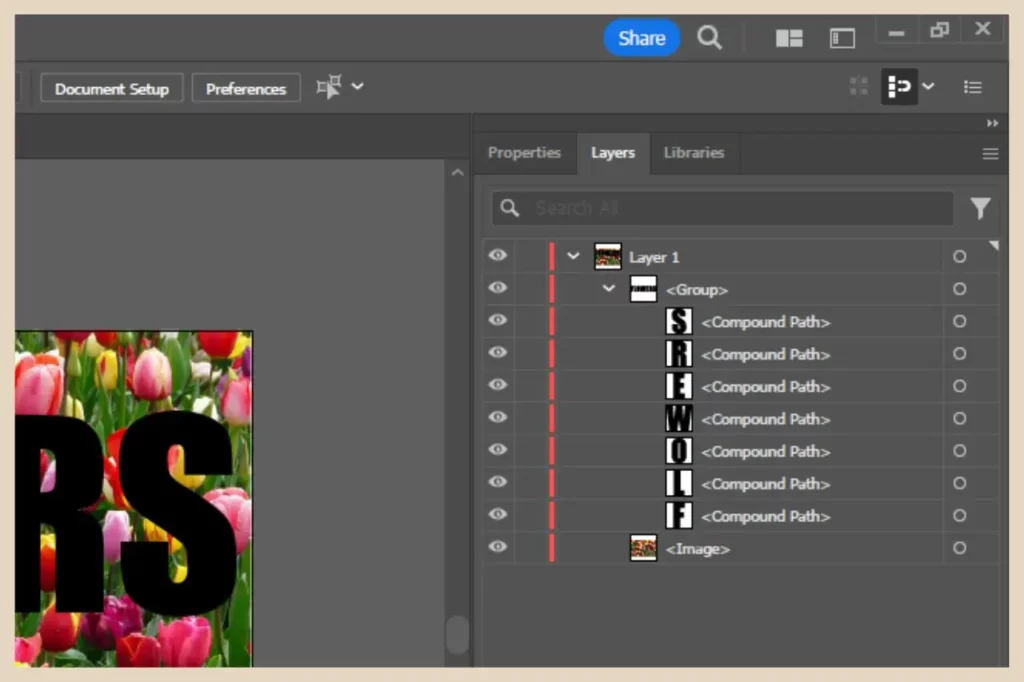
This will now change your text into graphics and you’ll notice that although the letters have been placed into a group, each letter is now its own separate object in the layers panel.
This means that you can now make changes to each letter individually without affecting any of the others so if you feel like moving them around or making them different sizes, you can now do that.
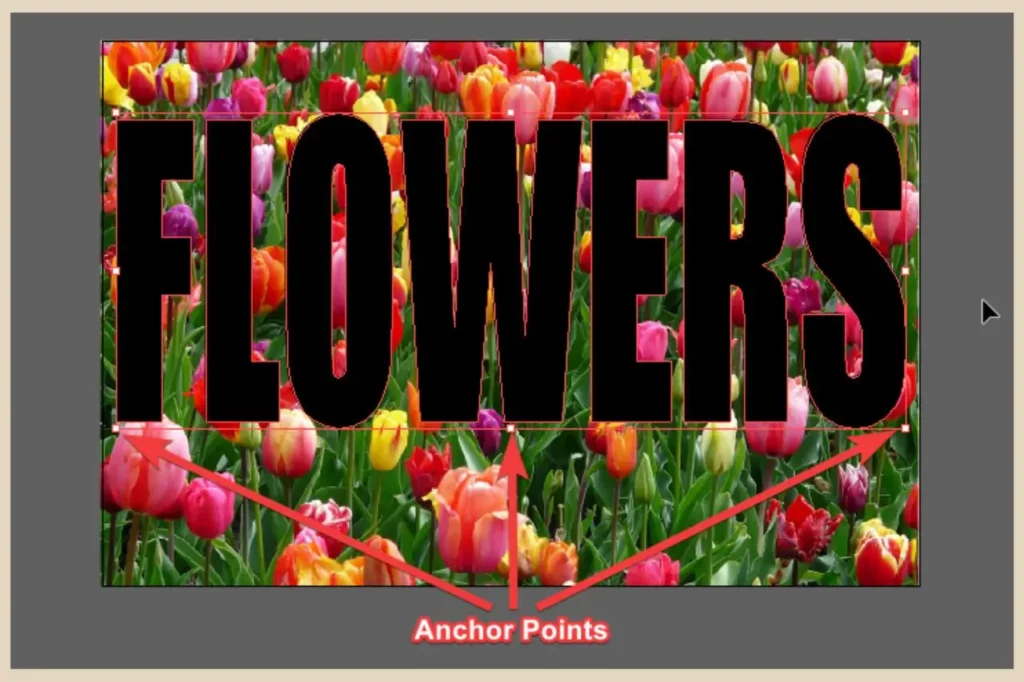
I don’t really want to do that here but what I would like to do is make all the letters equally taller which I can do by simply selecting all the letters together and then clicking and dragging on any anchor point surrounding the selection to change the height of all the selected objects.
Once you’ve adjusted the text to the shape and size that you’d like, you’ll now need to combine all the letters back together into one object before making the clipping mask.
As I mentioned earlier, the reason for this is that only one object can be used as the “frame” with a clipping mask and it can’t be part of a group either so if you tried to make a clipping mask at this point, it wouldn’t work correctly and you’d end up with something completely different to what you were expecting.
Combining Multiple Objects Into One Compound Path
Luckily, there’s a very easy and quick solution to this and that’s making all the objects into one compound path. To do that, simply select all the objects that make up the text and then click Object from the main menu.
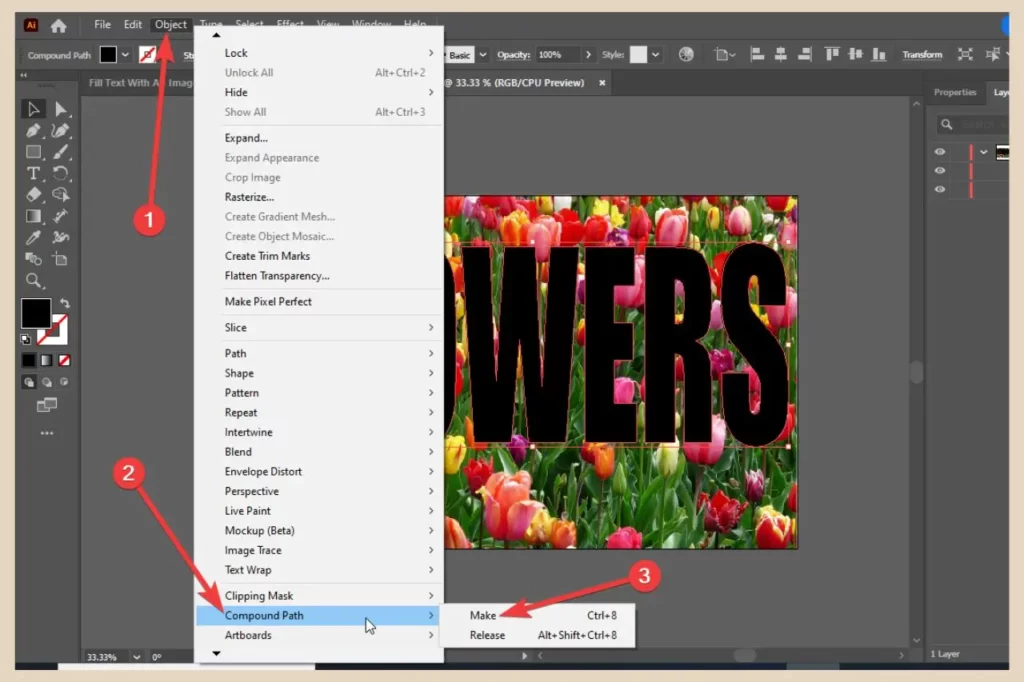
Scroll down until you see Compound Path (it’s directly under Clipping Mask), then hover over it and click Make from the flyout menu that appears.
This will now combine all the objects together into one compound path which you’ll now notice in the layers panel.
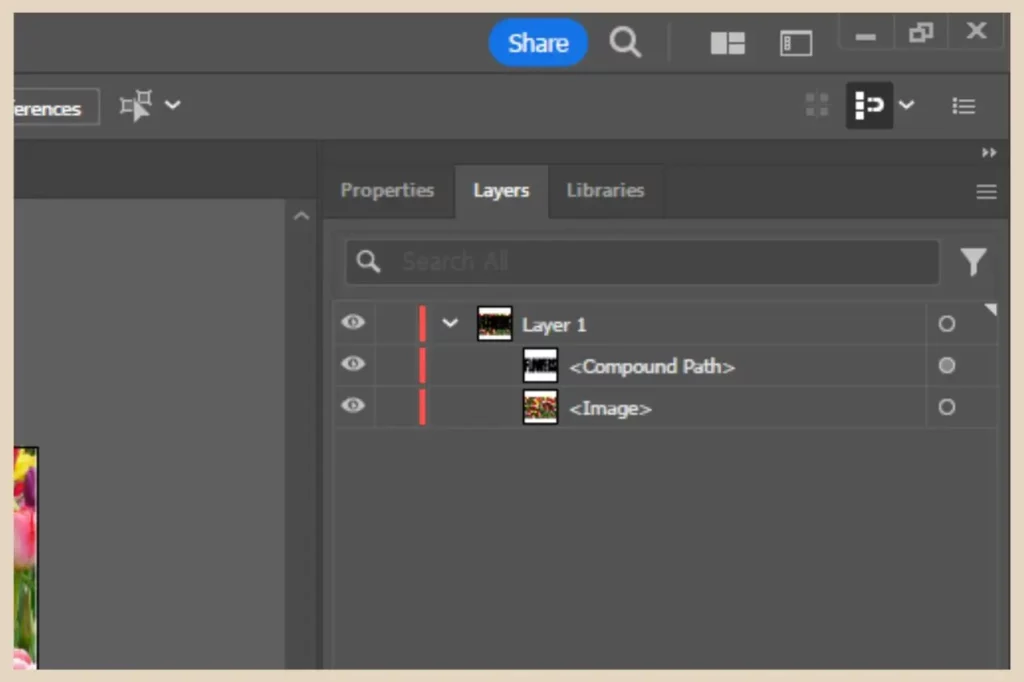
This will also remove all the fill and stroke colours of the combined objects so you won’t be able to see it in the design anymore unless it’s selected.
However, this doesn’t really matter here as it’s about to be used in a clipping mask but you can give it a fill colour temporarily if you like so that you can still see it in the design before you make the mask.
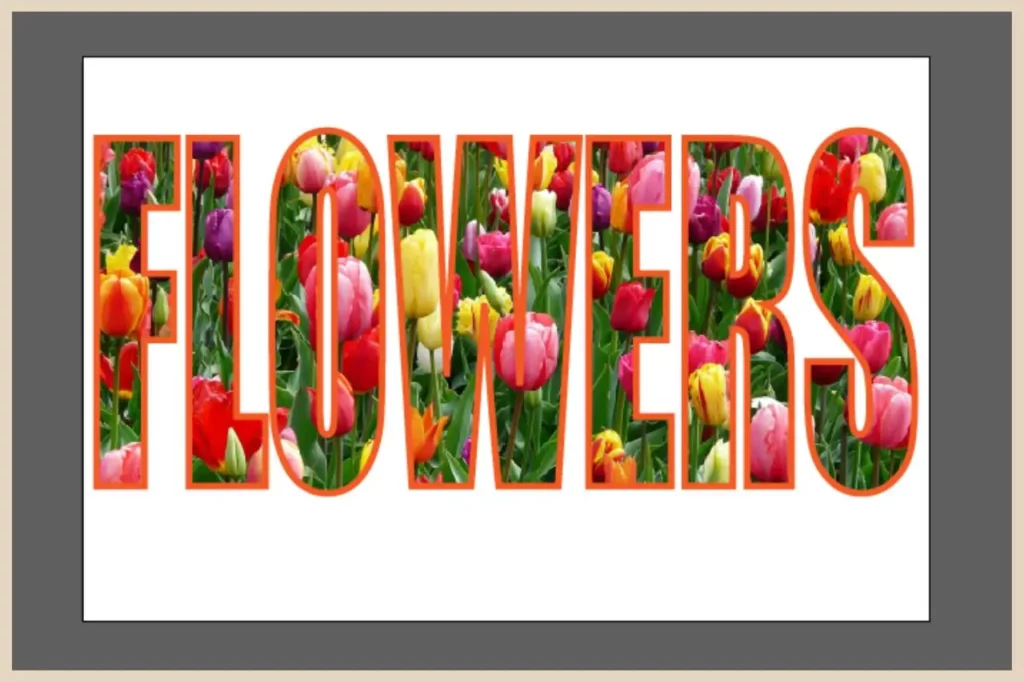
Now that it’s back to being one object, you can go ahead and create a clipping mask just as before with your customised text as the frame.
And if you want to dress it up a little further, you can also add a stroke colour to the finished clipping mask to add a nice border to the letters.
This compound path-making technique is actually a great way to use a combination of several objects as the frame for your clipping masks to create truly unique-looking clipping masks.
Let’s Get Clipping
And there you have it, a quick and simple way of dressing up dreary text and turning it into an eye-catching piece of design.
So why not give it a try for yourself and see what kinds of cool text designs you can come up with? You’ll be amazed at what you can create.
Have fun creating your text designs and if you feel like sharing your own text-filling stories then please feel free to share them in the comments below.
Happy Text Filling!

Helpful Guides to Read Next
These beginner-friendly guides will help you keep building your blog step by step.
- Create Professional Blog Graphics with Adobe Illustrator
- How to Fill Shapes with Text for Creative Illustrator Designs
- How to Use Illustrator’s Advanced Drawing Modes to Draw Behind or Inside Objects
- How to Use Clipping Masks for Better Illustrator Designs
- How to Create Smooth Professional Gradients in Illustrator

Jessie
Founder, nomorerush.com
Hi, I’m Jessie — founder of No More Rush. I help beginners build profitable, beginner-friendly blogs without the overwhelm or unrealistic expectations you see online. Everything here is built around simple, structured steps so you always know what to do next.