Are you looking to boost your Pinterest marketing game and drive more traffic to your website? Why not start by learning how to create Pinterest pins with Canva?
Pinterest has become a powerhouse for visual content, and creating eye-catching pins is essential for standing out in the crowd on this visually-driven platform.
Fortunately, Canva, a free (for the most part) user-friendly graphic design tool, can be your secret weapon in creating stunning Pinterest pins that get noticed as well as creating any other imagery to spice up your business.
In this step-by-step guide, I’ll show you how to create captivating pins using Canva, helping you elevate your Pinterest strategy to new heights.
Understanding Pinterest’s Visual Landscape
Before I dive into the pin design process, let’s take a moment to understand the visual landscape of Pinterest.
Pins on Pinterest are primarily vertical in orientation, with ideal dimensions of 1000 x 1500 pixels for standard pins or a 2:3 aspect ratio.
High-quality images that resonate with your target audience are crucial for capturing attention as users scroll through their feeds.
Moreover, maintaining consistency in your pins’ branding elements helps establish your visual identity, making it easier for users to recognize and engage with your content.
How To Create Your Pinterest Pins With Canva
To begin your journey of pin creation with Canva, you’ll first need to head over to Canva.com. Once you’re there, you’ll be prompted to sign up if you don’t already have an account.
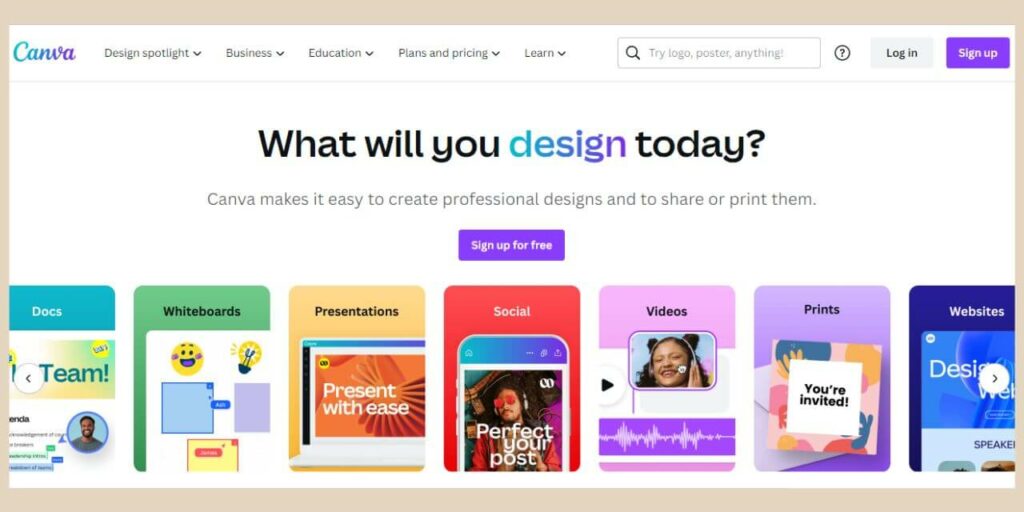
If you have a Google account, this is the easiest way to sign up but choose whichever method works best for you.
Once you’ve signed up, you’ll be able to start your Pinterest pin designing so using the search box at the top of the page, type in “Pinterest Pin” to see a large selection of Pinterest pin templates.
Canva offers a range of templates designed specifically for Pinterest, saving you time and effort in creating pins from scratch.
Selecting Your Pin Template
As you scroll through the templates, you’ll notice that some will have a money sign or crown icon on them. These templates are Canva Pro or paid templates so they’re not free to use.
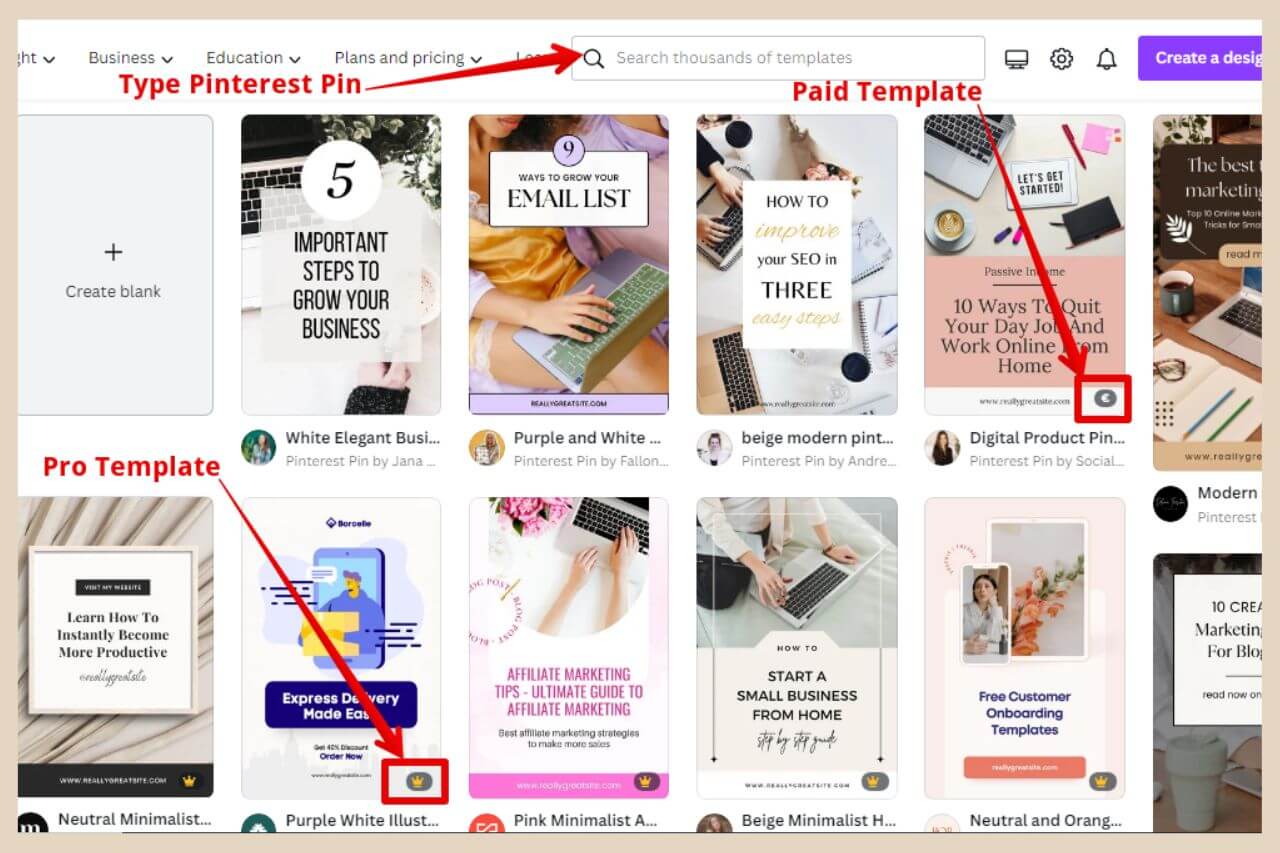
However, if there’s no icon on them then they’re free to use and there are plenty of free ones here to choose from.
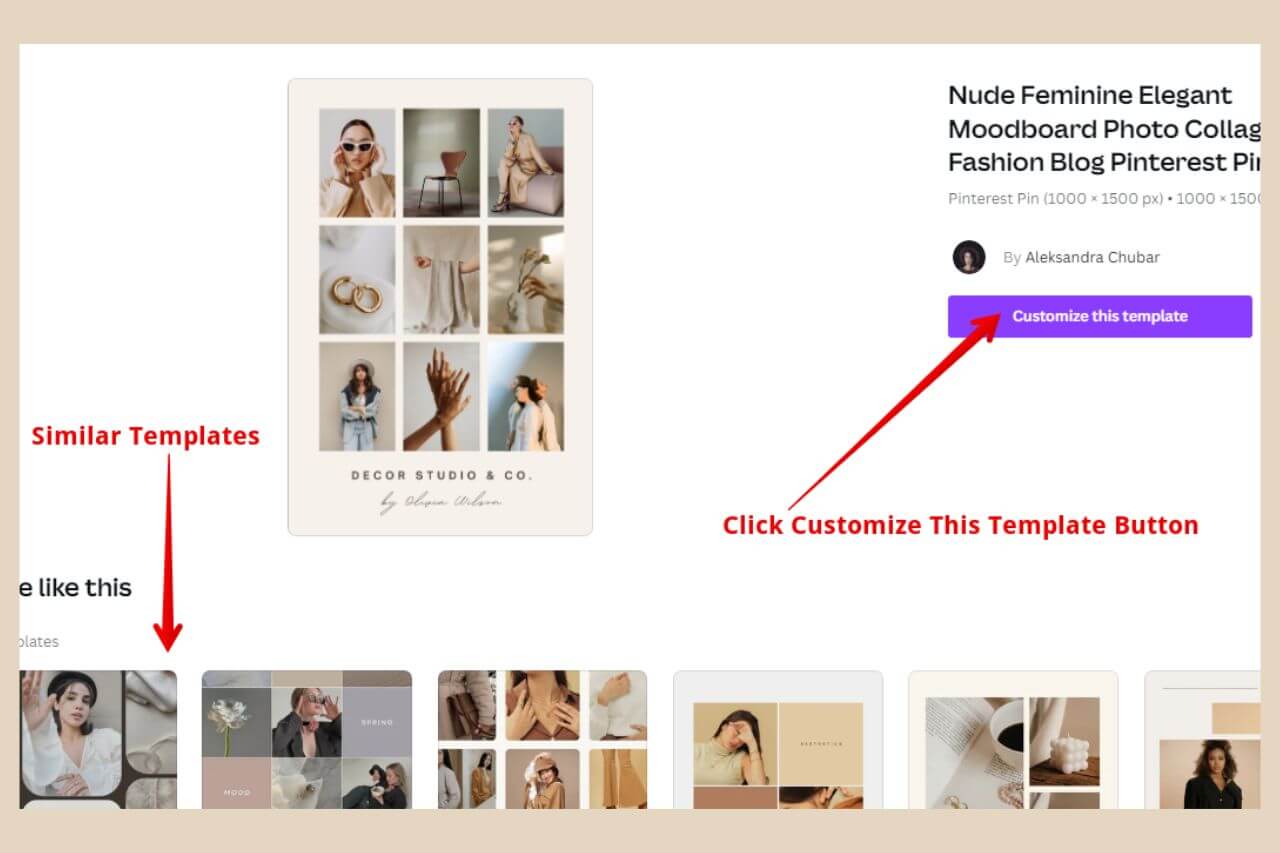
Once you’ve selected a template, a new window will open showing you a larger version of your chosen template.
If you scroll down, there’ll be some similar templates beneath it to give you some more inspiration but if you’re happy with your choice, go ahead a click the “Customise This Template” button.
From here, a brand new tab will open where you’ll now be able to customise your Pinterest pin design.
Customizing The Pin Design
Now comes the fun part – customizing the pin design to make it uniquely yours. Now, while these templates are undeniably eye-catching and many people will just change the text and leave it at that, merely changing the text might not be enough to make your pins stand out.
Given the vast number of Pinterest users utilizing these templates for their pins, sticking to the basics could result in a sea of identical-looking pins, differing only in the choice of words – lacking the uniqueness that sets your content apart.
If you want to unlock the true potential of these templates, explore the plethora of creative possibilities they offer. Customizing the colours, layouts, and images can breathe fresh life into the design.
Personal touches and unique elements will elevate your pins, capturing the attention of Pinterest users and making them more likely to engage with and share your content.
These same customisations will also make them look completely unique from the template they started out as. So, with that in mind, let’s do some major customising.
Breaking Down The Template Into Elements
If you’re not familiar with Canva, then it’s important to know that all of these templates are built with numerous elements.
From the images, text, shapes, lines, arrows, etc., every single one of these elements is changeable, resizable and removable.
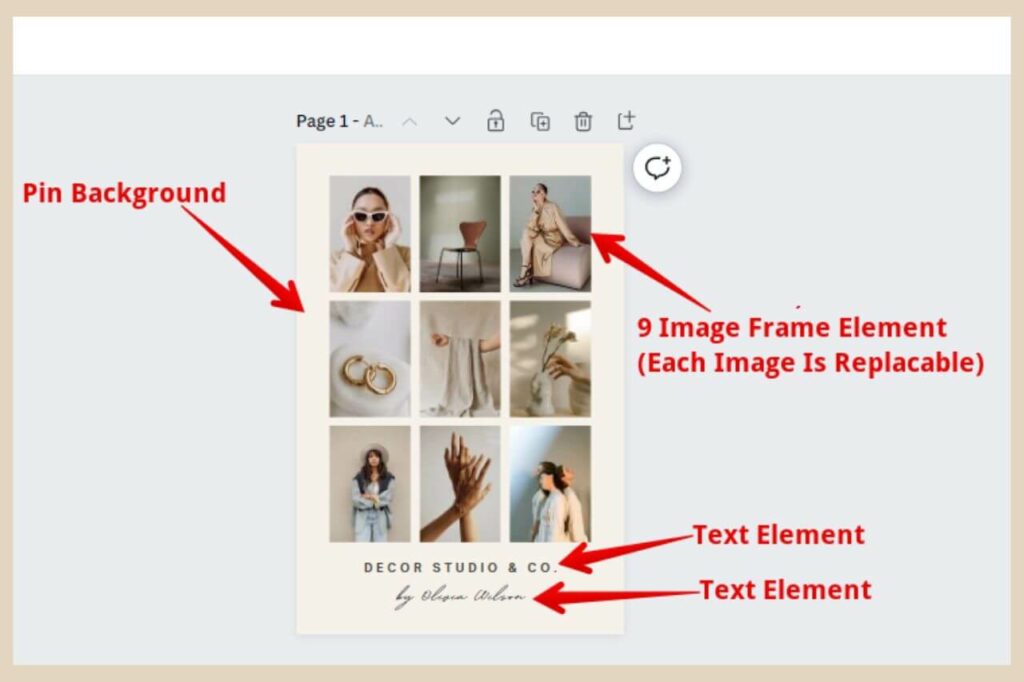
For this tutorial, I’ve picked a template that has 3 different elements within it, a frame element and two different text elements.
The frame element is a nine-image one and I can change each and every one of these images so let’s see how unique we can make it by making a few customisations.
On a side note, once you’re on your design page, you can search for more templates based on the size of your current design (in this particular case, a Pinterest pin size) by using the Designs tab on the top left of the page.
You can even get more granular and use the search box to search for pin templates relating to your niche.

So, for example, if you’re in the food niche or travel niche, you could type food or travel in the search box and this would bring up pin templates related to that term.
Changing The Text And Text Style
Obviously, one of the first things you’ll want to change is the text on these templates which you can do by clicking on and highlighting the current text and typing in your own text to replace it but you can also completely change the text style too.
To do that, simply click on the text to select it. You’ll now see numerous menu options at the top of the page that will allow you to change the font type, font size, font colour, etc.
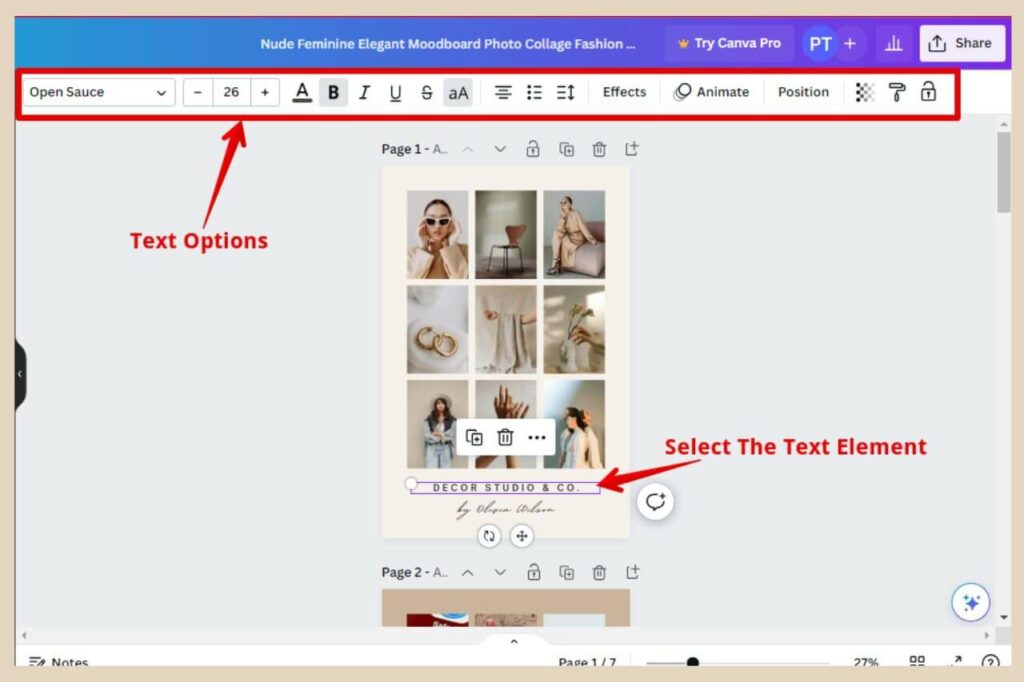
There’s also an animate and an effects section here which can add very cool effects to your text.
The effect section, in particular, lets you do things like add a shadow around your text or curve your text into an arch so it’s definitely worth having a look at if you want to get a little jazzier.
You can also use the Text tab on the left of the page if you’d like to add more text or replace the text that’s already there. On the text tab, you can choose to add regular text, heading text or subheading text.
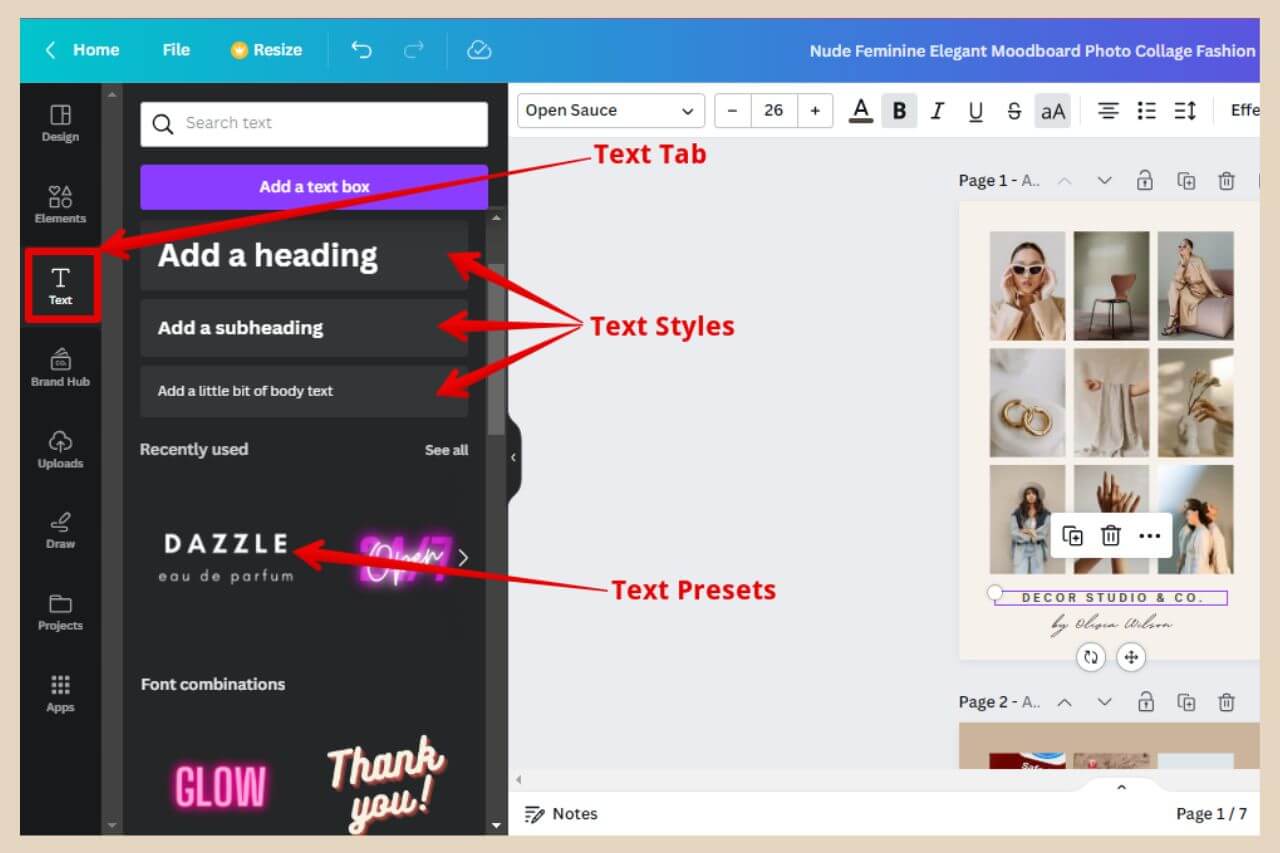
There’s also a selection of presets at the bottom which are fancier text combinations that work well together. If you use one of these, you can still customise them further using the menu options at the top of the page.
Adding A Box Around Your Text
If you find that the text is hard to read against the background colour/image, you can use box shapes (or any shape for that matter) behind your text to solve this issue.
Simply head to the Elements tab on the left of the page and either search for the shape you’d like to add behind your text or click the See All button in the Lines and Shapes section and pick a shape from here.
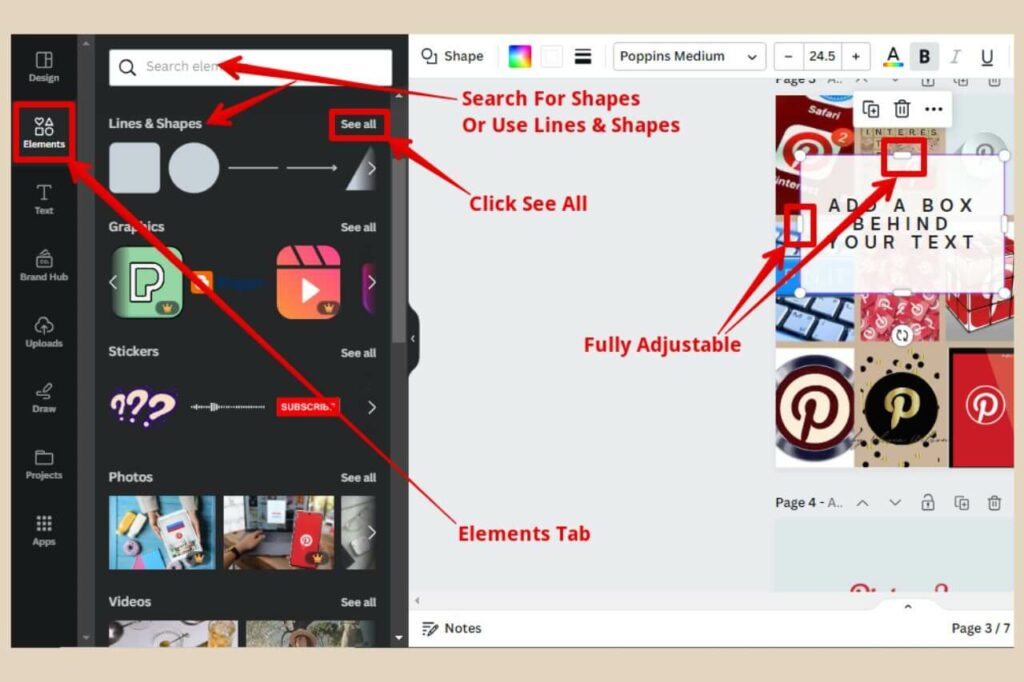
I prefer to use the shapes in the Lines and Shapes section because these tend to be more adjustable.
Shapes in other sections like the graphics section are often only resizable but not necessarily adjustable in different directions which is what you really want when you’re using them as a text surround.
This new element may sit over the top of your template and cover all the other elements including your text but you can fix this very easily and I’ll show you how to do that in a moment.
These shapes are also customisable so you can change their colour, etc. You can also make the shape transparent too if you’d like the image/background to be partially visible behind it.
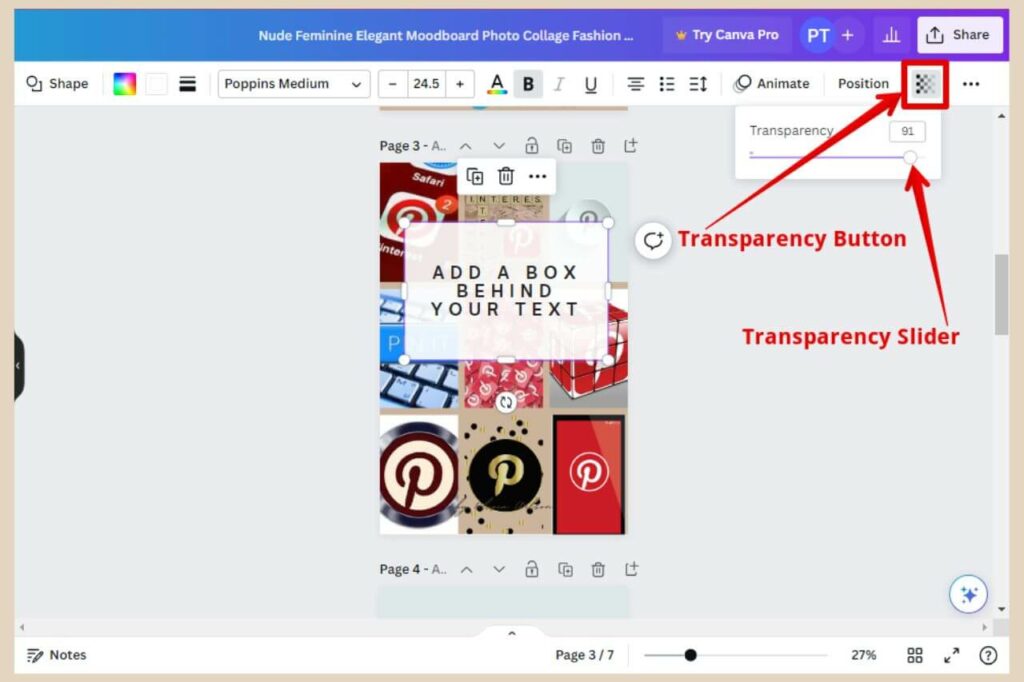
To do that, simply click the Transparency button in the top menu (you may need to click the three dots to expand the menu if you’re not seeing it) and a small window will appear.
Simply drag the transparency slider to adjust the level to make your shape less or more transparent and it will change as you make adjustments.
Changing The Order Of Your Elements
Sometimes when you add something new to a design, it’s placed above all your other design elements which may not be the desired effect you wanted but this is very easy to change using the Position button.
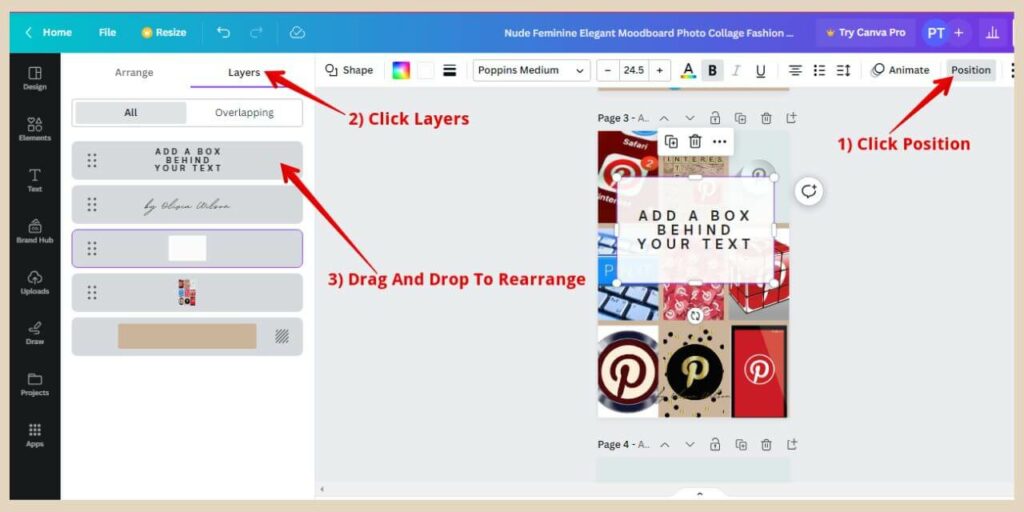
To change the position of elements, click the Position button in the top menu and some new options will appear on the left of the page. Click the Layers tab and this will show you the current order of all your elements.
The item at the top of the list is the element at the very front of the design and the item at the bottom of the list is the element at the very back of the design.
To change their positions, simply click, drag and drop them to move them in front of or behind each other.
Changing The Background Colour
The next thing you can customise is the main background colour which is very easy to change.
To do that, simply hover your cursor over the template and click on it when you see the blue outline surrounding the entire template area.
From here, you’ll see a colour box on the far left of the menu at the top of the page.
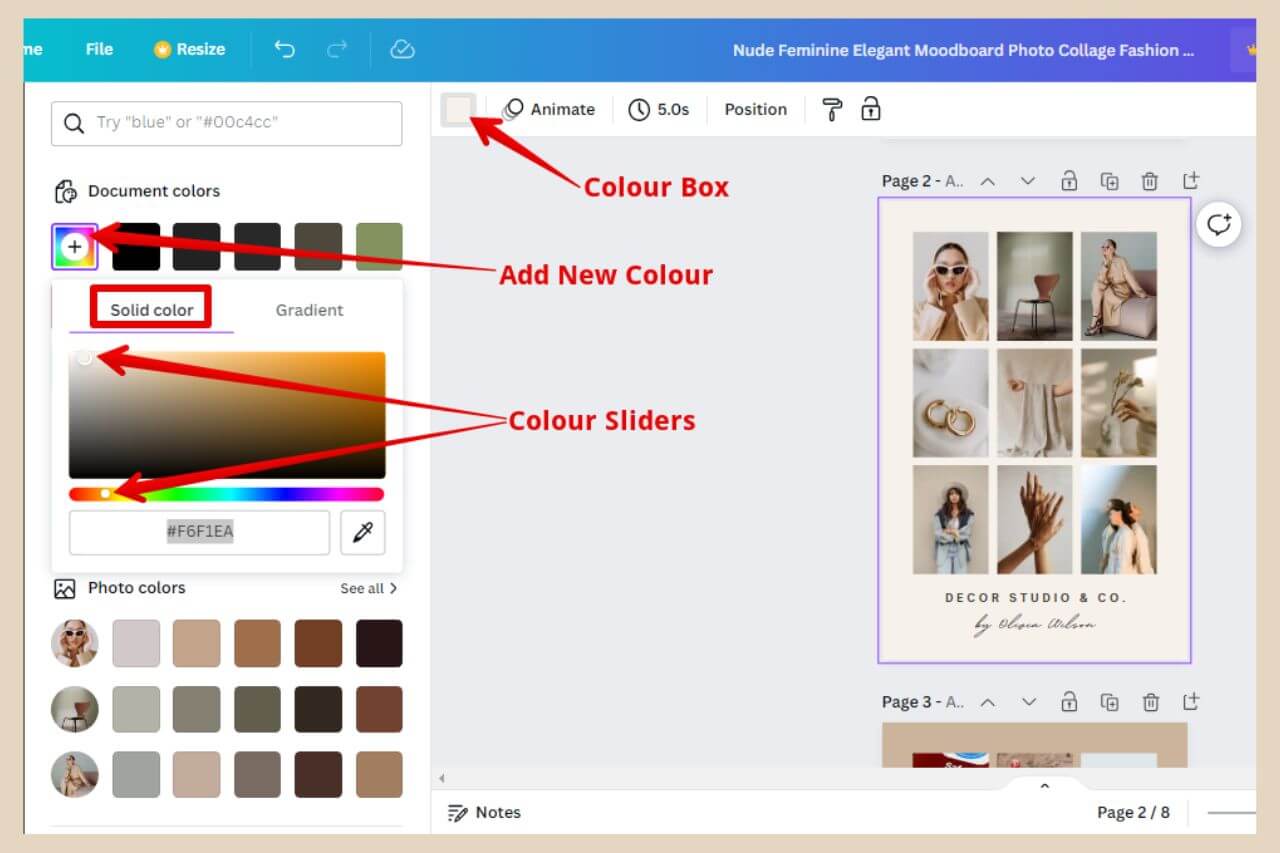
If you click this colour box, a new section will appear on the left of the page where you’ll have a small selection of default colours to choose from.
If you’d like to choose a different colour, click on the multicoloured box with the + sign within it to open up a small colour selection window.
There’ll be two tabs here, a solid tab which will be open by default and a gradient tab. For a solid colour, simply click and drag the two sliders to find a colour you like.
The template background will change as you move the sliders around so you’ll be able to see the colour effect as you work.
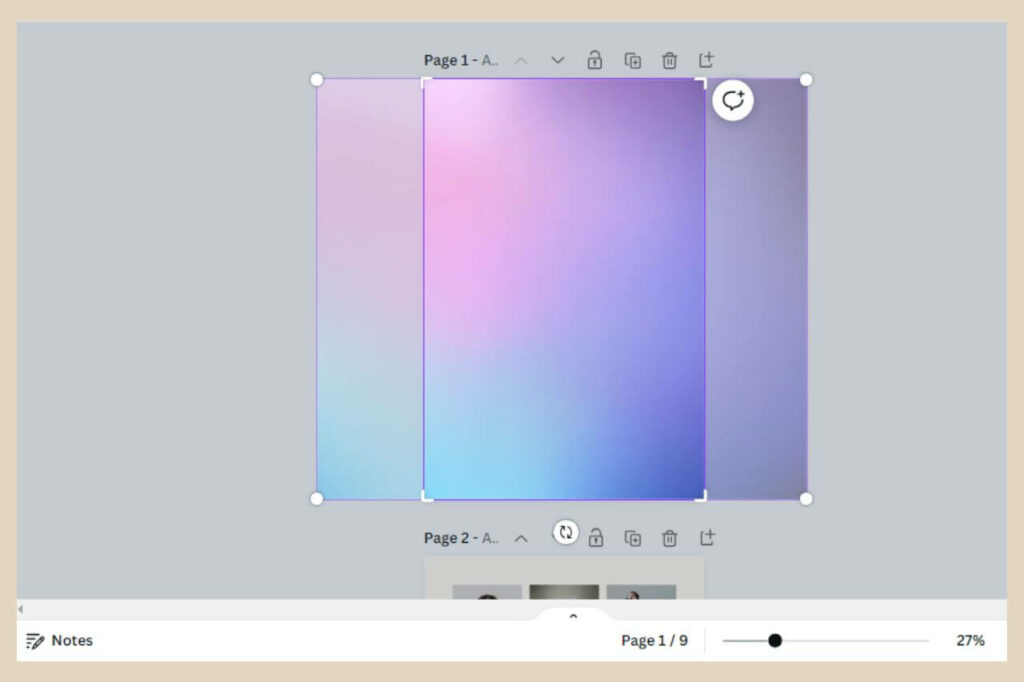
For a gradient colour (a mixture of colours that blend and change into each other), click the gradient tab.
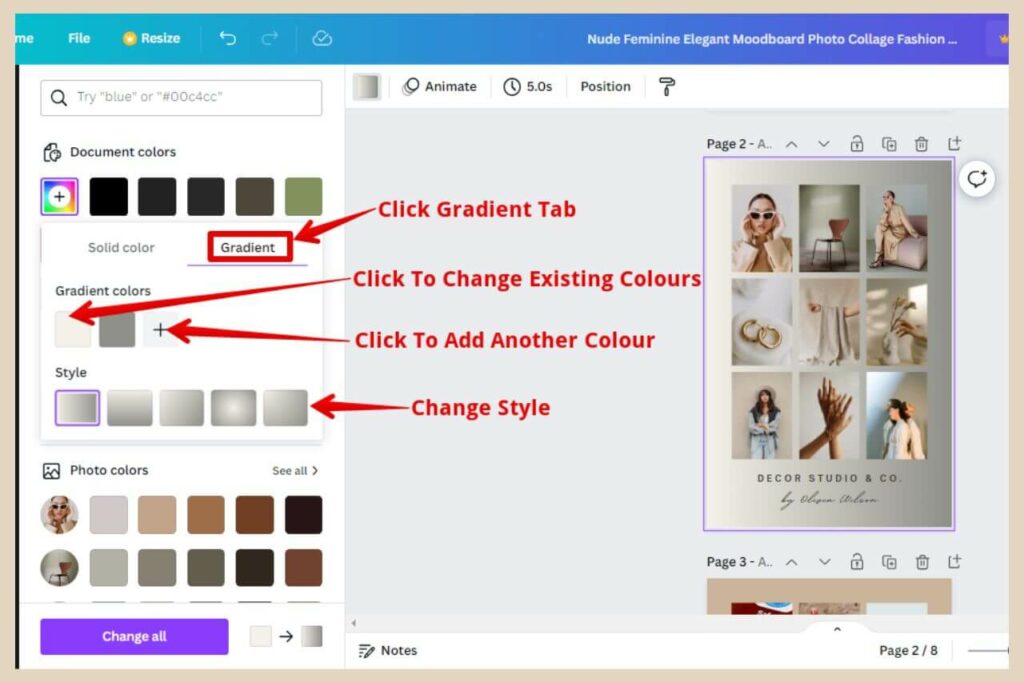
A gradient colour will be created based on the current background colour of the template but you can change these by clicking on each of the colour boxes and selecting your own colours.
You can add more colours too by clicking on the box with the + icon and you can choose between five different styles (the direction of the gradient) by clicking on any of the style options underneath.
Adding An Image Or Element As The Background
If you want something a bit more unique than just basic colours as your background, you can add your own images or a predesigned background colour instead.
For predesigned backgrounds, click the Elements tab on the left of the page and then type “Background” into the search box. You can actually use this area to search for anything you like including images, icons, shapes, etc.
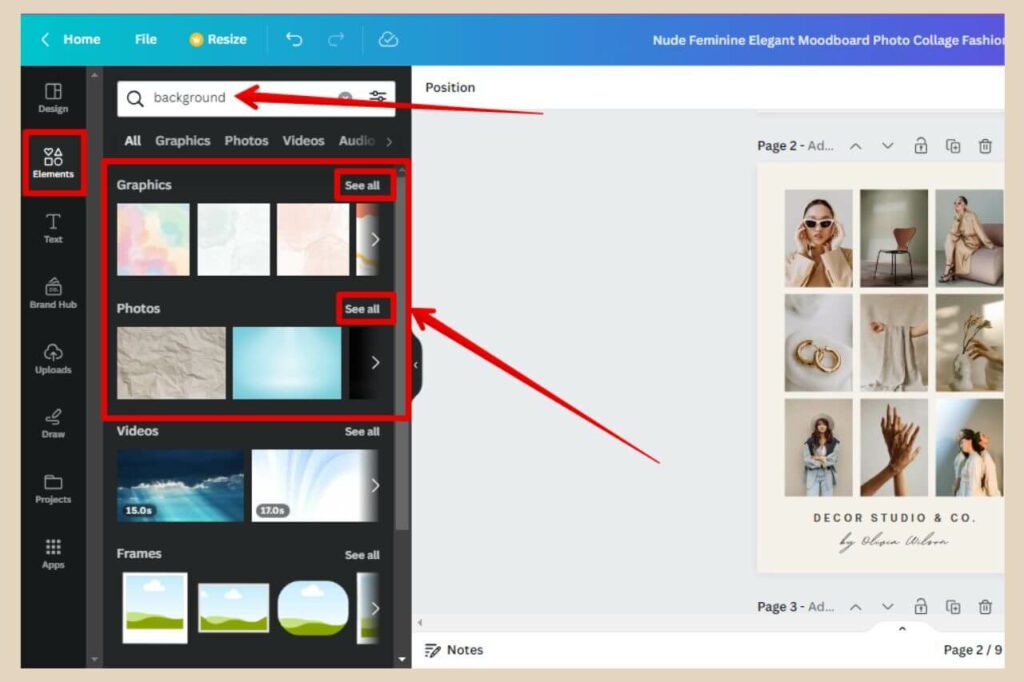
A selection of results will appear but the two best places to get backgrounds are the Graphics area and the Photos area so click the See All button on each area to see the full selection.
Again, much like templates, some elements will have a paid icon on them but there’s plenty of free stuff that you can use here.
Once you find a background that you like, simply click on it, drag it across to your template and release it when you see the full-sized image fill up the entire template area (if it’s a horizontal image, you’ll see it extend past the template before you release it).
This happens roughly when your cursor touches the left edge of the template. Again, you can use the position button to change the order of where it sits in the design if it’s covering other elements you don’t want it to.
As Pinterest pins are vertical, horizontal images will be cropped on the left and right so only the centre of the image will be visible on the template.
To change which section of the image is visible, simply double-click on the image and you’ll now be able to see the entire image including the cropped sides.
Now you can just click and drag the image to your position of choice so that a different area of the image is visible.
Uploading Your Own Images To Canva
If you want to add your own images/backgrounds, then head to the Uploads tab instead. From here, click the Uploads button to browse your computer for all your images.
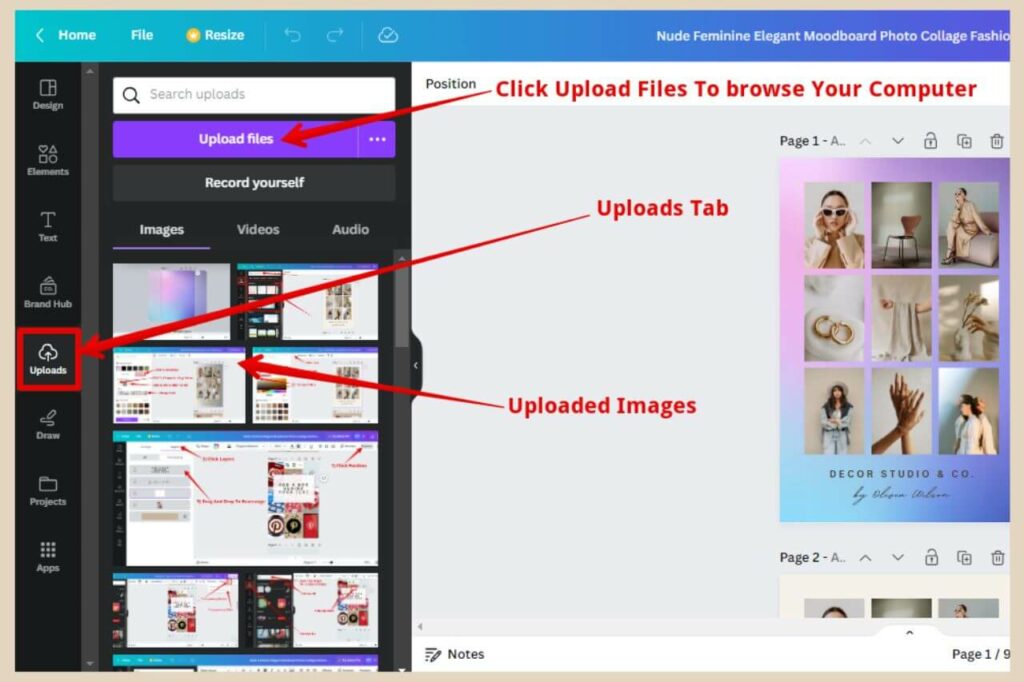
Once you select your image of choice, it will be added to the images section on the left of the page where you can just simply drag and drop it in the template as you did before.
Canva does have a vast collection of images/graphics but if you want more options, you can also use the likes of Pexel.com, Unsplash.com or Pixabay.com which all offer a much larger collection of free-to-use images.
Note: If you just click on an image/element or drag it past the left edge of the template, it will insert a small version of it within the template that you can then resize or reposition.
Changing The Images On A Template With Frames
Depending on the template you’ve chosen, you may have a template that uses the entire pin area for one image or you may have a template that uses frames (one or more images that sit within the pin but don’t take up the full area).
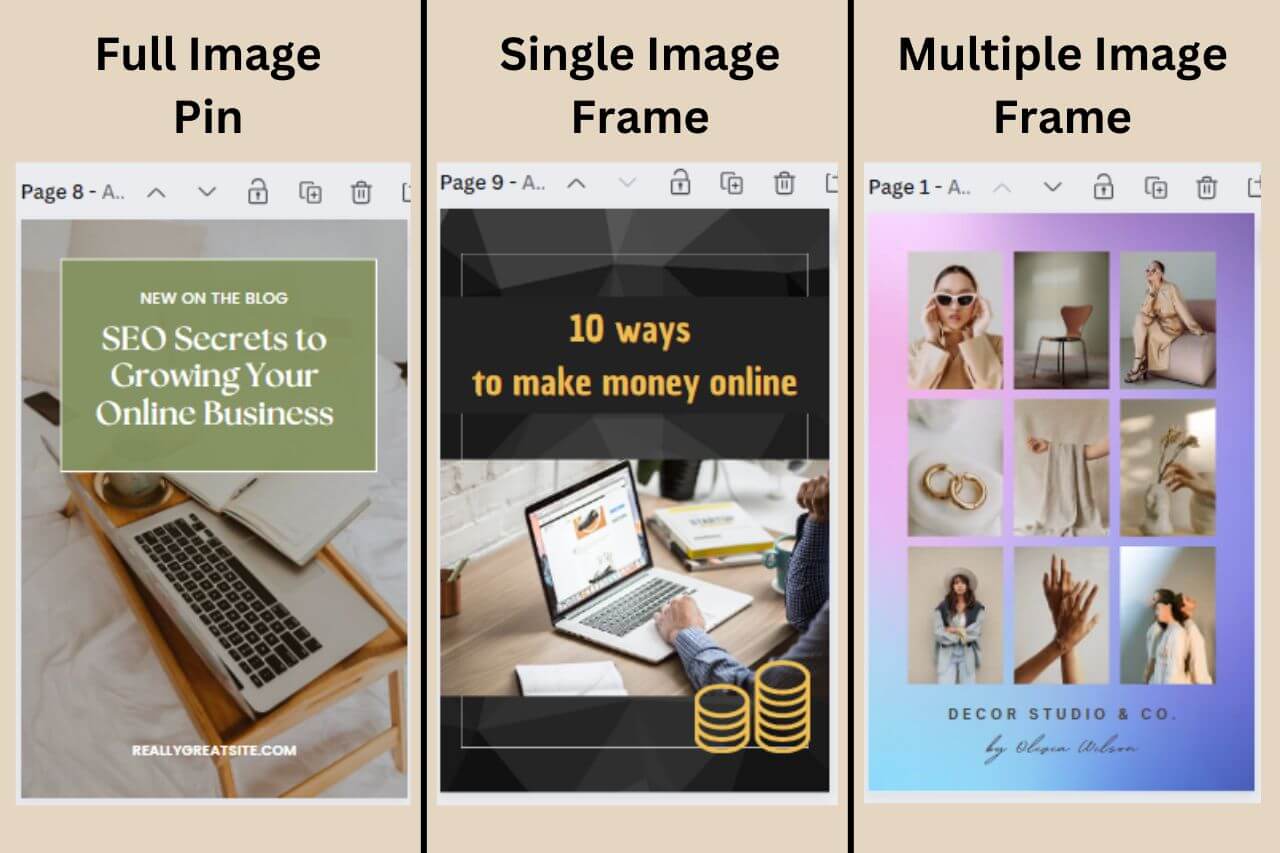
The template I’ve chosen for this tutorial uses a frame that consists of nine small frames all with different images so to change these, you simply need to drag a new image of your choice across to the template.
However, this time instead of releasing it when it fills the full pin area, you’ll need to release it when it fills up the frame you want to add it to which is usually when your cursor is over the frame.
These frames are also resizable so you can adjust how much of the pin area they take up.
If you’d like to create your own pin from scratch, you can actually use the Elements tab and search for the term Frames which will bring up a whole variety of different frames in various shapes, sizes and image quantities.
Utilizing Canva’s Tools and Effects
Canva provides users with numerous other tools for image adjustments, such as brightness, contrast, and filters.
To use these tools, click on the image you’d like to adjust then click the Edit Photo button in the menu at the top of the page.
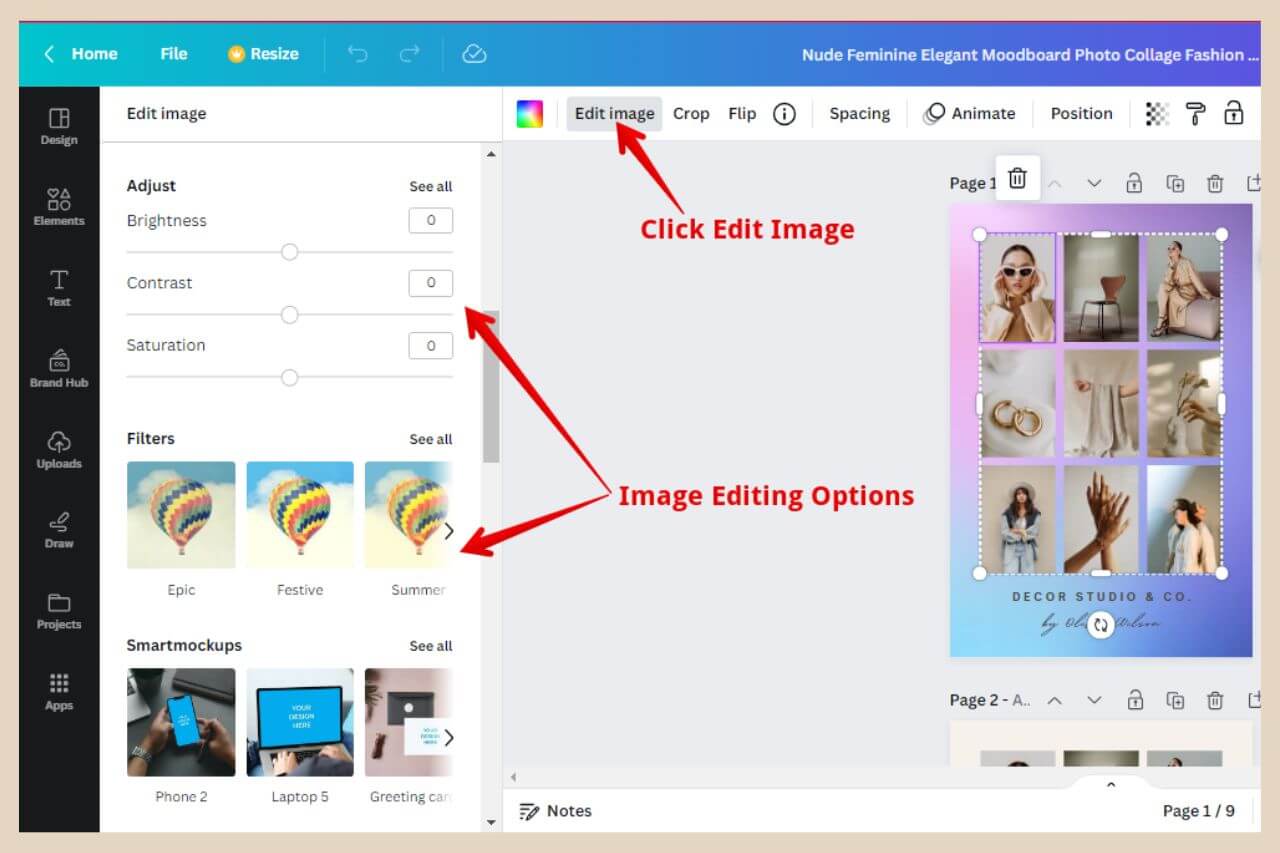
When the new section appears on the left of the page, you’ll be able to adjust the image in several different ways using the options here.
Experiment with these tools to refine your images and create captivating effects that catch the eye. These small tweaks can make a significant difference in the overall appeal of your Pinterest pins.
Canva also has a selection of AI tools that are incredibly fun to play around with and they’re also serious time savers too if you really want to up your Pinterest design game.
Incorporating Other Graphics and Icons
To make your pins even more visually appealing, Canva offers a wide array of other elements and icons. As I mentioned earlier, the elements tab can be used to search for anything you can imagine.
From shadows to borders to lines and shapes, these graphics and icons can add a touch of creativity and enhance the overall aesthetics of your pin.
Choose elements that are relevant to your content and place them strategically for maximum impact.
Adding Branding Elements
To establish brand authority and recognition, incorporate your logo and/or website URL into the pin design. Remember to place these branding elements discreetly, ensuring they don’t overpower the main content.
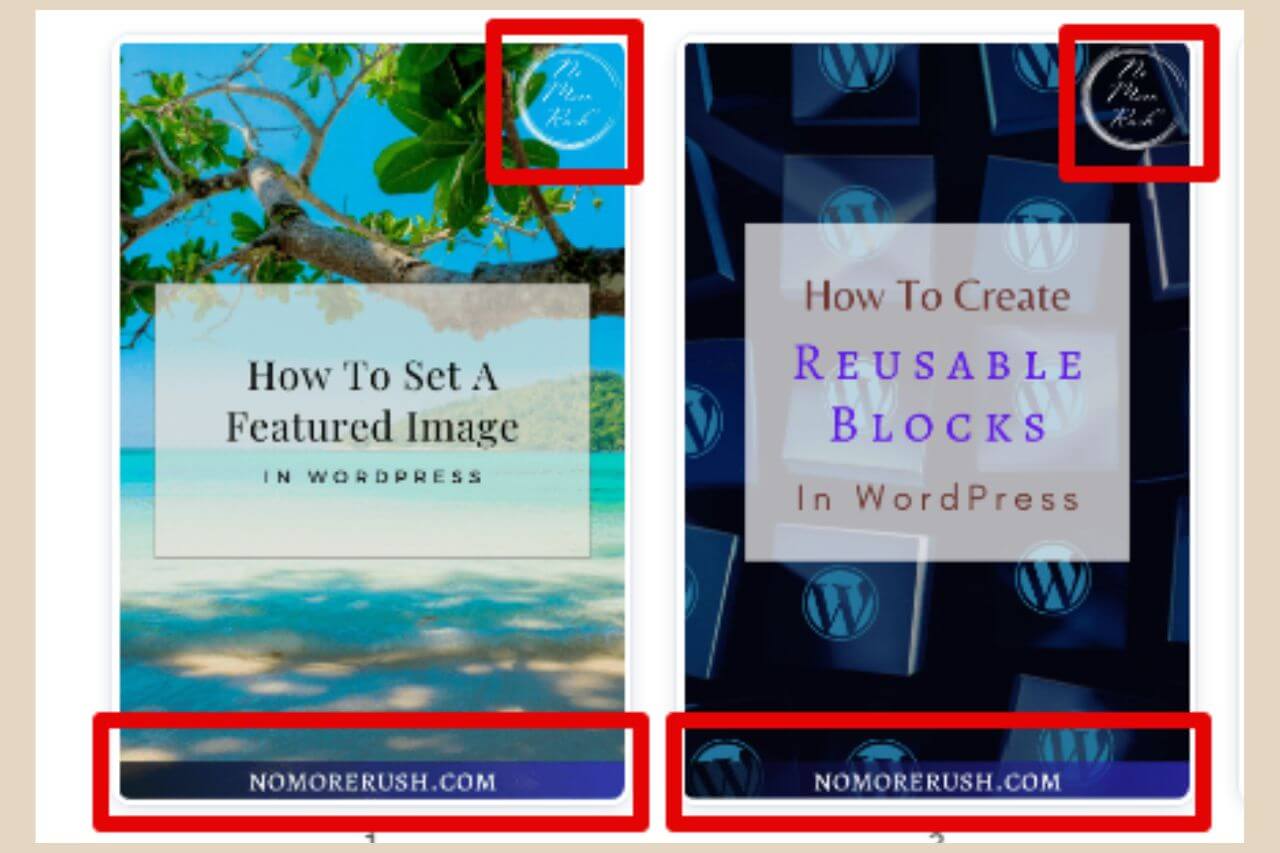
I personally always include my website URL but I’ll also add a logo too if it doesn’t take away from or crowd the pin design which unfortunately sometimes it does.
However, consistent branding on your pins with one or both will help users associate the content with your brand.
How Is Your Customised Pin Looking
Canva’s templates are an awesome feature, but you really need to customise them to make them as unique as possible.
The below image is a comparison of how the template looked originally against how it looked once I finished customising it.
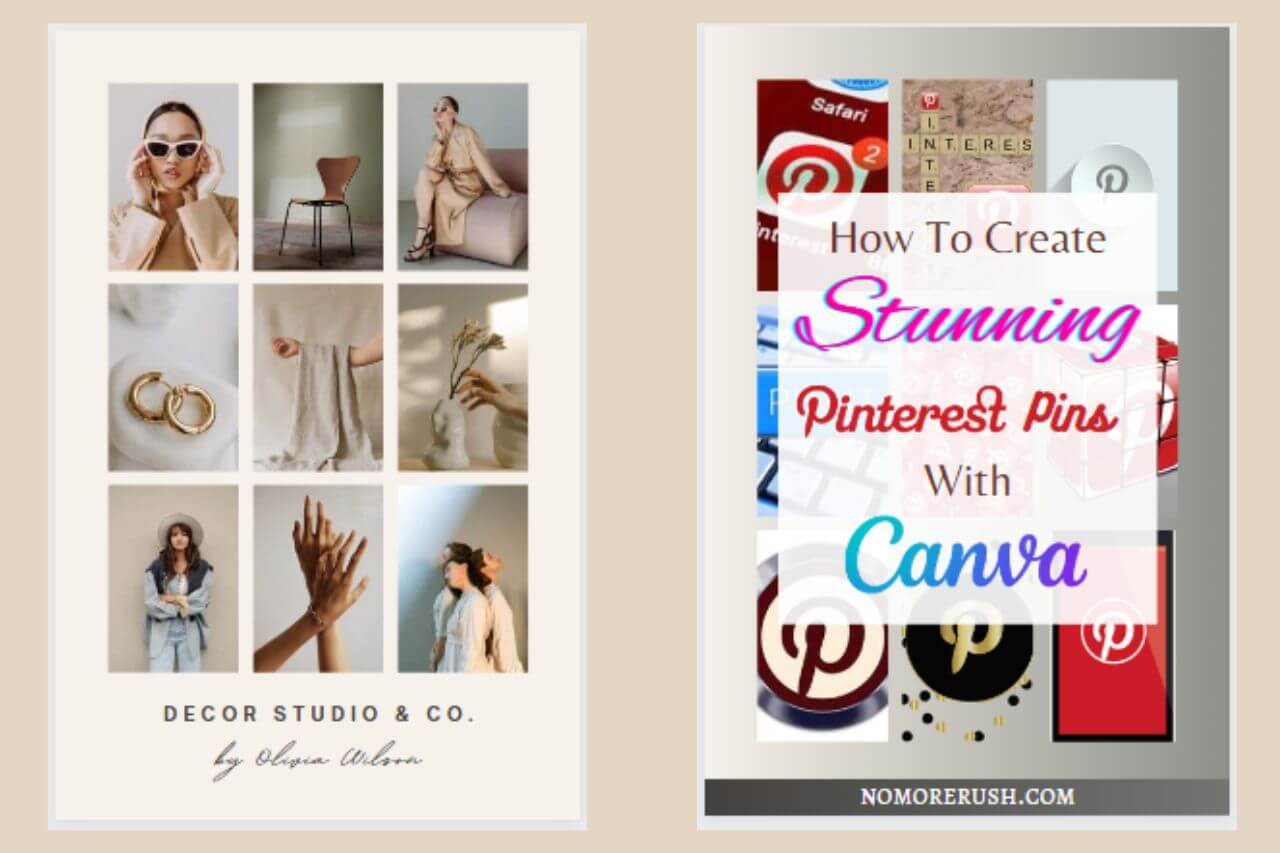
As you can see, you can make a template look completely different from how it started just by making a few customisations to it. This ensures that your designs are always truly unique and stand out in the Pinterest crowd.
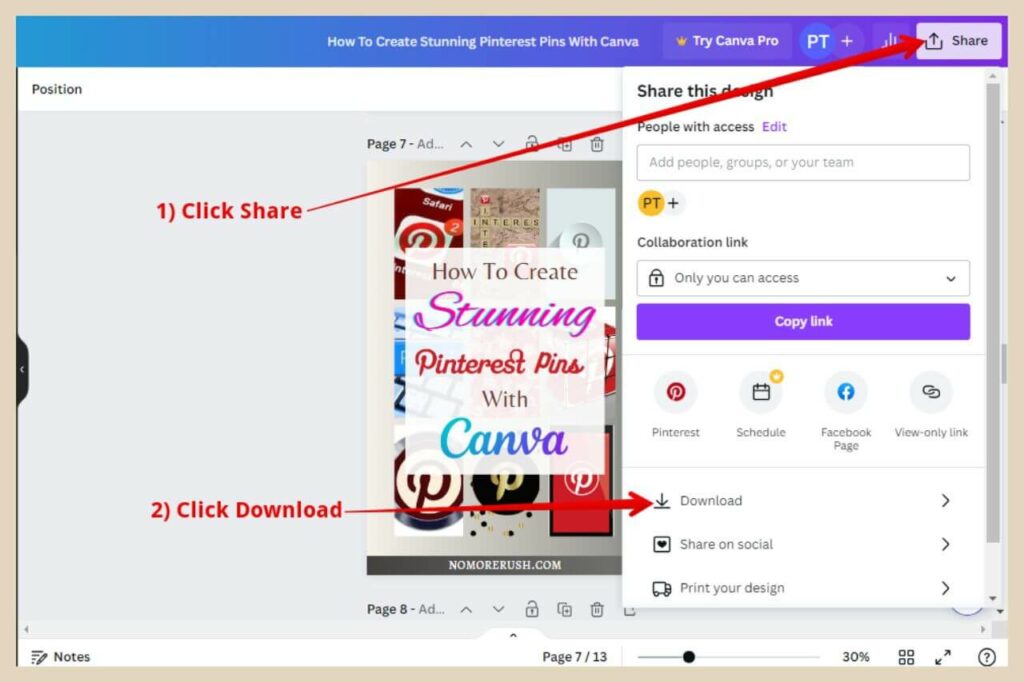
Previewing And Saving The Pin
Before finalizing your pin, take a moment to review your design. Check for any errors and ensure that the pin aligns perfectly with your content and branding. Remember, simplicity often reigns supreme on Pinterest, so keep the design clean and uncluttered.
Once you’re satisfied with the result, save your pin in a preferred format, such as PNG or JPEG, ready for uploading to Pinterest.
With your stunning Canva-designed pin ready, it’s time to share it with the world on Pinterest. So head over to your Pinterest account (or create one if you’re new to Pinterest) and create a brand new pin.
Upload your saved Canva design and craft an engaging description with relevant keywords for improved discoverability.
Let’s Get Those Pins Created
Congratulations! You’ve now mastered the art of creating stunning Pinterest pins with Canva. Your visually captivating pins will undoubtedly help elevate your Pinterest marketing strategy and attract more traffic to your website.
Embrace your creativity by experimenting with different designs, and watch your pins flourish on Pinterest’s vibrant platform. Start designing and sharing your pins today, and don’t forget to analyze their performance to refine your strategy further.
Remember, Pinterest is a dynamic platform, and staying updated with its trends and features will keep your pinning game ahead of the curve.
As always, I hope you found this tutorial helpful but if you need more help or get stuck with anything, please feel free to let me know in the comments below and I’ll be more than happy to help you out.
Happy Pin Creating!

Get the Free Blog Traffic Guide
A simple guide to getting more eyes on your blog with traffic strategies that actually make sense.
Helpful Guides to Read Next
These beginner-friendly guides will help you keep building your blog step by step.
- Get More Pinterest Visibility with Rich Pins
- How to Showcase Your Pinterest Content Directly on Your Blog
- How to Use ChatGPT to Create Pinterest Content Faster
- How to Set up Google Analytics and Track Your Blog Traffic
- How to Create Better Graphics Faster with Canva AI
Ready to Scale Your Digital Footprint?
Publishing content is only half the battle. If you’re ready to amplify your reach, visit my Grow Hub for actionable deep dives on search engine optimisation, email list building, creating better content and graphics and sustainable traffic strategies.

Jessie
Founder, nomorerush.com
Hi, I’m Jessie — founder of No More Rush. I help beginners build profitable, beginner-friendly blogs without the overwhelm or unrealistic expectations you see online. Everything here is built around simple, structured steps so you always know what to do next.