So, you want to know how to start a blog and make money online, but your brain is spinning with questions like: What do I write about? Do I need tech skills? Is it too late to start a blog? And… can I really make money online doing this?
Well, you’re not alone, and you’re not behind either. As long as you have something you want to share with the world, then there’ll always be someone who wants to listen.
You can create a blog you love, one that grows with you, and one that actually makes money in the process. And you don’t need to be a tech genius, a content machine, or an influencer with 100k followers to get started.
This guide walks you step-by-step through everything you need to start a blog easily with confidence and clarity. You’ll learn how to choose a niche you can grow into, set up your new blog, write helpful posts, promote them without burning out, and start earning from all your efforts.
So, are you ready to finally start that blog you’ve been dreaming about? Let’s do this.
How To Start A Blog And Make Money Online
Starting a blog doesn’t need to be complicated or expensive. You just need to start slowly and build as you go along.
As a beginner, there are many free tools and platforms that you can use to get your blog off the ground. You will need to part with some small change for hosting and a domain name, but we’re talking single digits a month to get started.
So let’s break this down into simple steps that you can work on one at a time to get that blog up and running.
Step 1: Choose a Blog Niche That’s Worth Your Time (and Can Grow With You)
Before you even think about picking a blog name or touching a single theme, you need to know what you’re going to blog about.
This is your niche, and it’s the core topic of your blog. It helps readers know what to expect, and it helps you stay focused, grow your content strategically, and build a brand that earns trust and eventually income.
The easiest way to pick a niche is to think about your own interests, hobbies, skills or things that you often search for online. With that in mind, pick a niche that’s:
- Something you enjoy or are curious about.
- Something people are already searching for.
- Something that solves a real problem or answers a real question.
You can also ask yourself the following questions:
- What could I talk about all day?
- What do people ask me for advice on?
- What would I Google if I were a beginner in this area?
Once you have a niche idea in mind, make sure it’s not too broad (like “lifestyle” or “wellness”). You’ll struggle to stand out if you’re trying to cover too many different topics. At the same time, don’t niche down so far that you run out of content after 10 posts either. The sweet spot? A focused topic with room to grow in the future.
If you’re really struggling for inspiration here (this is one of the most common hurdles many new bloggers come up against), check out my more in-depth post “How to Choose a Niche For a Blog“. This should help nudge you in the right direction.
Step 2: Set Up Your Blog
Once you’ve chosen your niche, it’s time to officially start your blog. But don’t worry, setting up your blog doesn’t have to be complicated. In fact, you can have a professional-looking blog up and running in a weekend.
Here’s what you’ll need to get started:
1. Choose a Blogging Platform
The first thing you’ll need to decide is what blogging platform you’re going to use and if you’re going to use a free or paid platform. This is the website or software your blog is going to be built on.
For those who are serious about turning their blog into an income stream, a paid platform like self-hosted WordPress is the way to go. So, if you want full control and the ability to grow your blog into a business, go with WordPress.org (not .com).
It’s flexible and perfect for beginners who want to build something long-term. Think of WordPress.org as your blog’s “engine”.
If budget is an issue, and you don’t want to part with any funds just yet, check out my other post on how to start a blog for free instead.
2. Get Website Hosting
To use WordPress.org, you’ll need a host (this is where your blog lives online). Beginner-friendly options include:
- SiteGround – known for fast support and beginner tools.
- Hostinger – super affordable for beginners.
- Bluehost – popular and WordPress-recommended.
You’ll also need to decide which web hosting type is right for your blog, ie, shared, managed, cloud, etc. You will need to part with some small change here, but if you keep it basic to get you up and running, it’s nothing that one less cup of coffee a month wouldn’t cover. For basic shared hosting, expect to pay around $2 – $4 per month to get started.
I personally have all my websites hosted on the all-inclusive training platform that taught me everything I know. Multi-site managed WordPress hosting is included with my membership, so I figured I might as well use it. If you’re interested in doing something similar, you can read my full blog post all about the platform here.
3. Choose a Domain Name
The next step is to choose a domain name. Again, you’re going to have to part with some more small change here, although you can often get a free domain for the first year with your hosting.

The average domain cost is between $10 – $20 per year, although this can vary greatly depending on domain extensions (.com, .org, .net) or extra features, etc.
Pro Tip: Opt for a .com as these are the most globally recognised and trusted, and they’re great for branding and authority.
When it comes to picking a name, choose one that’s easy to remember, easy to spell, and reflects your blog’s focus. If you need some help, try ChatGPT as it’s excellent at coming up with catchy domain names. Simply tell it your website niche and ask it to suggest a list of catchy domain names.
4. Install WordPress & Pick a Theme
Next, it’s time to install WordPress and pick a theme. Most hosts have 1-click WordPress installs, so this should be a simple step. Once that’s done, choose a clean, mobile-friendly theme like:
- Kadence (free + fast)
- Astra
- Hello by Elementor
Then customise it to match your vibe with fonts, colours, and layout. Don’t forget to add a logo to solidify your brand. You can use free tools like Canva to create professional-looking logos easily, even if you have zero design experience.
5. Add Essential Pages And Set Up Your Main Menu/Navigation
Before you start writing any blog posts, there are some pages that all websites need, and these include:
- About Me Page – Who you are and what your website is about.
- Privacy Policy Page – Standard page required on all websites (you can find lots of free templates online that you can use for this).
- Affiliate Disclosure – If you’re monetising your blog with affiliate links, then you’ll need to add one of these by law (again, there are plenty of free templates online that you can use for this).
- Contact Page – So people can get in touch with you if they need to (you can use a free contact form plugin for this one, such as WPForms).
These essential pages will become part of your menu structure, and for now, they can be used to set up your main menu.
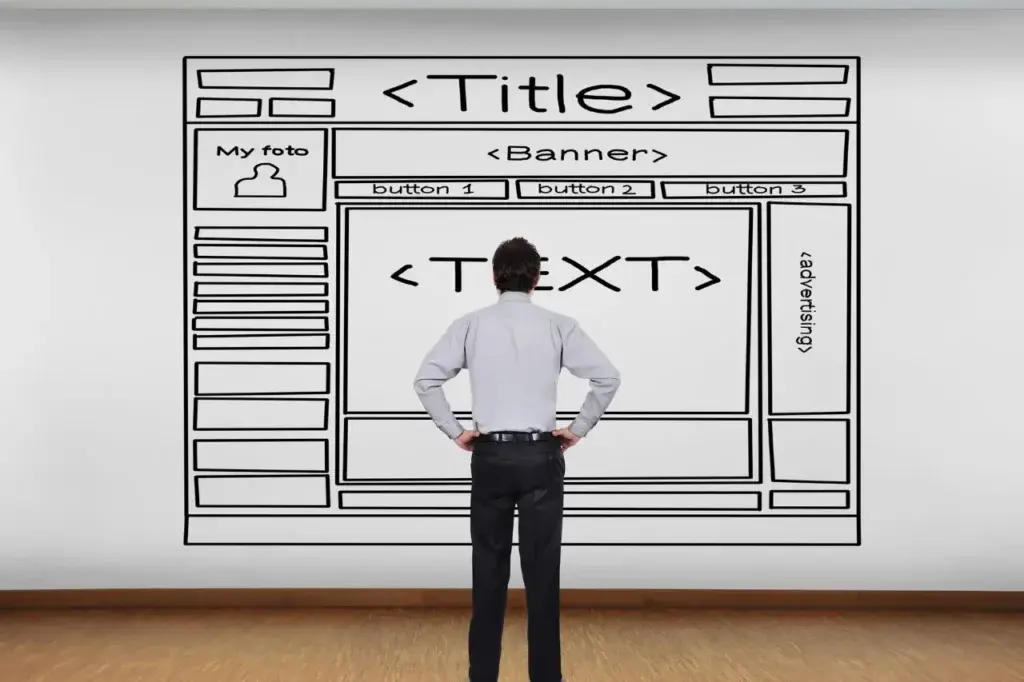
However, once you’ve created more content, you can expand and fine-tune your main menu and eventually move some, if not all of these, into a small footer menu at the bottom of your site (like mine at the bottom of this page).
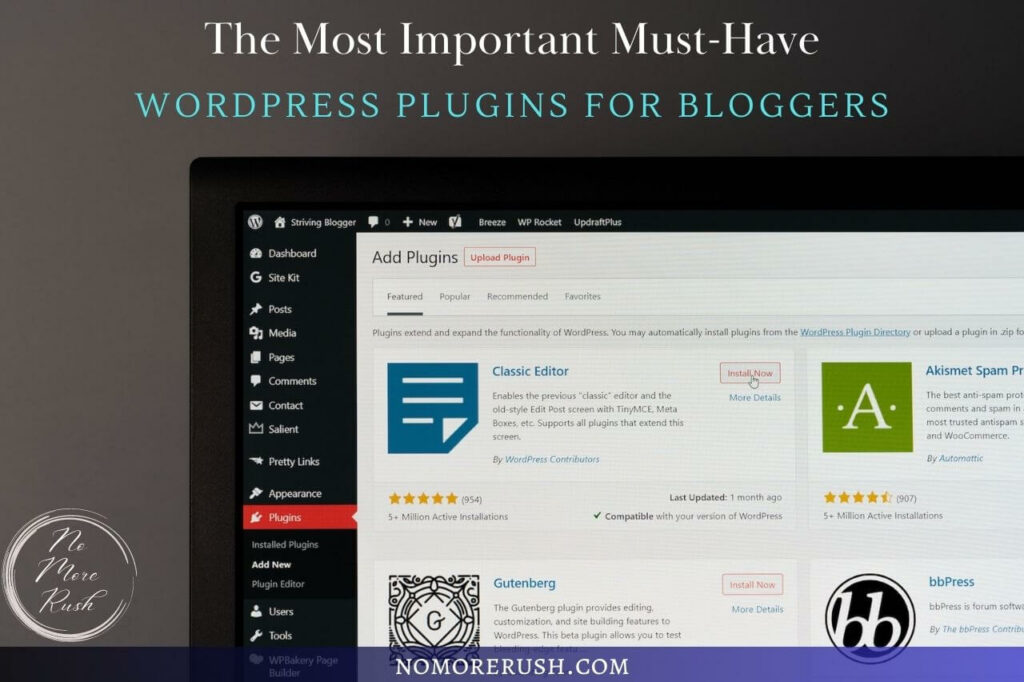
You can also take this opportunity to add a few plugins to help with things such as adding code (to verify your site with Google Analytics, Pinterest, etc), improving SEO, adding social share buttons, etc. If you’re not sure which plugins to add, here’s a list of a few must-have plugins you may want to consider.
As for how to design your new blog site, check out my beginner-friendly post with simple design tips to make your blog look professional even if you’re a complete newbie.
Step 3: Write Your First Blog Posts (Without Getting Stuck)
Once your blog is live, it’s time to fill it with helpful, beginner-friendly content. But don’t let perfectionism slow you down. Your first posts don’t need to be perfect. They just need to help your future readers.

advertisement
Remember, you can always go back and edit them later on if you feel they need it as your blogging skills improve.
What Should You Write First?
To make the writing process easier, you should start with the simplest topics in your niche. Start with posts that:
- Answer common beginner questions in your niche.
- Share personal stories or tips that build trust.
- Offer step-by-step help for small problems.
The most important thing here is to be helpful. The more helpful you are, the more likely it is that you’ll grow a trusting audience.
Great Starter Post Ideas
Think about some of the issues you had or things you had to learn when you first got started in your niche. You can use this as inspiration and create posts that share what you’ve learned or solved with other beginners. Think of posts such as:
- A “how-to” guide (e.g., How to Set Up a YouTube Channel).
- A beginner checklist (e.g., What to Pack for Your First Hiking Trip).
- A quick win tutorial (e.g., How to Create a Budget in Google Sheets).
Each post you write should give you even more ideas for the next one. Is there a natural next step to the content in post one? If so, write that next. Are there points in post one that you could elaborate on in even more detail? If so, write full individual posts around those points.

This also creates a great opportunity for internal linking between your posts, which is great for improving SEO (Search Engine Optimisation).
Step 4: Get Traffic to Your Blog (Even If You’re Starting from Zero)
Your blog is live. You’ve written a few helpful posts. Now what? Well, now it’s time to get people to actually read them! But don’t worry, you don’t need to “go viral” to start seeing results. Just start with simple strategies that grow over time.
1. Share Your Posts on Social Media
The most effective way to get traffic to your blog as a beginner is to share your posts on social media. Start with the platforms where your ideal readers hang out. For beginner bloggers, Pinterest and Facebook are great choices. To share your content on social media:
- Create simple, shareable graphics in Canva.
- Write relatable captions that invite people to click.
- Post consistently, even if your audience is small.
Pro Tip: Pinterest acts like a search engine, not just a social platform. Your pins can show up in searches for months (or years) after posting!
2. Use SEO (Search Engine Optimisation)
This means writing blog posts around keywords people are already searching for, so they can find you on Google.
As a new blogger, start small:
- Use a free keyword tool like Ubersuggest or Answer the Public.
- Search your topic on Google and check the “People Also Ask” section.
- Use those phrases in your title, headings, and naturally within your content.
Once you’re ready, you can upgrade to paid tools such as Ahrefs or Semrush for much deeper keyword research and analysis.
3. Join Online Communities
Places like Facebook Groups or Reddit threads in your niche can help you:
- Understand your audience’s problems.
- Share your blog in a helpful, non-spammy way.
- Connect with others starting out just like you.
However, you should avoid dropping your blog link randomly. Lead with value and join the conversation.
4. Build Your Email List Early
Even with just a few readers, offering a freebie like a checklist or guide can help you start collecting emails. Then you can share new posts directly with people who want to hear from you.

No idea what to offer? Try something simple, like a beginner’s checklist for getting started in your niche.
Pro Tip: Set up Google Analytics and also set up Google Search Console so that you can monitor how much traffic you’re getting and where it’s coming from.
Step 5: How to Make Money From Your Blog (Even as a Beginner)
Here’s the truth: You don’t need a massive audience or a viral moment to start earning. You just need the right monetisation method for where you are now and what your readers need.
Let’s break down 3 beginner-friendly ways to make your first blog income.
1. Affiliate Marketing
Affiliate marketing is one of the easiest ways to get started. You recommend products or services you love, and earn a commission when someone signs up or buys through your unique link.
Example:
If you write a post like “Best Free Tools for New Bloggers,” you can include affiliate links for Canva, Grammarly, or your favourite hosting platform.

Start by signing up for beginner-friendly affiliate programs, such as Amazon Associates, ShareASale, or Rakuten Advertising. Once you’re accepted, you’ll be able to access affiliate links that you can then add to your posts.
2. Offering a Digital Freebie (that leads to a paid product)
Once you’ve built a little trust with your audience, you can create simple digital products like:
- Printables
- Mini ebooks or guides
- A beginner-friendly email course
Start with something free, such as a checklist, and then offer a helpful paid upgrade, like a workbook or mini toolkit.
3. Freelance Services
If you have a skill like writing, designing, social media, or even organising information, you can use your blog to show it off and get clients.
Add a simple “Work With Me” page to your blog and list what you offer. Think about what people often ask you to help with. That’s your first offer.
4. For When You’ve Grown Your Traffic
There are several other ways to monetise your blog, but you may want to wait until you’ve grown your traffic. These include:
- Display ads (they usually require high traffic)
- Building a full online course (wait until you’ve grown your audience)
The main key to making money as a blogger is to focus on helping real people solve real problems. When your content is useful, the money will naturally follow.
Step 6: Keep Going and Grow Like a Pro
You’ve set up your blog, written your first posts, and learned how to start making money online. Now what? Well, now it’s time to stay consistent, keep learning, and build momentum.

Here’s how beginner bloggers grow into full-time bloggers:
Stay Consistent (Even When It’s Quiet)
In the beginning, you won’t see a ton of traffic, if any at all, but that’s completely normal. What matters most is showing up anyway.
- Aim to publish 1–2 posts per week.
- Set mini-goals: “Write 4 posts this month” or “Get 5 email subscribers”.
- Celebrate small wins because they lead to big ones.
Pro Tip: Create a 30-Day Blog Topic Planner to keep your content ideas flowing. This also helps you stay consistent. You can also use ChatGPT to help brainstorm content ideas.
Keep Learning (But Don’t Get Overwhelmed)
There’s a lot to learn when you’re a beginner blogger, and as a consequence, it’s easy to get overwhelmed, so take it one step at a time. Pick one area to improve each month, such as:
- SEO
- Pinterest
- Email marketing
- Content writing
Then focus on that one area alone for the entire month before moving on to the next. You don’t have to master everything all at once. You just need to keep moving forward, one area at a time.
Let’s Grow That Blog
Starting and growing a blog takes time and patience. Blogging is a long game, and the small steps you take today will build the momentum you need tomorrow. With every post you write, every pin you create, and every email you send, you’re learning. You’re building. You’re growing.
So give yourself permission to be a beginner. Be messy. Be brave. Be consistent. Because your blog matters. Your voice matters. And someone out there needs exactly what you’re about to create. And Remember…
You’re not behind. You’re not too late. You don’t need to do it all at once. You just need to keep going. Because progress adds up. And if you get stuck and need more help, just let me know in the comments below, and I’ll be more than happy to help you out and give you some encouragement and reassurance along the way.
Happy Blog Growing!

You May Also Like
- How To Create And Add A Favicon To A WordPress Website
- How To Easily Add A Profile Picture To WordPress
- The Most Important Must-Have WordPress Plugins For Bloggers

