Last Updated: July 20, 2024
I’m sure you’ve come across plenty of cool text designs where text mimics the shape of an object and you’ve probably wondered how it’s done. Well, it’s super easy to do and today I’m going to show you exactly how to fill a shape with text in Adobe Illustrator.
Adobe Illustrator is an awesome tool for creating designs and text designs are no exception. A simple technique of filling a shape with text can create a seriously eye-catching design effect.
It will make your text appear in the shape of the object you’ve placed it in and there are two different ways to do it.
One will distort your text while the other will not, so I’m going to show you how to do both to create two different but equally cool text effects to really snazzy up those text designs.
How To Fill A Shape With Text In Adobe Illustrator (Distorted Text Method)
I’ll start with text that will become distorted because I actually think this is the cooler one of the two. So start by adding your shape of choice to your artboard and then type the text you’d like to use.
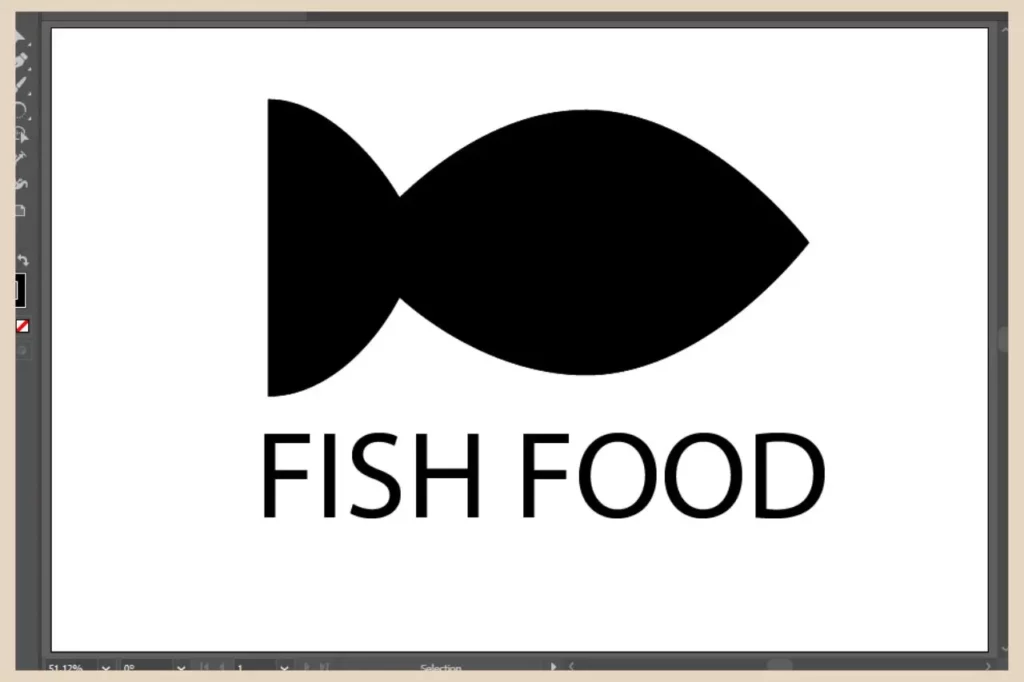
For this example, I’ve added the text FISH FOOD and created a basic fish shape. The next step is to make sure your shape is in front of your text and you can simply check your layers panel to ensure this is the case.
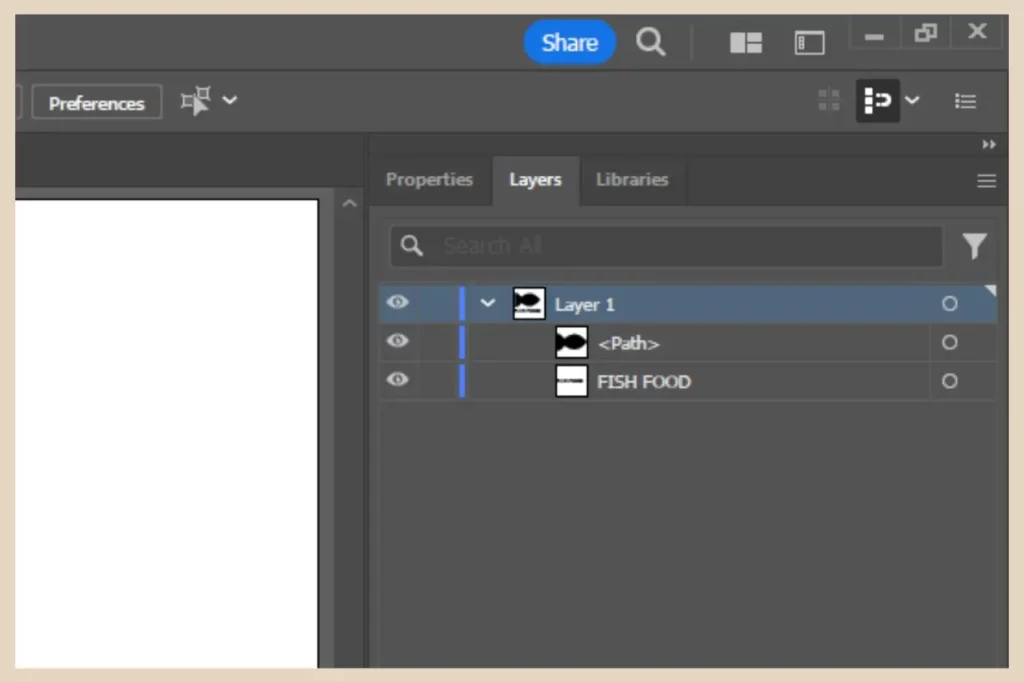
The item at the top of the layers panel is at the very front of the design while the item at the bottom of the layers panel is at the very back of the design.
As you can see in the screenshot above, the fish shape is at the top and the text is underneath it which is exactly the way I need it but you can just click and drag items in the layers panel to change their position if they’re not ordered the way you need them.
Using Envelope Distort To Shape Your Text
Once your items are ordered correctly, select both of them and click Object from the main menu. Next, hover over Envelope Distort to show a flyout menu and then click Make With Top Object.
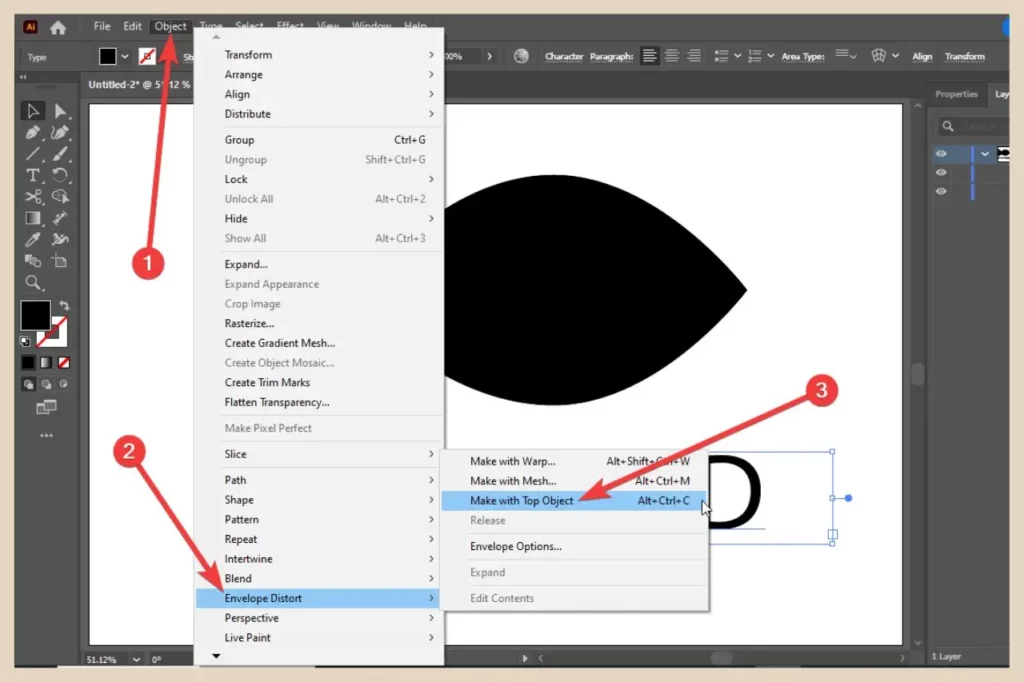
This will now combine your shape and text to create your new shapey text design which should look something like the screenshot below.
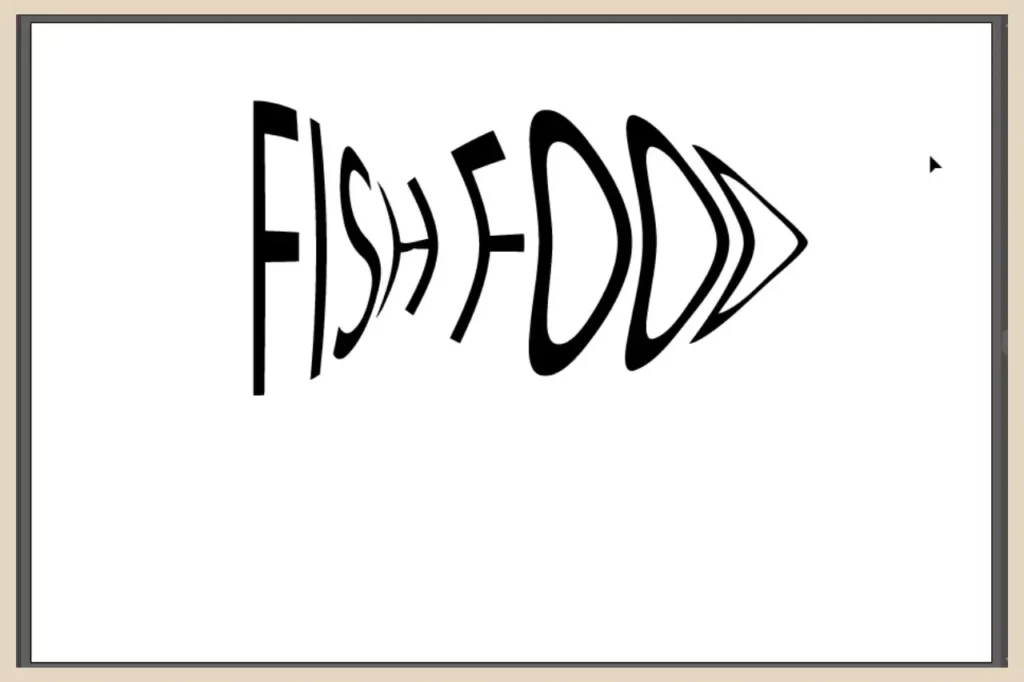
One thing to note about creating this kind of text effect is that the shape used to make it will be gone once you’ve used it to change your text.
However, if you want to keep the shape as well around the outside of your text, then there is a way around this.
Keeping The Shape As A Border
To achieve this effect, you’ll need to make a copy of the shape first before you click the Envelope Distort option.
advertisement
So the simplest way to do this is to copy and paste the shape and place the copy directly on top of the original so that it looks like one shape.
Next, in the layers panel, click the eye icon to hide the shape copy and click the empty space to the right of the eye icon to lock the shape copy (a lock icon will now appear to indicate it’s locked). Locking it will prevent you from accidentally moving or changing it.
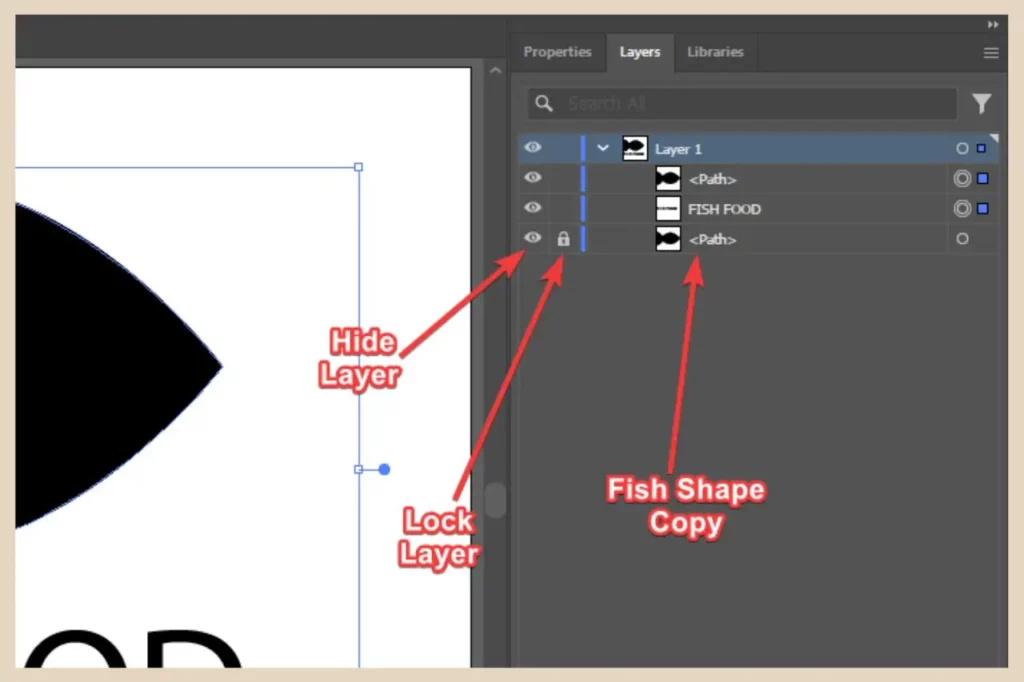
I’ve also clicked and dragged my copy to the bottom of the layers list to keep it separate from the objects I’m about to use for the Envelope Distort.
This also means that it’s at the very back of the design behind my FISH FOOD text so my new text will appear on top of it.
You can now go ahead and use the Envelope Distort just as you did before but now when you’re finished, you can unlock and unhide the shape copy layer so that you now have both the shape and the shaped text in your design.
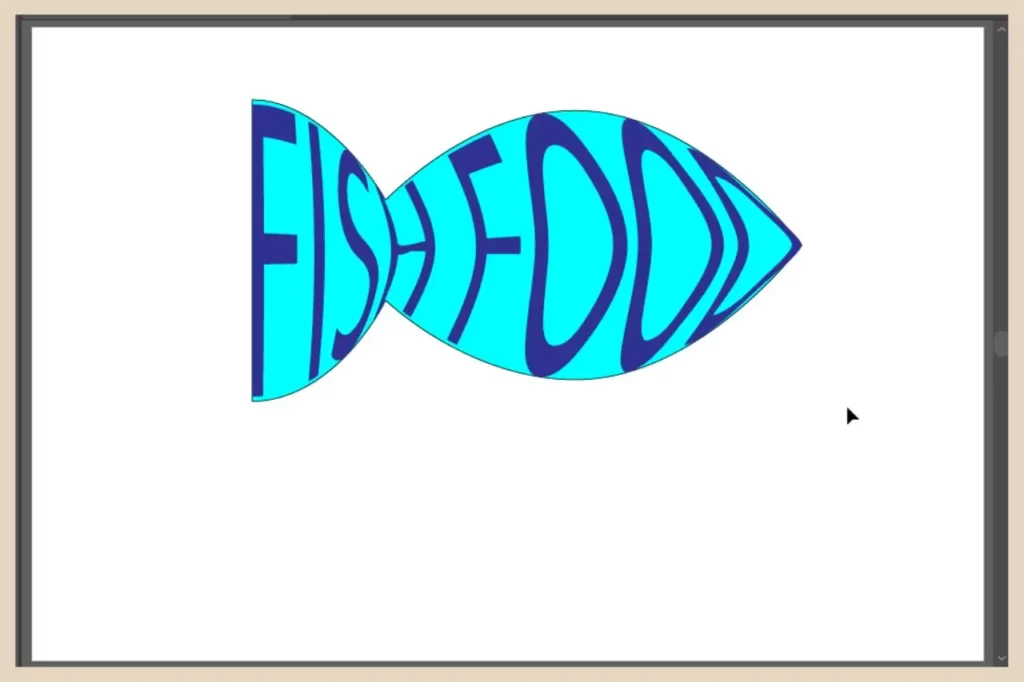
From here, you can change the fill colour and stroke (border) colour and thickness of the main shape as you would any other object and if you double-click on the text, you can also change the text colour too.
How To Fill A Shape With Text In Adobe Illustrator (Non-Distorted Text Method)
The second way to do this is to use the Text Type tool/Area Type tool but the text won’t be distorted like it is with the Envelope Distort method.
So simply add the desired shape to your artboard (I’ll use the fish shape again here) then select the Text Type tool from the toolbar.
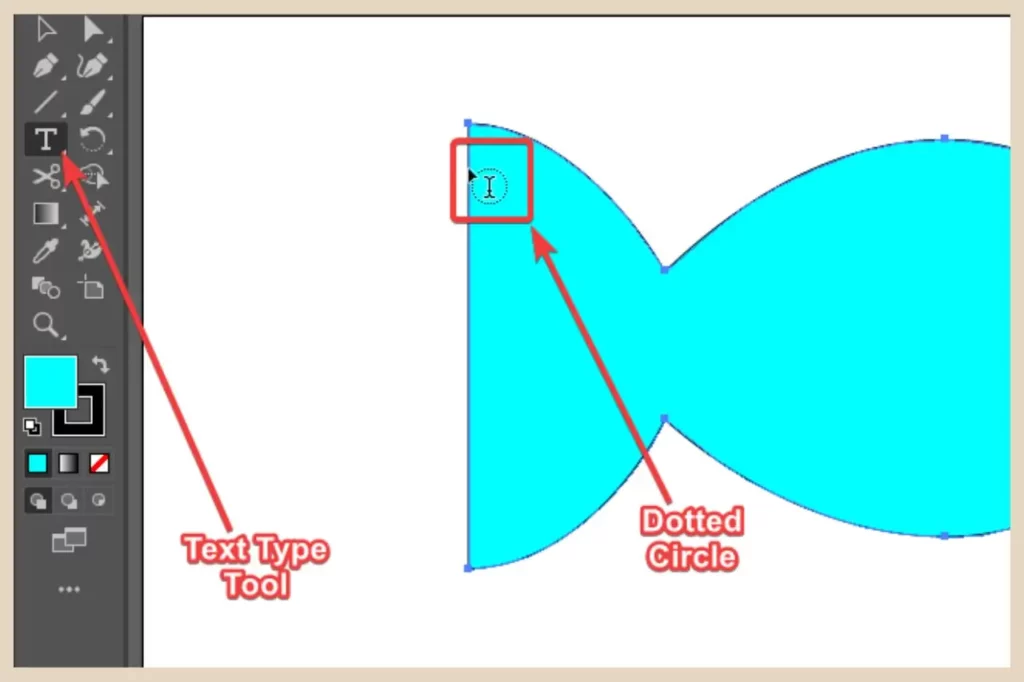
Hover your cursor (it will now be a Text Type tool icon) close to the path (line) of your shape until the dotted square line surrounding the text icon changes into a dotted circle line.
This indicates that the Text Type tool has automatically changed temporarily to the Area Type tool, which is used for filling objects with text.
Once you see this, click on the area and the default Lorem Ipsum text will be inserted inside the shape which you can now replace with your own text.
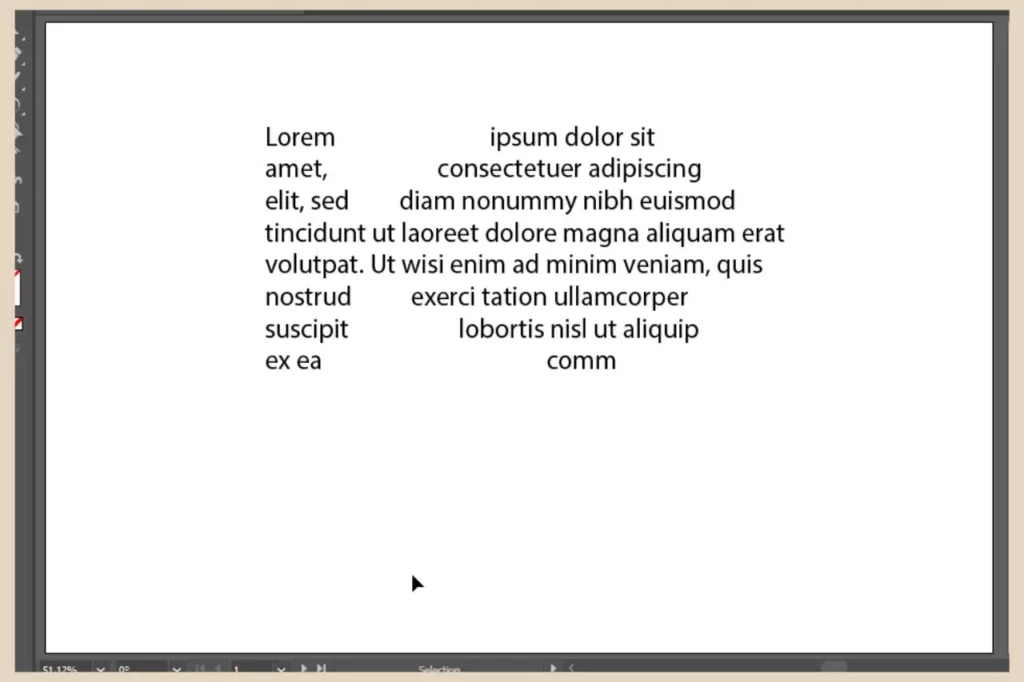
Again, much like the Envelope Distort method, the shape will vanish from the design but you can use the same copy method from before if you want to keep the shape as part of the text design.
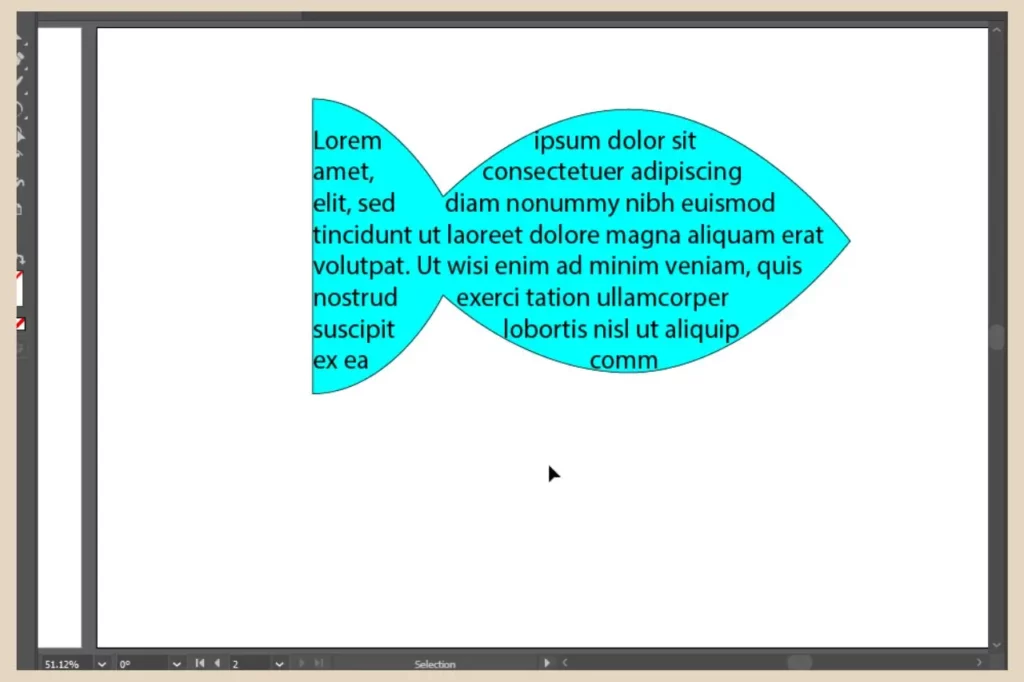
The only thing worth noting with this method is that it works best for paragraphs of text rather than a few short words because you need enough text to wrap within the shape to see the effect.
Let’s Get Shape Filling With Text
And that’s all there is to it. Filling a shape with text is a seriously easy thing to do but the results can be pretty awesome. So why not give it a try for yourself and see what kinds of cool text designs you can create?
And as always, if you get stuck or just feel like sharing your own shape-filling stories, then please feel free to let me know in the comments below.
Happy Shape Filling!

You May Also Like
- How To Draw Behind Or Inside Objects In Adobe Illustrator
- How To Create The Ultimate Gradients In Adobe Illustrator
- How To Add Cool Effects To Text In Adobe Illustrator

