So, you’ve been playing around with AI image generators and stumbled upon the outpainting feature but what is AI image outpainting and how do you do it?
Well, in this tutorial, we’re going to look at what outpainting is and how to do it correctly to get the best results. It’s actually pretty easy to do and many AI generators have an outpainting feature.
But even if your go-to AI image generator doesn’t, you’ll find many other good ones that do even if it’s the only thing you use it for.
So, let’s take a look at what outpainting is and how to use it to make changes to your favourite images.
What Is AI Image Outpainting
AI image outpainting is a way of extending an image past its original edges by adding additional content around the image to extend it horizontally, vertically or both. The AI uses the content within the existing image as a reference to create the additional content so that it blends and extends from the original image seamlessly.
It’s a great way to change the image dimensions and aspect ratio of an image without losing any of its content unlike if you cropped the image.
And because you’re actually adding extra content to the image to expand it out further, it’s a fun way to enhance it with more details past its original borders.
How To Use Outpainting
For the sake of this tutorial, I’m going to be using Playground AI because it’s one of my favourite free AI image generators but the process should be pretty similar across most AI image generators with the outpainting feature.
Usually, outpainting is done in a canvas editor so if your go-to AI image generator has a canvas editor, then the chances are it has the outpainting tool.
One of the most common reasons why I personally would want to outpaint would be if I wanted to use a particular image across different platforms that used different aspect ratios.
A prime example of this would be a landscape blog post featured image and a vertical Pinterest pin. For example, I recently generated a landscape image that I used as my featured image on a previous post.
Now, as part of my weird OCD, I always like to use the same image for my very first Pinterest pin for that post and in most cases, I can usually do that without any issues.
When The Ratio Doesn’t Work For All Occasions
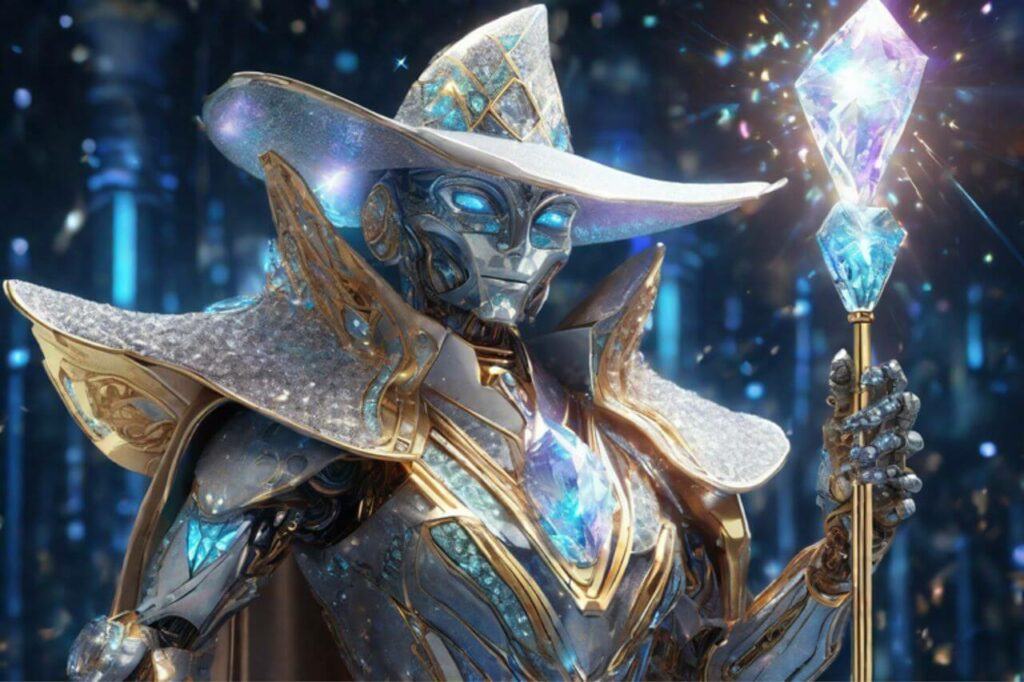
However, on this particular occasion, the landscape image was too close up and I was losing too much of the important parts of the image using it in a vertical Pinterest pin design.
To get around this, I used outpainting to extend the image vertically so that it would work better for a Pinterest pin. The image below is the original image I was working with.
And the first image on the left below is how it looked when I used it to create a Pinterest pin design. The image on the right on the other hand is the amended image that was extended vertically with outpainting.
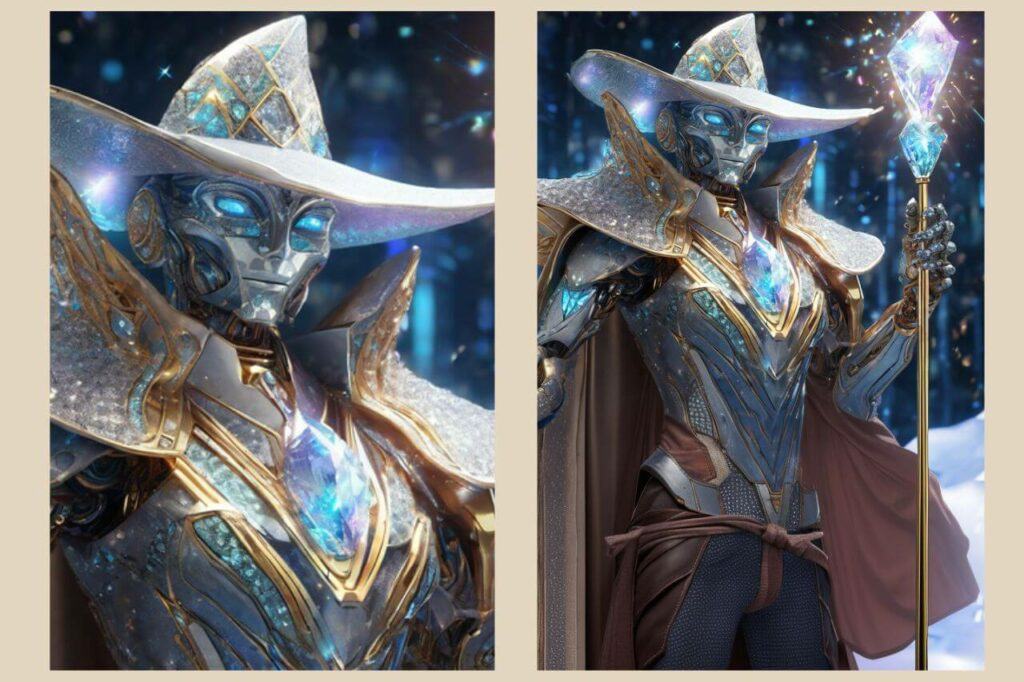
You may be thinking that the image on the left doesn’t look that bad for a Pinterest pin, however, once the text overlay is added, even more of the image is unseen and it starts to lose its look.
Below is an example of what both pins look like once the text overlay was added and for me, the extended image on the right is much more what I was looking for with this pin.
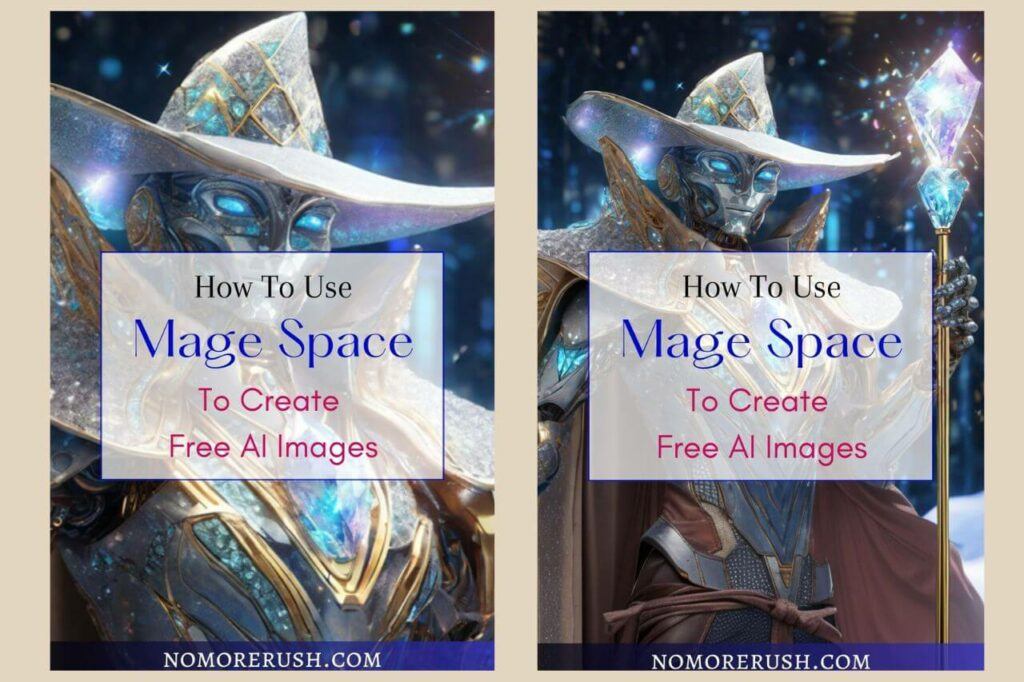
So, as you can see, this image was extended very successfully and this is just one example of where outpainting can come in very handy.
I’ve also used it many times on an extremely close-up image to make it look more like a wide-shot image or the alter the aspect ratio of square images.
The Best Way To Outpaint
So, the best way to do outpainting is to do it in small sections one area at a time. Usually, you’ll be working with a generative frame which you can move around the canvas editor freely.
This frame can also be placed over your image whenever you want to outpaint. The image below is the original image I’m starting with so let’s see how well I can extend it.
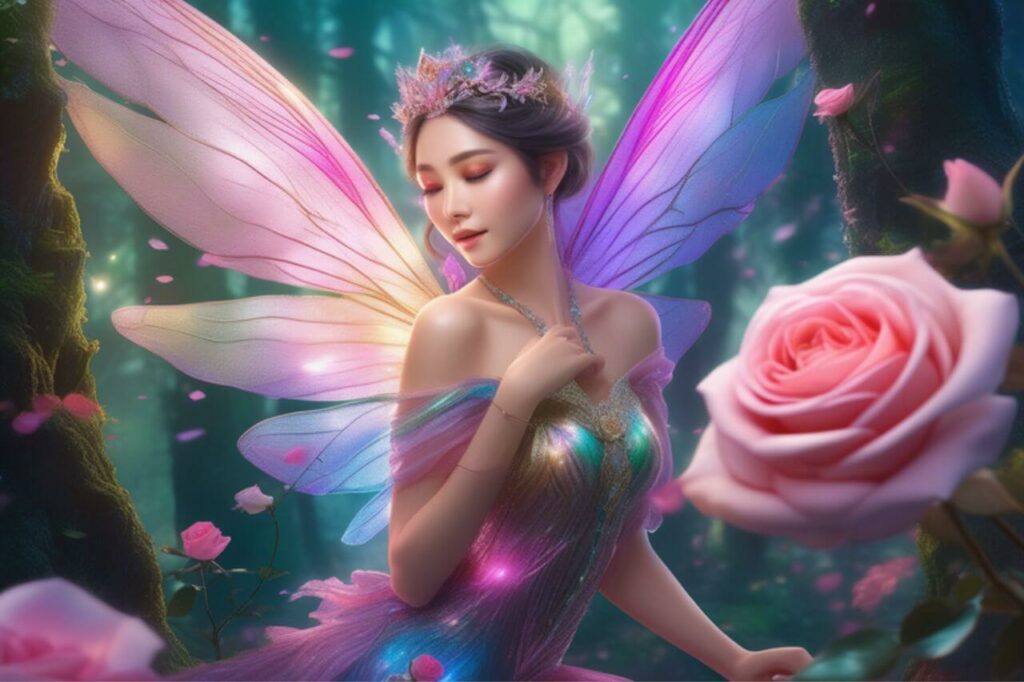
With this image, I’d like to see more of the background so I’m going to outpaint past the existing borders by placing the generative frame partially over the image with the remainder overlapping the blank canvas area just like the screenshot below.
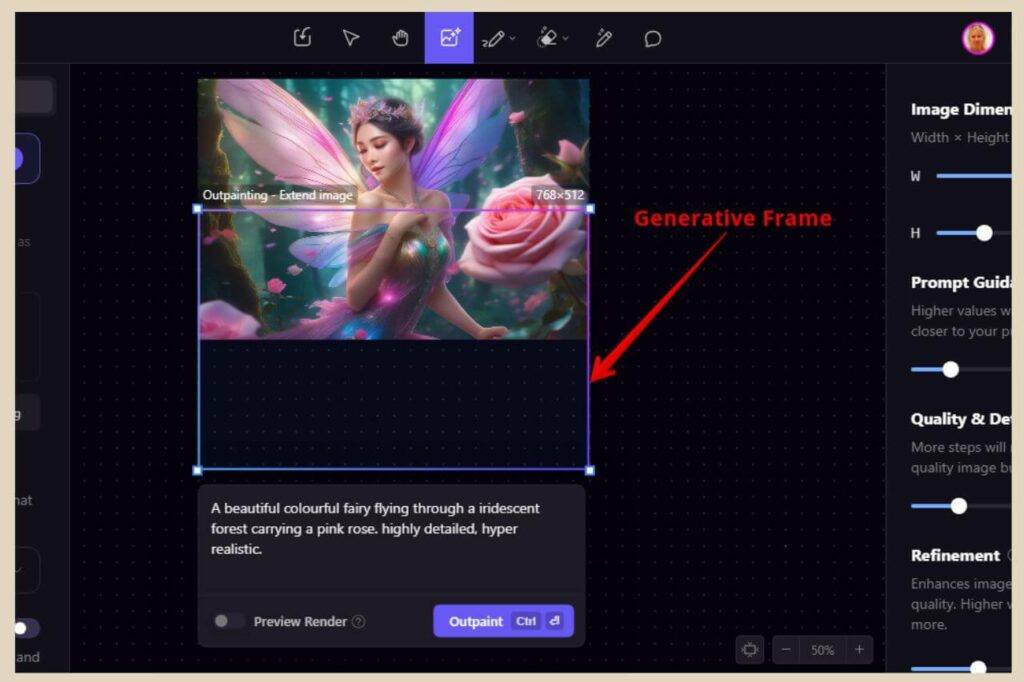
The results of the outpainting will fill this blank canvas area within the frame and the easiest way to do this is to work on one side of the image at a time.
Outpainting Prompts
If you’re using an AI-generated image, then it’s best to use the same prompt again that you used to create it. This will help make the newly extended area blend in better with the original image.
However, sometimes the AI will fixate on a certain part of the prompt and start adding too much of it so you may need to adjust the prompt if you find that happening.
For example, with this image, I mentioned a pink rose in the prompt and the AI started to go a little nuts with the pink roses and the more I extended the image, the more it was getting taken over by pink roses.
To be fair, I ended up liking the final result but I could’ve deleted the pink rose section of the prompt if the AI got too carried away with it (and it does, sometimes).
So, if you find that the AI is running wild with part of your prompt, you can amend your prompt to stop that from happening. And of course, you can add to the prompt if you’re trying to add something new to the extended area.
If you’re using a “real” image, then try to describe the image as best as possible to get better results and again, if you’re trying to add something new to the extended area, include that too.
Keep A Good Percentage Of Your Image In The Frame
With outpainting, you’ll want to have at least 50% of the original image within the generative frame so that the AI has a reference to work with.
Any less than that and you may end up with something that does follow the prompt but is a completely different image to the original and therefore doesn’t blend into it at all much like this image below.
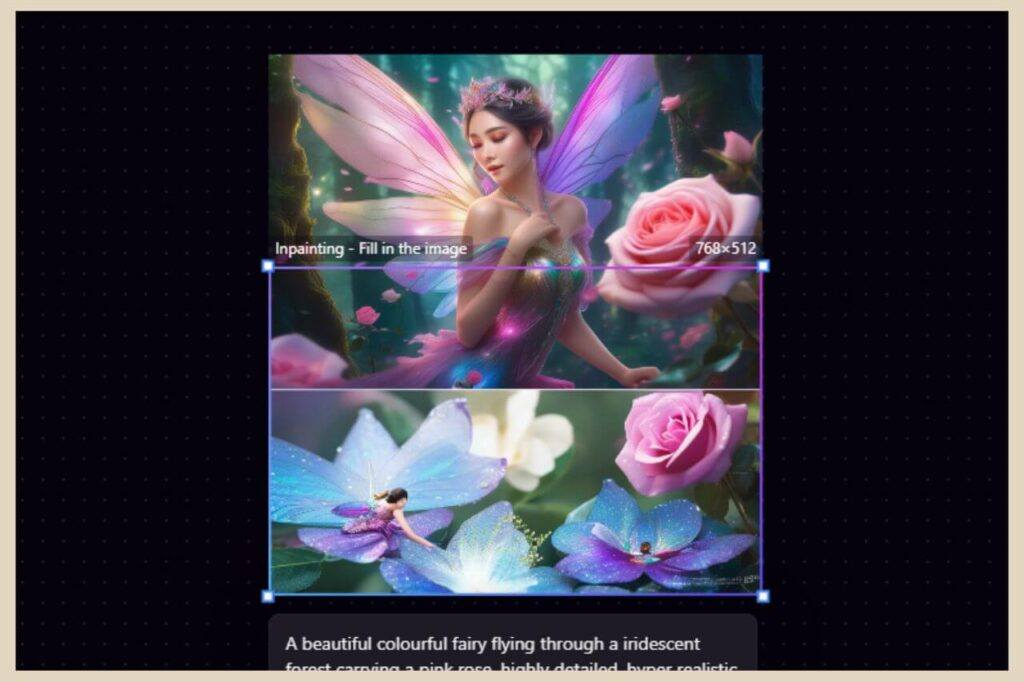
In fact, sometimes this can still happen even if you have most of the original image within the frame with only a small section overlapped onto the blank canvas.
You can however just undo or reject anything that didn’t work out so well although if your generator of choice costs credits/tokens for the outpainting feature, you’ll usually still be charged the credit/token cost even if you don’t accept the results.
That’s actually one of the main reasons why I use the likes of Playground AI for all my outpainting. It’s free to use for up to 500 images daily so I can do a lot of outpainting without worrying about credit/token costs because there aren’t any.
Outpaint One Side At A Time
So, with the image I’m working with, I started at the bottom of the image first and then I moved on to the top. I then decided that I wanted to see a bit more on the sides so I outpainted a little more on each side individually.
If you find that you’re not getting the best results with 50% of the image in the frame, try doing smaller sections at a time as this can help to get more precise results.
With outpainting, you can literally keep going and extending an image as much as you want even if that’s extending past the new extended area.
As a recap, the below image is what I started with before doing any outpainting.

The next image below is the final result I ended up with after outpainting from every side of the original image.
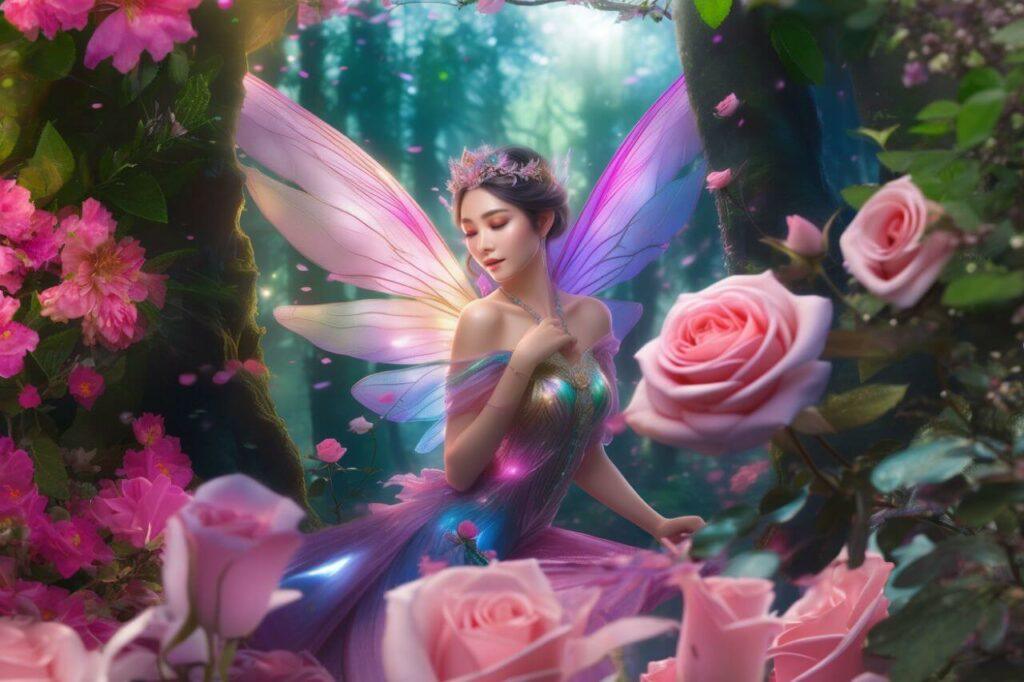
As you can see, the AI generator did a really good job at outpainting this image so it’s a really useful tool for extending an image in any direction you want.
Even if it did get a bit carried away with the pink roses, I’m not mad at it as this image was purely for this tutorial only and I like the way it turned out.
Let’s Get Outpainting
And there you have it, it’s as easy as that. So, whether you’re trying to add to a portrait image to make it landscape or vice versa or make a close-up image look not so close up, outpainting will do just that and it’s super easy to do.
So, why not try it out for yourself and see what you can do by extending one of your own favourite images? It’s a very cool feature and a lot of fun to use to enhance and expand your images.
I hope you’ve found this post helpful and if you feel like sharing your own outpainting stories, please feel free to do so in the comments below. I’d love to hear all about them.
Happy Outpainting!

You May Also Like
- Is Microsoft Copilot (Bing Chat) Good For Bloggers
- Is ChatGPT Or Bard (Gemini) Better For Bloggers
- How To Use Google Bard For Epic Blogging

