Are you wondering how to set a featured image in WordPress? Maybe you think you already have but can’t understand why it’s not showing up on your blogroll.
Or maybe you’ve figured out how to set a featured image but now you have two of the same image at the top of your posts.
Whether you’re trying to set a featured image or having a duplication issue after you’ve set it, this tutorial will walk you through step-by-step how to do it and how to rectify the most common mistakes a lot of us make when trying to set one for the first time.
What Is A Featured Image
A featured image is the primary image for your post that usually reflects the subject matter of the content. It is inserted at the very top of your post so that it becomes the very first thing your visitors see when they first land on your post often even before the title.
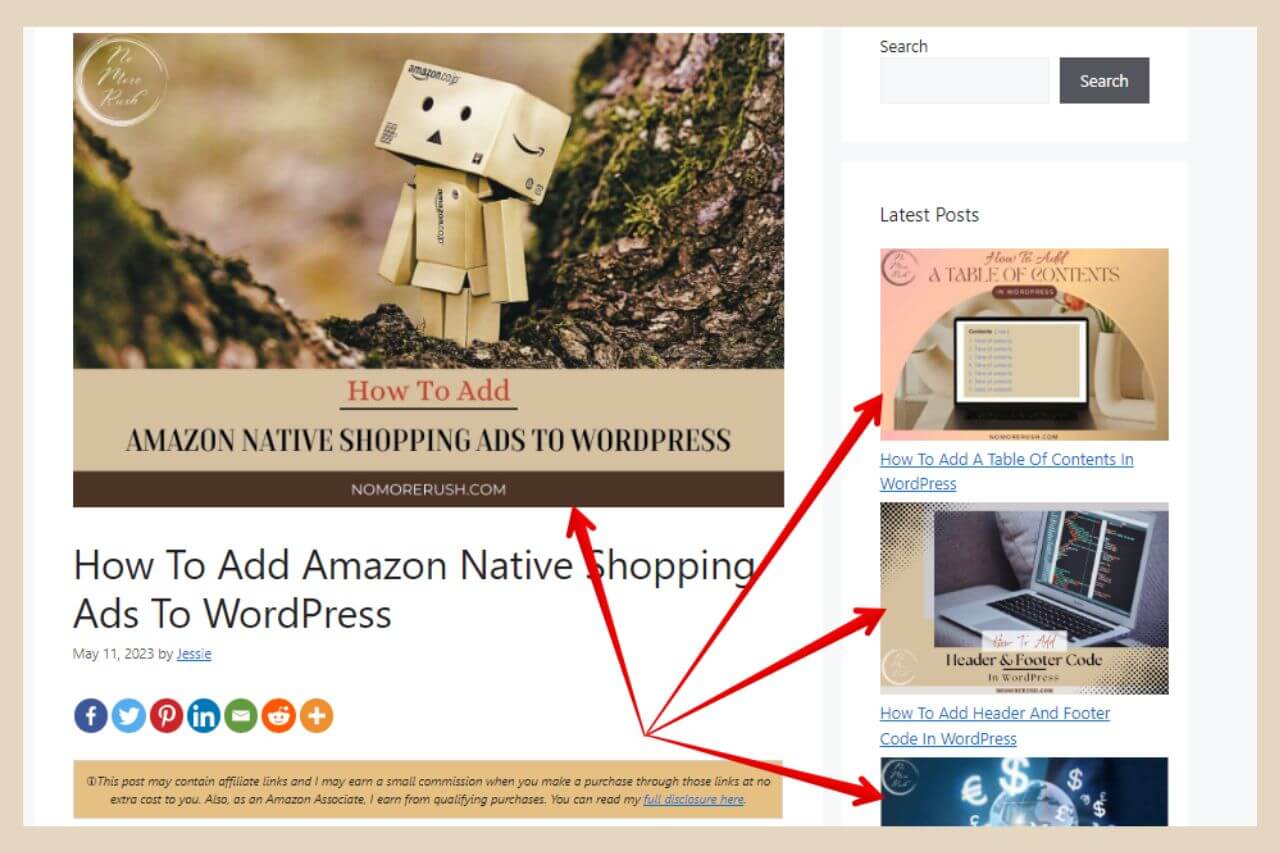
It also shows up on your homepage/blogroll to the side of or above your post depending on your theme options.
It will also be used if you add the latest posts widget showing thumbnails to your site if you have your featured images set up.
Featured images are also often used when you or your visitors share your posts on social media and you can set them to be the default sharing image in most SEO plugins.
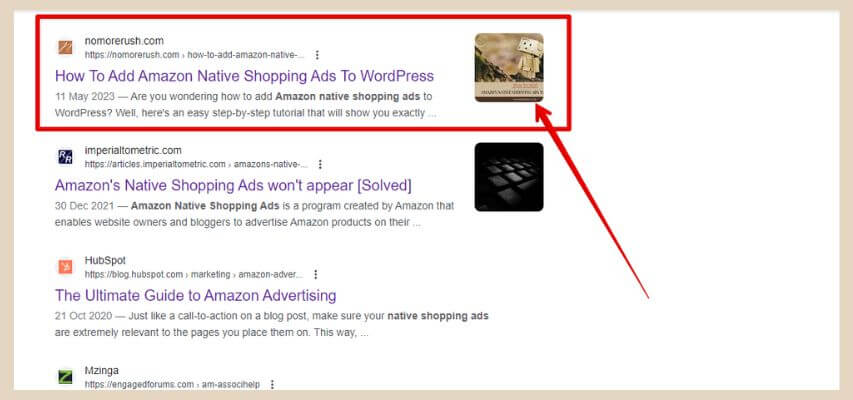
As an added bonus, if you’re lucky enough, they may even show up in the SERPs (search engine results pages) next to your posts.
Why Add A Featured Image
There are a few good reasons why you should add a featured image to your posts. From a visual standpoint, they make a huge difference to the way your individual posts look, not to mention your blogroll and your latest posts widget if you use one.
People are very visual by nature so grabbing their attention with a captivating featured image can make your content look more appealing.
They give your readers an idea of what your post is about and an eye-catching featured image can positively affect the way your readers feel about your content before they’ve even read a single word.
You’re also more likely to get engagement on your social channels if your social content is accompanied by a featured image.
The Most Common Mistakes When Adding Featured Images
Before I get into how to add featured images, I wanted to mention a couple of common mistakes that many people make in the beginning when they first start trying to add featured images.
The first one is adding an image manually in the WordPress editor using an image block and this is actually something that a lot of us do when we’re first starting out. The thing is though that even if you insert this image right at the beginning of your post, it still isn’t an actual featured image.
It won’t show up with your post on the homepage/blogroll or as a thumbnail in your latest posts widget because it’s just a regular in-content image like any other you would add throughout your post.
The Second Common Mistake
The second common mistake is closely related to this in which you do set a featured image correctly but you’re now getting two of the same image at the top of your post.
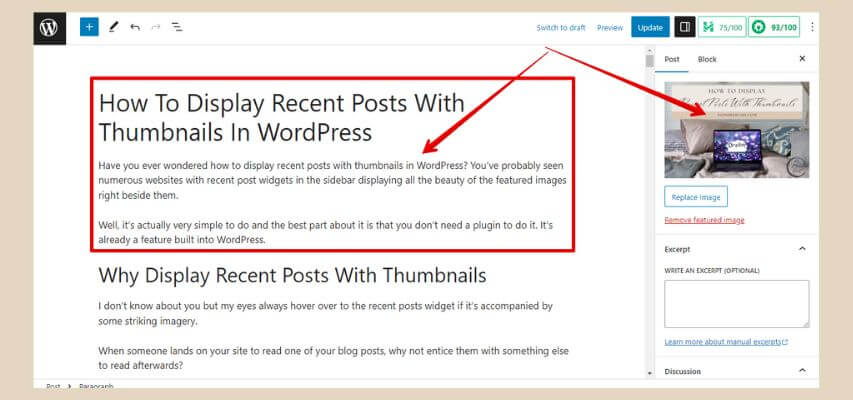
The reason why this is happening is because a featured image doesn’t actually show up at the top of your post in the WordPress editor but it is showing up on your live site.
If you’ve ever used a plugin to automatically add social icons or automatically add a table of contents to your posts, you may have noticed that these features aren’t visible when you’re viewing your posts in the WordPress editor but they are there when you view your site live.
A feature image actually works in the exact same way in that you can’t see it in the editor after you’ve set it up.
You may have set a featured image correctly but because you can’t see it in the editor, you add one manually with an image block as well (or leave the manual one there that you already had inserted).
This is what causes the double image issue so deleting the manually added one will solve this problem.
How To Set A Featured Image In WordPress
Setting a featured image is actually a pretty quick and easy thing to do once you know how. To get started, the first step is to find a good image to use as your featured image.
If you’re not taking your own photos, then there are plenty of sites that have images that are free to use.
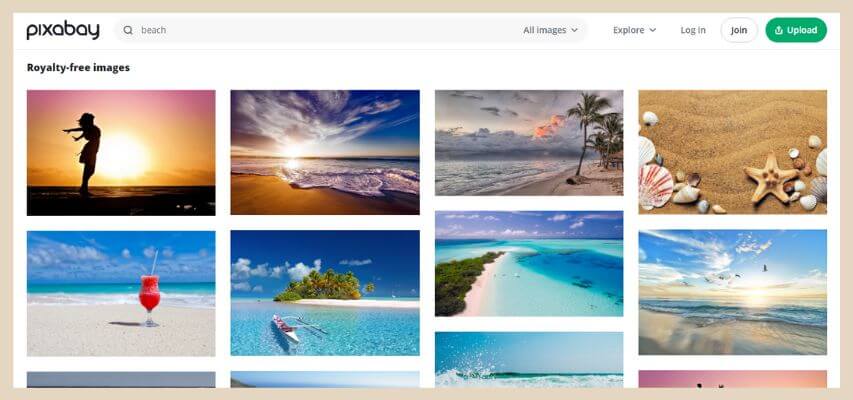
If you’re not sure where to find free-to-use images then my favourite two are Pexels and Unsplash. There’s also Pixabay as well and if you’re familiar with Canva, they also have many free-to-use images too.
Choose The Right Sized Image
Ideally, your featured image should be large enough to fill the full width of your content area. This will be theme dependant so you may need to try a few sizes until you find the size that fits the best.
I’m using GeneratePress and with this theme and the default “content/sidebar” layout, I find that Pexels medium-sized rectangle image of 1280 x 853px works really well.
If you’re worried about your image file size being too big, you can use the likes of TinyPNG which is a free site that will compress your image to make its file size smaller. You can also use an image compression plugin that automatically compresses all images that you add to your site.
Keep Your Featured Images The Same Size
You should also try to keep all your featured images the same size for a more professional and consistent look on your site.
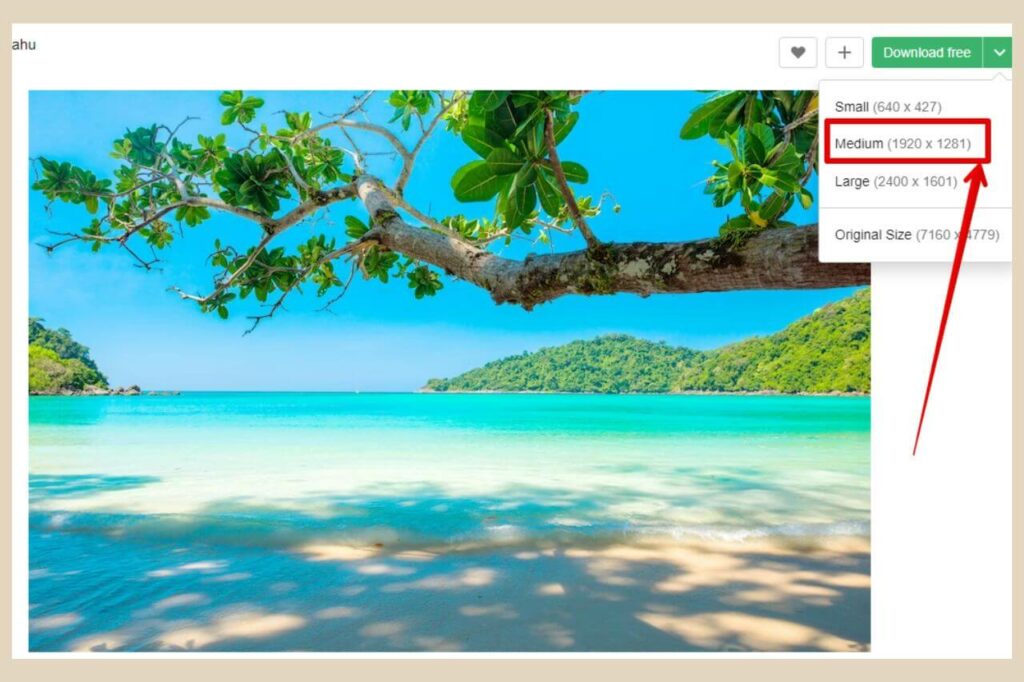
Unfortunately, as you can see in the above image, sometimes image sizes vary especially if you’re getting them from different sites (Unsplash medium images are often a slightly different size and even Pexels medium-sized images can differ).
A great way to get around this is to use a free design site like Canva to keep all your images consistent. I simply create a custom-sized design template in the size I’d like all my images to be. From here I can just add my downloaded images and crop them to fit the template size.
This way, all my featured images are the same size throughout my site and it also gives me the ability to add text, a logo, etc, to make my featured images even more visually appealing..
Setting The Image
Once you have your featured image ready to go, the next step is to head to the post where you’d like to add it. Once you’re in the post, you’ll need to use the settings on the right-hand side of the page to set the image.
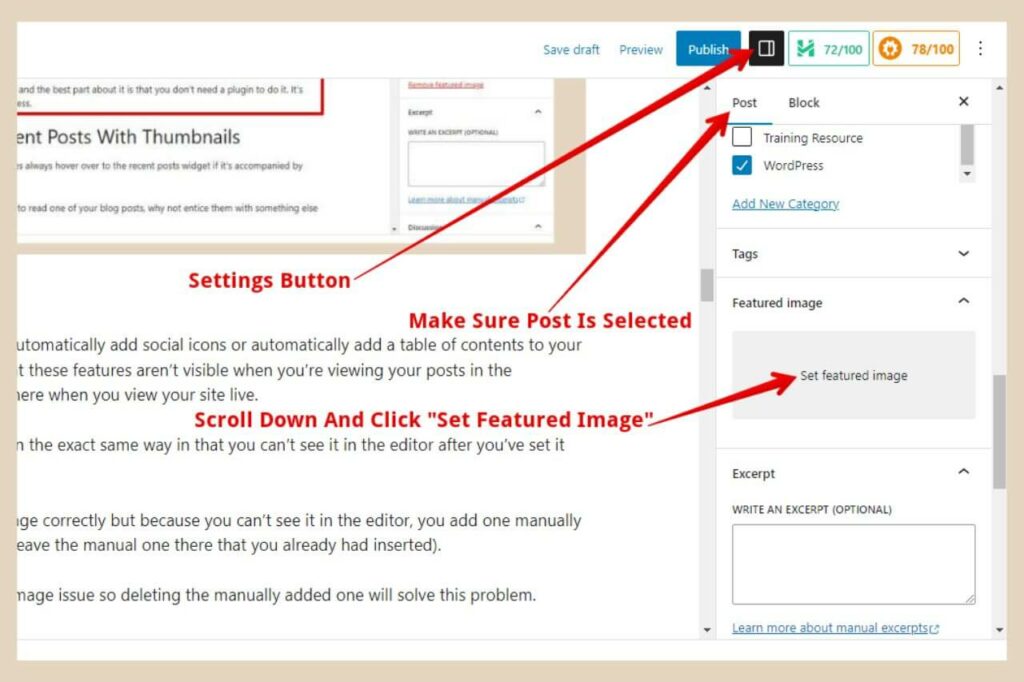
If you’re not seeing any settings on the right of the page, you’ll need to click to settings button which is to the right of the Publish/Update button.
You’ll also need to make sure that “Post” is selected at the top of the settings as this is where you set your featured images.
The next step is to scroll down the settings until you come to the Feature Image section. There should be a grey box beneath this with the words “Set Featured Image” within it.
Click “Set Featured Image” and a new window will appear where you can now upload your image in the same way that you would for any regular in-content image.
Adding Alt Text
Once your image is selected, the last step is to give it some Alt Text. Alt text is used to help describe images to the visually impaired but it’s also important for SEO as well so it’s a good idea to get into the habit of adding alt text to every image you add to your site.
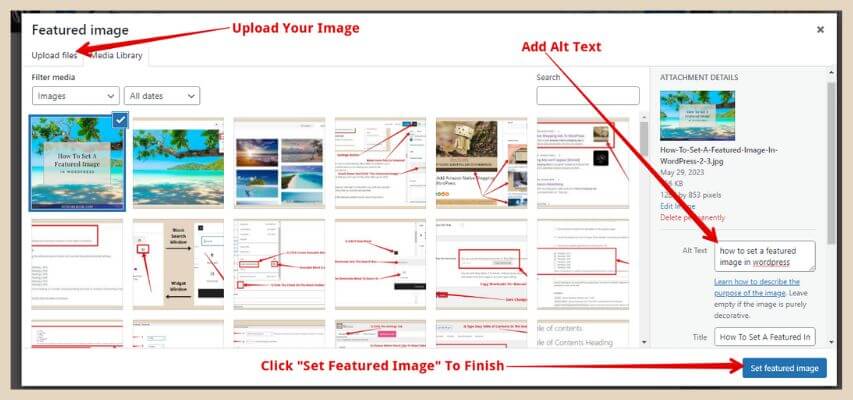
Once you’ve added some alt text to your image, you can now click the Set Featured Image button to finish and that’s all there is to it. Just remember to click the Publish/Update button to save your changes.
Like I mentioned earlier, you’ll now see your image in the featured image section in your post settings but you won’t see it at the top of your post in the WordPress editor but trust me, it will be there on your live site.
Simply click the Preview button and you’ll be able to see how your new featured image looks live on your post.
Once it’s published/updated, you’ll also be able to see it alongside your post on your homepage/blogroll and on your latest posts widget if you’re using one and you’ve set it to include your featured image.
Let’s Get Those Featured Images Set
Now that you know how to add a featured image, it’s time to amp up your visuals and get those images set. A great featured image can take your post and blog roll from plain and ordinary to vibrant and eye-catching all in the space of a few clicks.
I hope you’ve found this post helpful but if you come across any issues or need any help, please let me know in the comments below and I’ll be more than happy to help you out.
Happy featured image setting.

You May Also Like
- How To Display Recent Posts With Thumbnails In WordPress
- How To Add An Affiliate Disclosure To Your Posts
- What Is Wealthy Affiliate – Everything You Need To Know

