Do you find the Illustrator toolbar filled with tools you just don’t use or need? Well, why not consider creating your own one? Don’t know how to do it? Well, no problem because today I’m going to show you how to create your own custom toolbar in Adobe Illustrator.
I love creating designs in Adobe Illustrator, and the fact that I can create a completely customised toolbar with all of my most frequently used tools at the ready is an awesome feature.
What’s even better is that you can create as many of these customised toolbars as you like for all your different design purposes. It’s also quick and super easy to set up so let’s take a look at how it’s done.
How To Create Your Own Custom Toolbar In Adobe Illustrator
First things first, in case you’re not already aware, there are actually two preset toolbars that you can choose from before you start customising your own and they are the Basic toolbar and the Advanced toolbar.
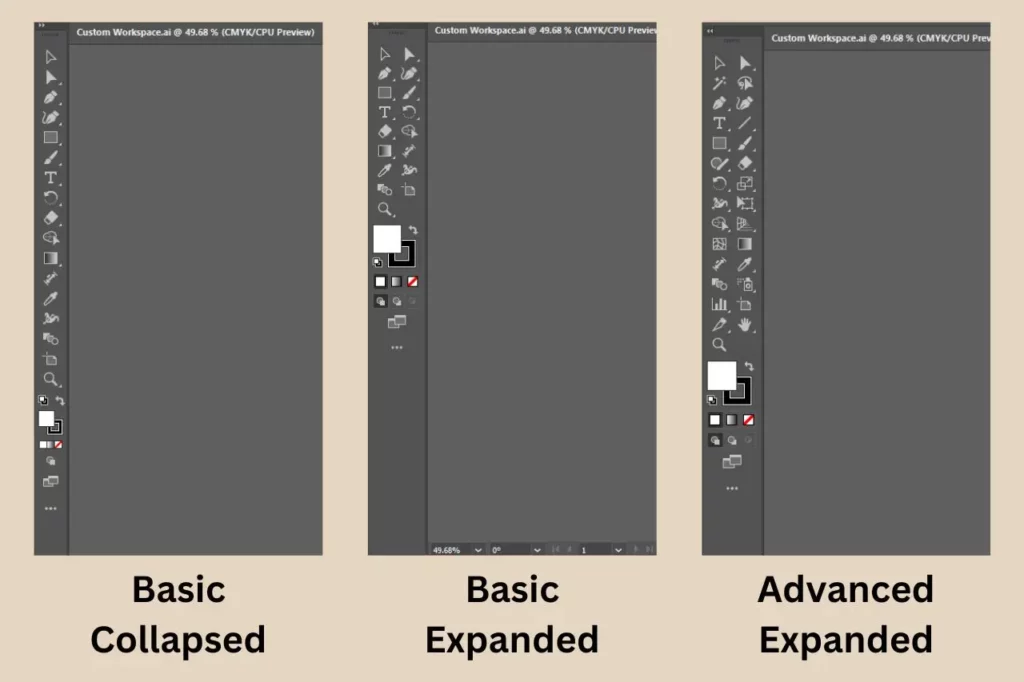
The basic toolbar is usually there by default and it tends to be in the collapsed position which means all the tools are in one column (If you don’t know how to expand/collapse your toolbar, I’ll show you that in a moment).
You can, however, easily switch to the advanced one if you want more of a selection of tools in your workspace. To do that, simply click the Window menu and hover over the Toolbars option.
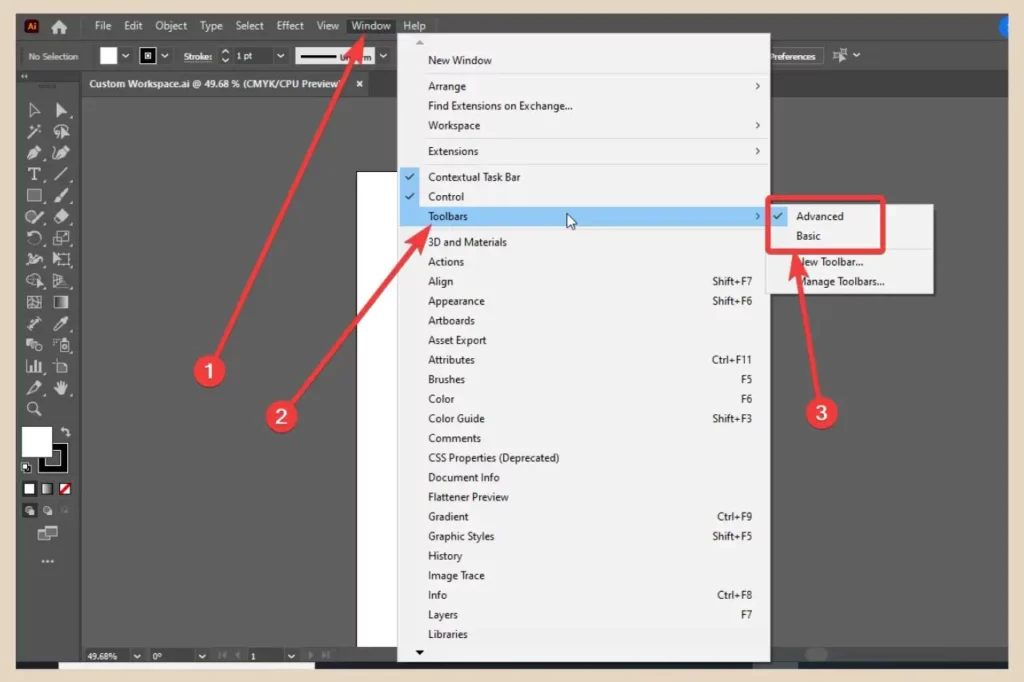
From here, a flyout menu will appear where you’ll be able to switch between the two toolbars whenever you need to.
Creating A New Custom Toolbar
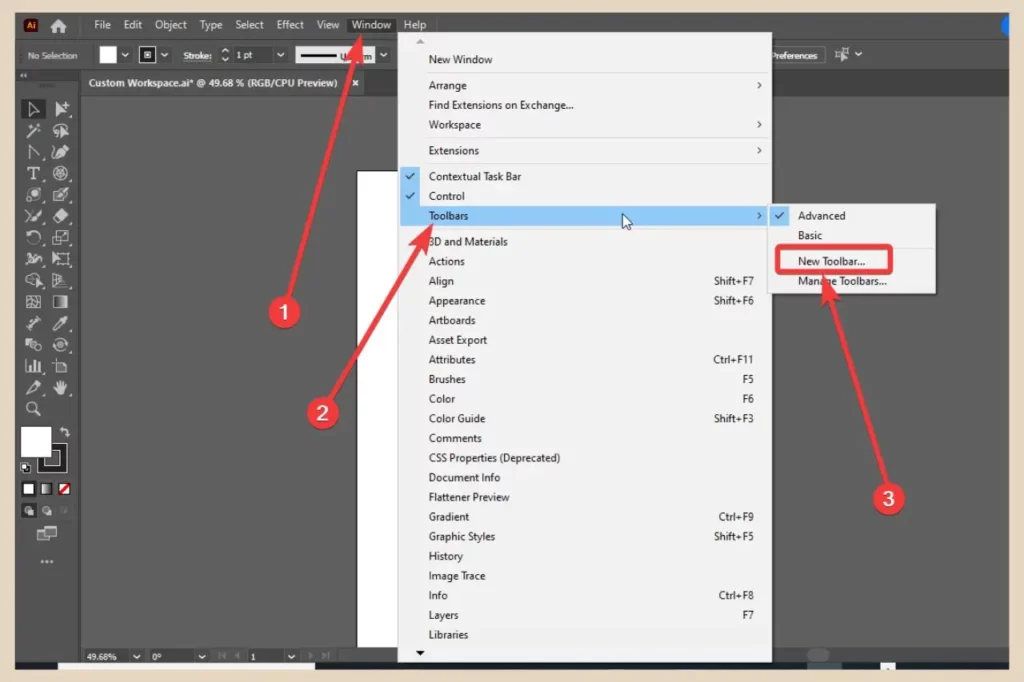
To create your own brand new customised toolbar, head to the same Window menu and Toolbars option but this time, click New Toolbar instead.
This will bring up a small window where you’ll now need to name your brand-new customised toolbar.
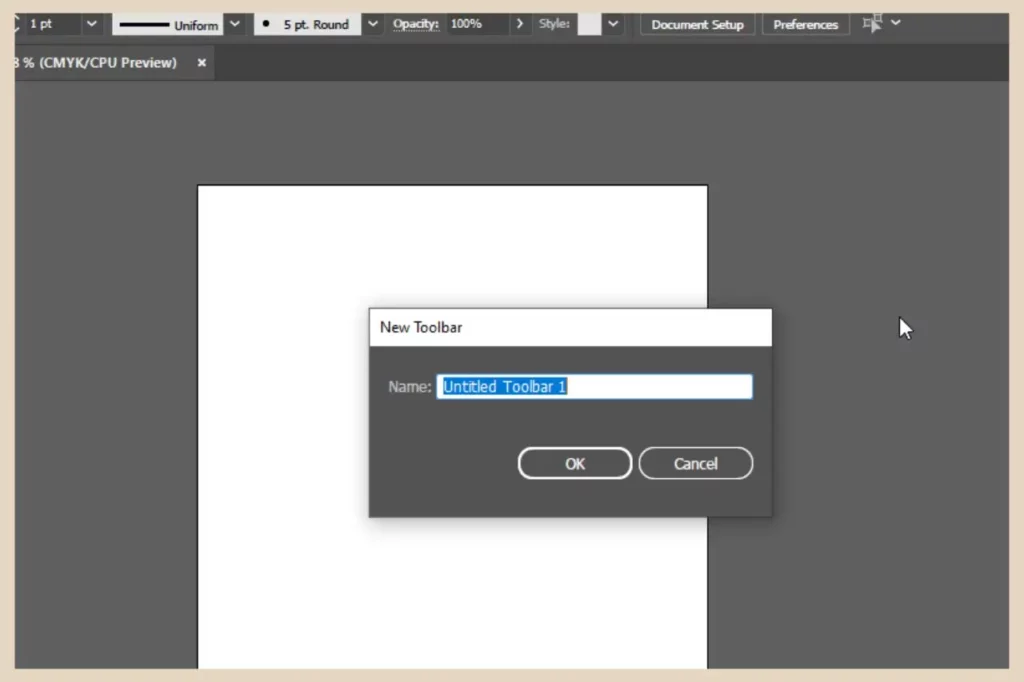
Once you’ve named your toolbar and clicked the OK button, a very small floating toolbar will appear in the editor but at this point, it will be completely empty.
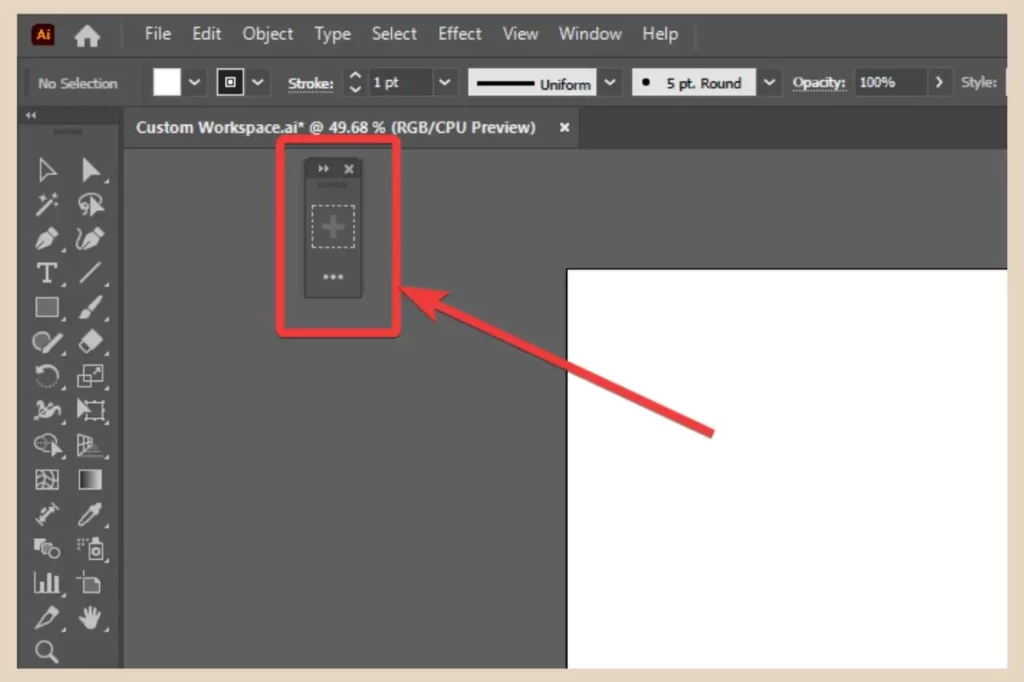
So, now you’ll need to start adding your tools of choice to it. To do that, click on the three dots at the bottom of your empty toolbar to bring up the full tool list.
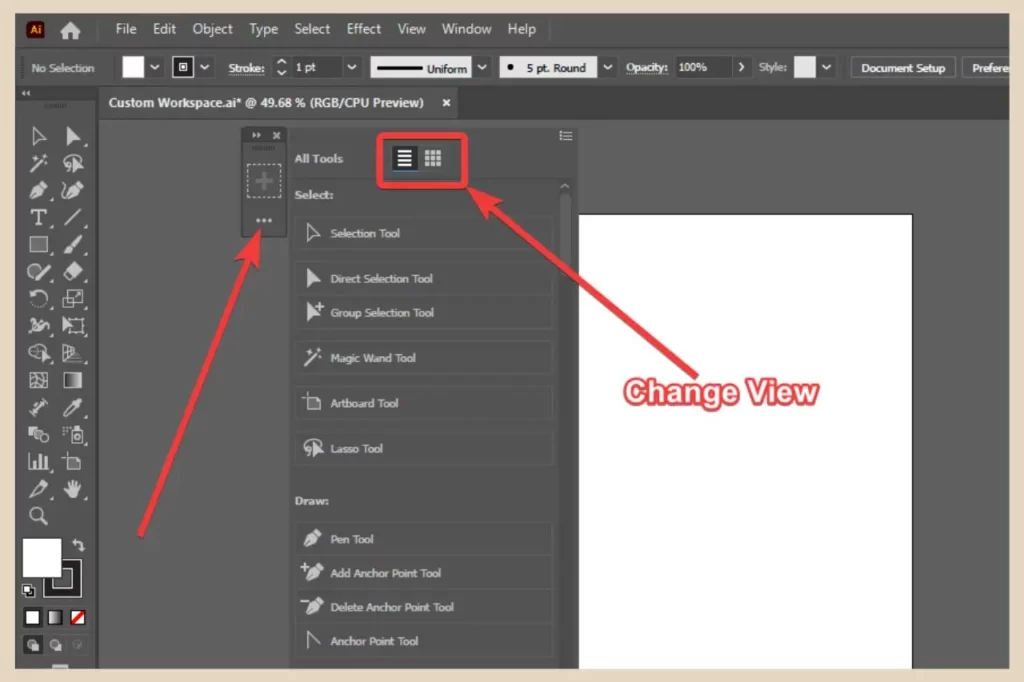
By default, this list will usually be set to Thumbnail View which only shows the tool icons. If, however, you’re not familiar with all of the icons, you can change this to List View as I have in the screenshot above which will also show the name of each tool next to its icon.
Adding Your Tools To The Custom Toolbar
To add your tools of choice, click and drag them from the main tool list and drop them within your new toolbar.
You can drop them either next to each other or if you’d like to create groups (where you have to click and hold or right-click to see all the tools), you can place them on top of each other.

If you make a mistake and add a tool you didn’t want, just click and drag it back to the tool list to remove it.
However, if it’s part of a group, you’ll need to select it first so that its icon is the one showing in the toolbar and then very quickly (and by quickly, I mean sonic speed) click and drag it back to the tool list.
Remember, grouped tools will show the full selection of tools in the group if you click and hold, hence the reason why you have to be super quick here.
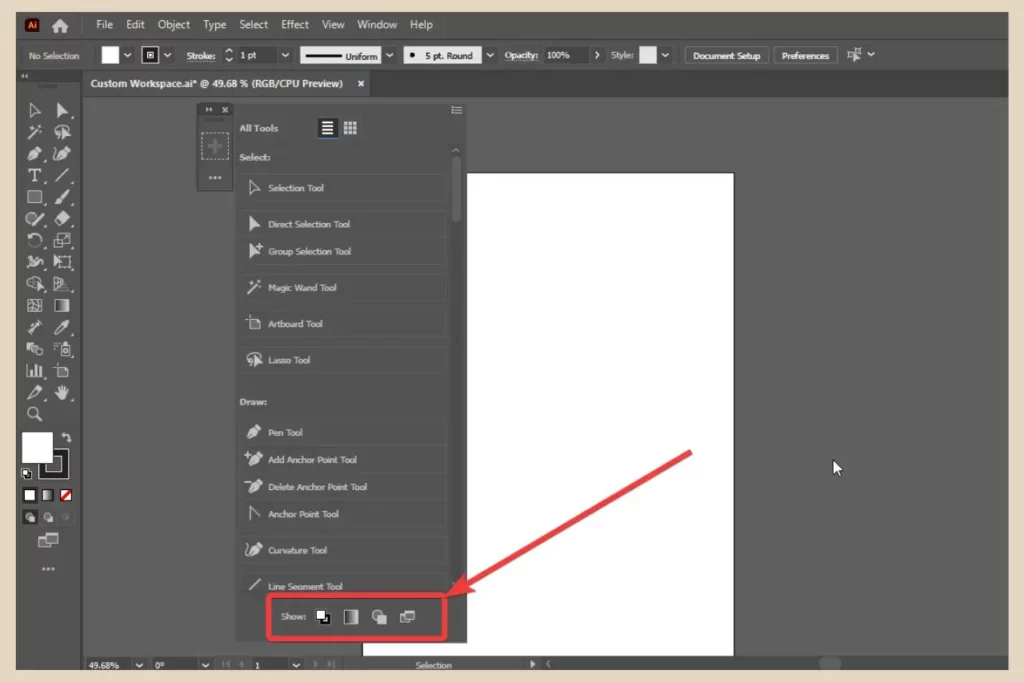
You may also notice that there are four icons at the bottom of the tools list. These include the Fill/Stroke controls, Draw Mode controls, etc and clicking on each one will show or hide it on the toolbar.
Rearranging Your Tools On The Toolbar
To rearrange your tools in the toolbar, simply click and drag them up or down to change their position. Now, at this point, I should probably mention that you can only edit the toolbar when the tool list is displayed (when you’ve clicked the three dots).
If you click the three dots again and close the tool list, you won’t be able to add, delete or move your tool icons around.
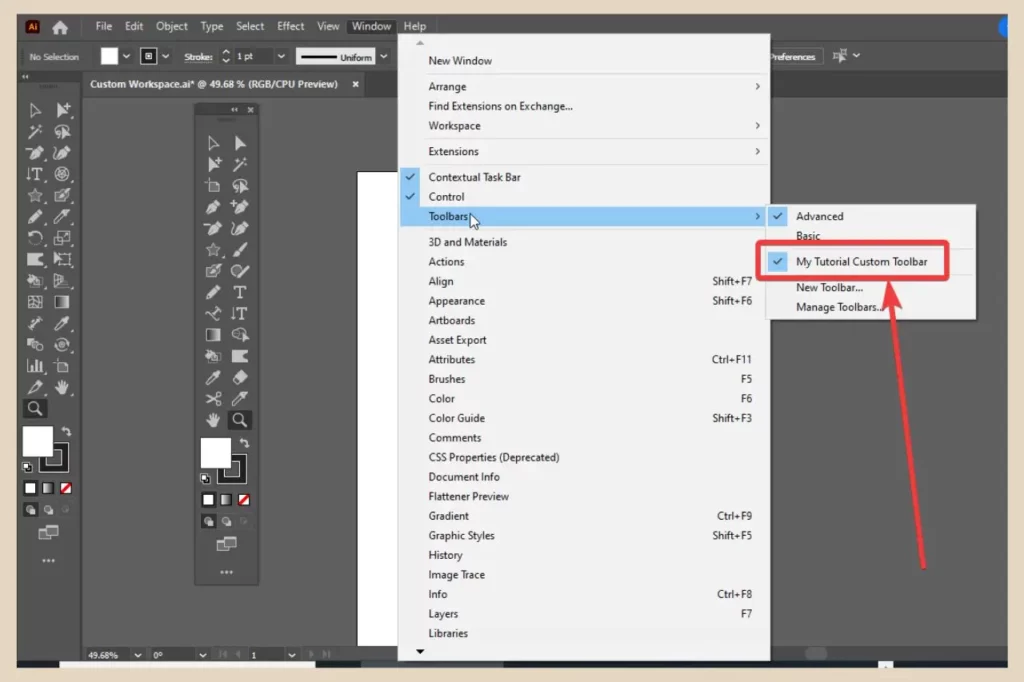
Once you’ve finished adding and arranging all the tools, you’ll now be able to turn this toolbar on or off by clicking on it from the Toolbars option on the Windows menu (it will already be on automatically at this point).
You can also expand (shows tools in two columns) or collapse (shows tools in one column) your toolbar if you like by clicking on the Expand/Collapse button (the small arrows) on the very top of the toolbar.
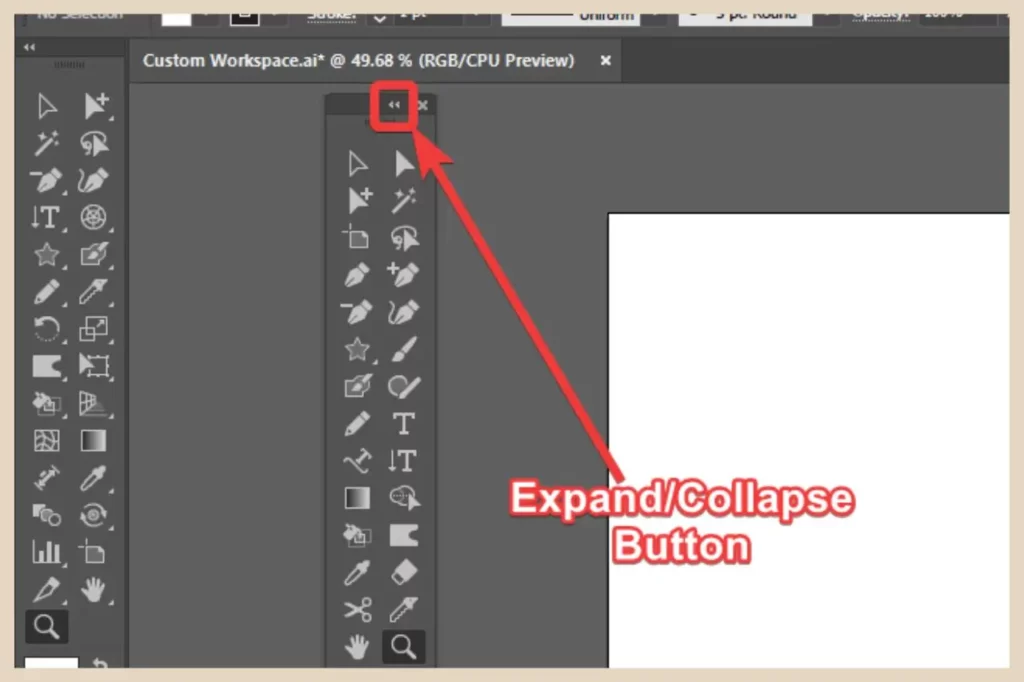
This is especially useful if you’ve gone tool crazy and added so many tools to the toolbar that they don’t all show up when the toolbar is collapsed into one column.
Replacing Your Existing Toolbar With Your New Custom Toolbar
Now, you may have noticed that currently, I have two toolbars selected, the advanced toolbar that was already there which is currently docked on the left of the screen and the new custom toolbar that I just created which is currently floating on my pasteboard.
As I want to replace the advanced toolbar with my new custom one, all I really need to do is click on the advanced one in the window, toolbars menu to turn it off but that still leaves my new toolbar floating in the middle of my design area which isn’t really ideal.
advertisement
So, to fix it to the left of the screen, just like the previous toolbar, I’ll need to dock it there and this is a really easy thing to do.
Docking Your Toolbar
Simply click and drag the entire toolbar over to the left of the screen and release it when you see the blue vertical line running down the side.
This will now dock your new toolbar to the left area which will help keep your workspace clean and tidy and your design area clear.
By the way, it doesn’t matter which way around you do this (turn off the existing docked toolbar first then dock the new one or dock the new one first, then turn off the existing docked one).
The result will still be the same regardless. You’ll just have two docked toolbars with the latter approach until you turn one of them off.
And seeing as Adobe Illustrator is quite the clever little so-and-so and remembers the set-up of your previous sessions, this new toolbar will automatically be the one selected every time you relaunch the app, at least, that is until you switch to a different one.
Managing Your Toolbars
As I mentioned at the beginning, you can create as many of these custom toolbars as you want if you have a tendency to use certain sets of tools for certain types of designs.
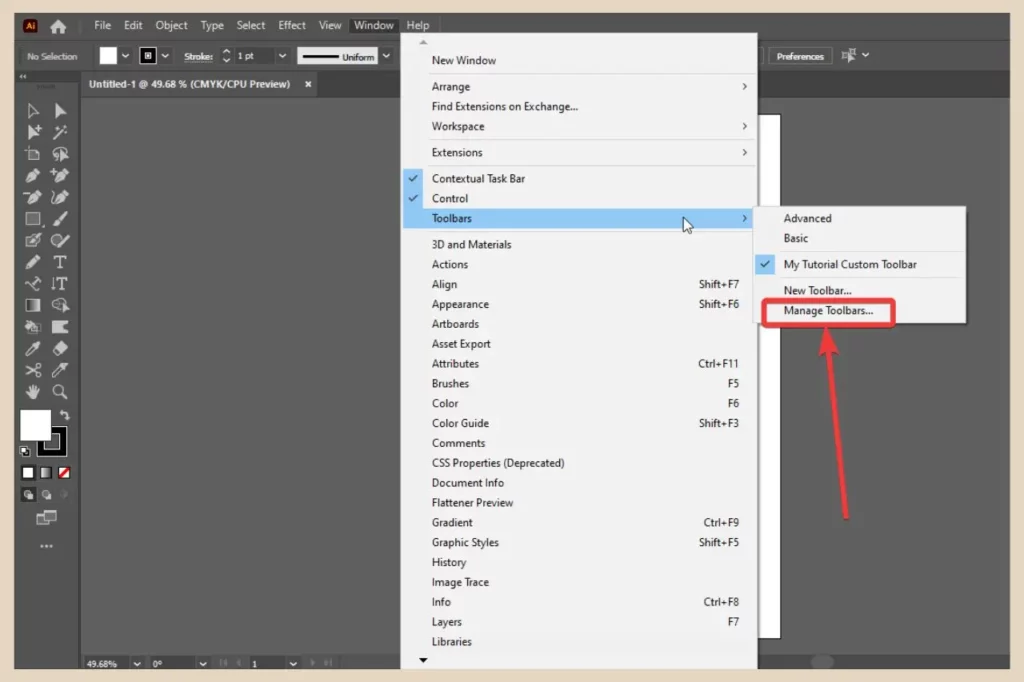
If you ever need to delete one, you can simply click on the Window menu and Toolbars option and select Manage Toolbars. This will open a small new window where you’ll be able to delete them or even add more new ones.
And, if you want to customise the panel area as well, you can create your own custom workspaces which will also save your customised toolbars as part of them.
Let’s Get Customising
And that’s all there is to it, your very own toolbar that’s customised just the way you want it so that all your most frequently used tools are set up and ready to go whenever you need them.
I hope you’ve found this tutorial useful and that it’s helped you organise your tools in a more productive and accessible way.
And if you feel like sharing your own stories and experiences with Adobe Illustrator, then please feel free to leave them in the comments below. I’d love to hear all about them.
Happy Toolbar Customising!

Helpful Guides to Read Next
These beginner-friendly guides will help you keep building your blog step by step.

Jessie
Founder, nomorerush.com
Hi, I’m Jessie — founder of No More Rush. I help beginners build profitable, beginner-friendly blogs without the overwhelm or unrealistic expectations you see online. Everything here is built around simple, structured steps so you always know what to do next.