Have you ever wondered how to draw behind or inside objects in Adobe Illustrator? Well, wonder no more because I’m about to show you exactly how to do it and it’s super simple using Illustrator’s drawing modes.
You’ve got to love Illustrator when it comes to creating epic designs because there’s just so much you can do with it.
And with the ability to draw behind or inside objects with just the click of a button, it makes tasks super quick and convenient no matter how complex the design.
So let’s jump straight in and learn how and why you’d use these drawing modes and what you can do with them.
How To Draw Behind Or Inside Objects In Adobe Illustrator
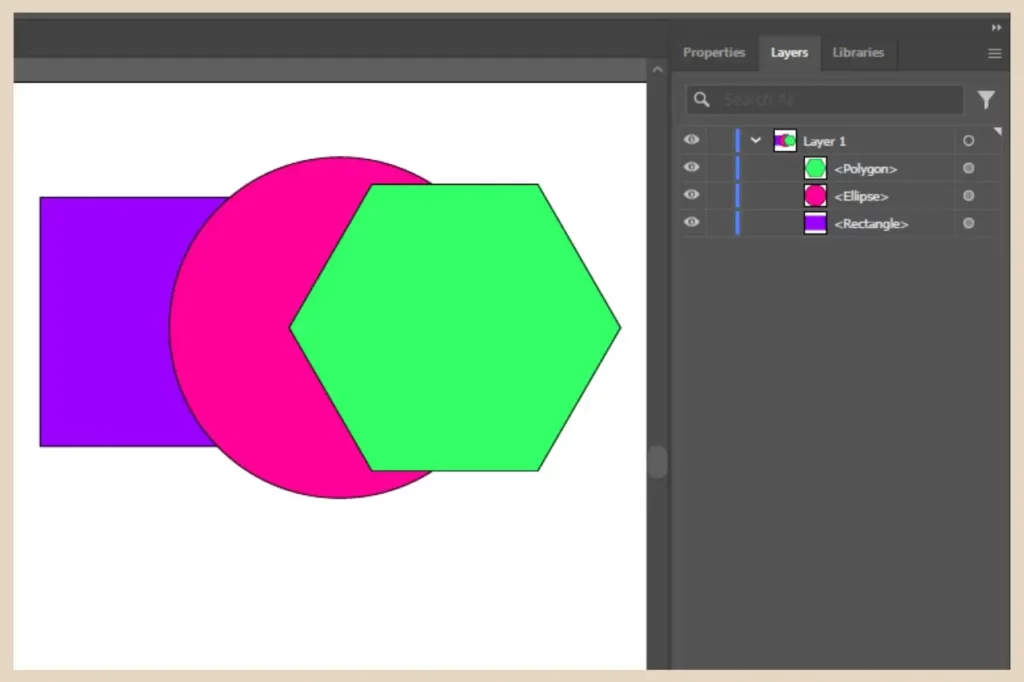
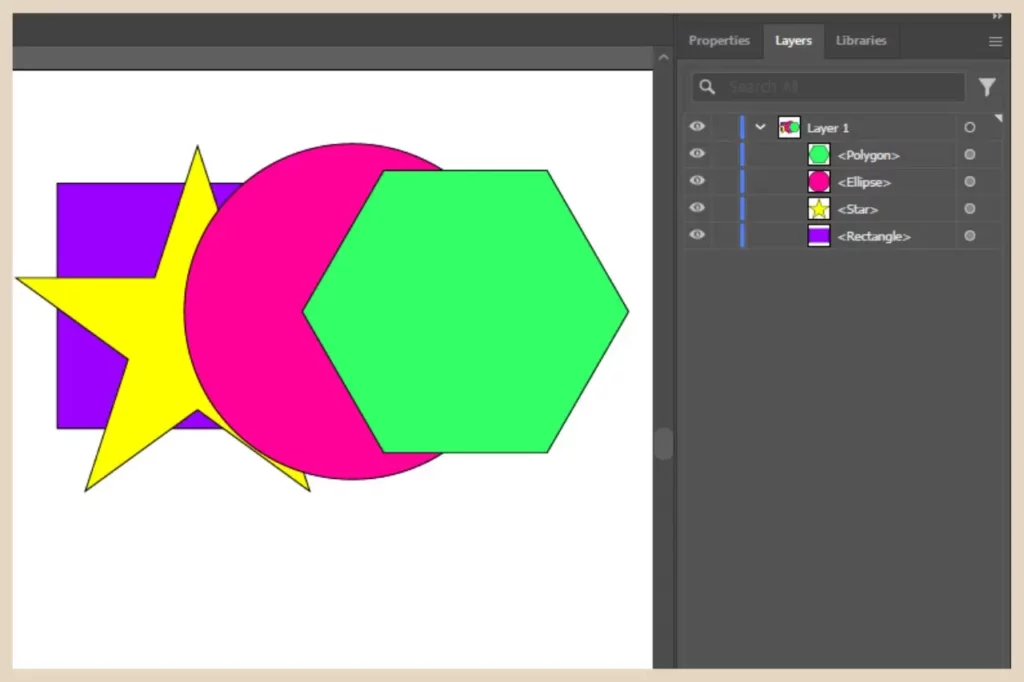
So let’s start by adding a few simple shapes to the artboard. By default, the drawing mode will be set to normal which basically means that any time you add something new to the artboard, it will be placed in front of anything else that’s already there.
You’ll also see this reflected in the layers panel because new elements are always added to the top of the selected layer.
For those new to Illustrator and new to layers, the item at the top of the layers panel list is at the front of the design whilst the item at the bottom of the list is at the back of the design just like the example in the screenshot below.
This means that you can use the layers panel to move items in front or behind each other in the design by simply clicking and dragging them up or down the layers panel list.
Moving Objects In The Layer Panel
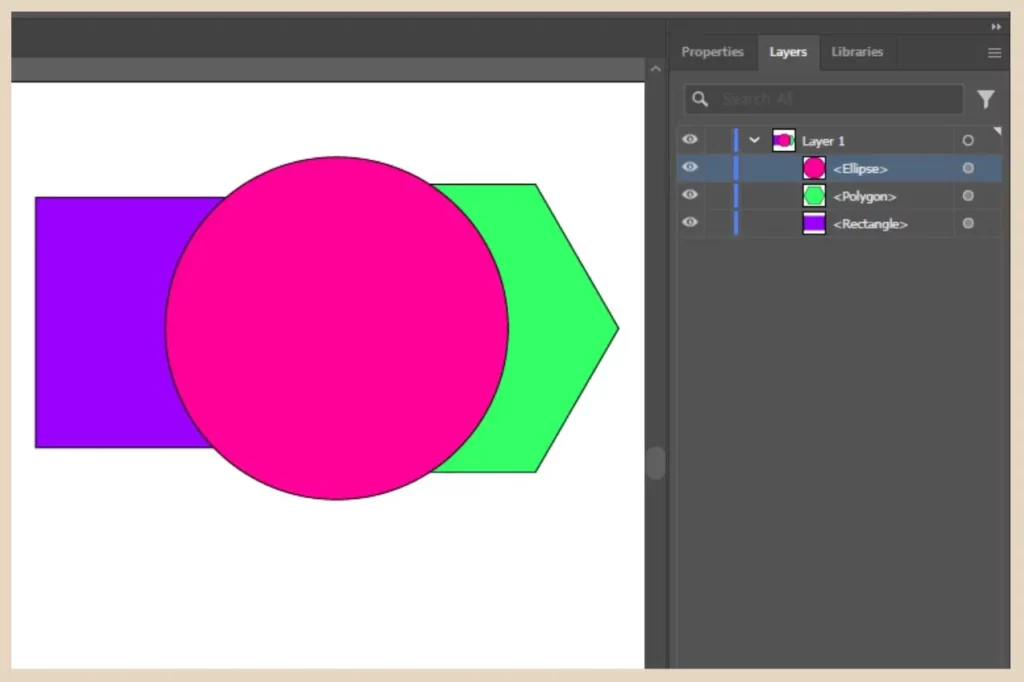
For example, if I decided that I wanted the ellipse to be in front of the other two shapes, I could simply click and drag it above the polygon in the layers panel to change its order position within the design like the screenshot below.
This is great of course but what if you’re working on a really complex design that has many objects (aka layers) and you’ve decided that you want to add something new in between two existing objects?
Rather than adding your new item to the design and then moving it in the layers panel to where you want it, there is a much quicker and easier way to do it and that’s using the Draw Behind drawing mode.
How To Draw Behind An Object In Adobe Illustrator
The Draw Behind drawing mode will let you add elements behind a selected layer and of course, any subsequent layers in front of it.
advertisement
This means that you can slot new items into your design exactly where you want them without having to touch the layers panel.
For this example, I’ve decided I want to add a star behind the ellipse. So select the object you want to draw behind (in my case, the ellipse), then click the Draw Behind icon (if you have your toolbar expanded) which is near the bottom of the Toolbar.
I should mention that with the Draw Behind drawing mode, you can actually select the object you want to draw behind before or after switching the drawing mode but for this tutorial, I’m selecting it first but either way will work.
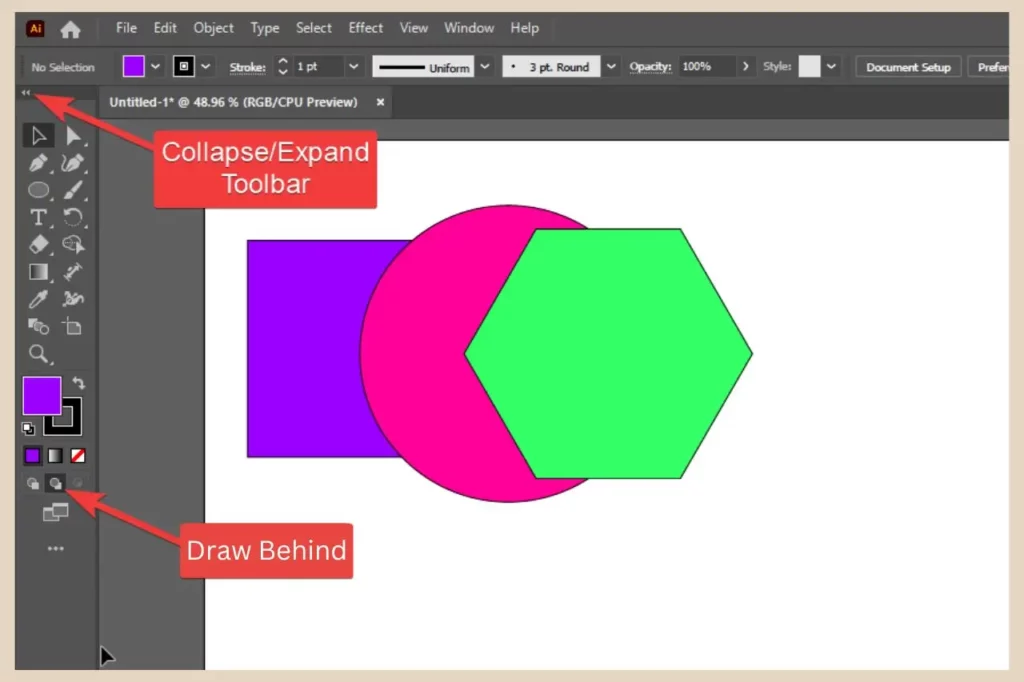
Depending on whether your toolbar is collapsed (single column) or expanded (double column), your drawing mode icons may look a little different from the screenshot above which is an expanded toolbar.
Drawing Modes On A Collapsed Toolbar
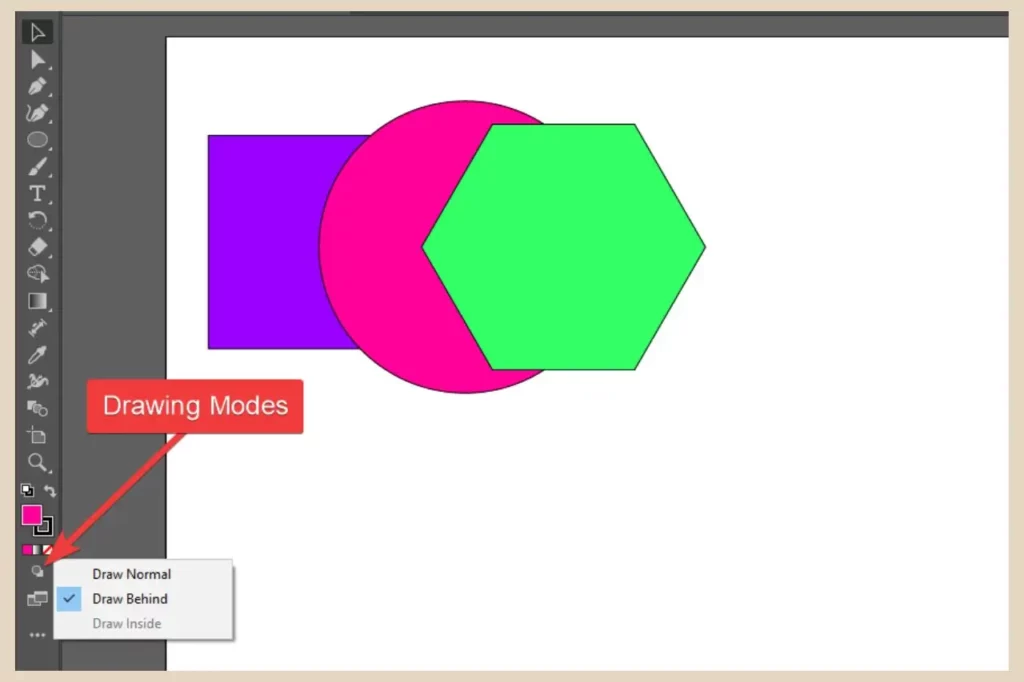
If you have your toolbar collapsed into a single column, click on the Drawing Mode icon instead which is also near the bottom of the toolbar and then select Draw Behind from the options that appear.
On a side note, if you ever want to switch between a collapsed or an expanded toolbar, simply click on the two small arrows in the top left corner of the toolbar to switch between them.
Once you’ve selected the Draw Behind tool, simply add your new object to the design and it will be placed behind the selected layer just like the screenshot below.
You’ll also notice that its position will be reflected in the layers panel so your layer organisation will remain perfectly ordered without you needing to touch it.
How To Draw Inside An Object In Adobe Illustrator
Let’s now look at drawing inside an object. This tool will let you add elements inside another element and keep them contained within it. So for example, if you add something around the outside of a selected object while using the draw inside tool, it won’t be visible.
At the same time, if you add something that partially covers the selected object, only the parts that are within the selected object will be visible with the overflow being hidden.
To show you that in action, let’s take the ellipse from earlier and add some stars inside it. To use the Draw Inside tool, you’ll need to select the object you want to draw inside first otherwise the icon will be greyed out and you won’t be able to select it.
So, select your object first and then click on the Draw Inside icon from the toolbar on an expanded toolbar or the Drawing Mode icon on a collapse toolbar to show the drawing options.
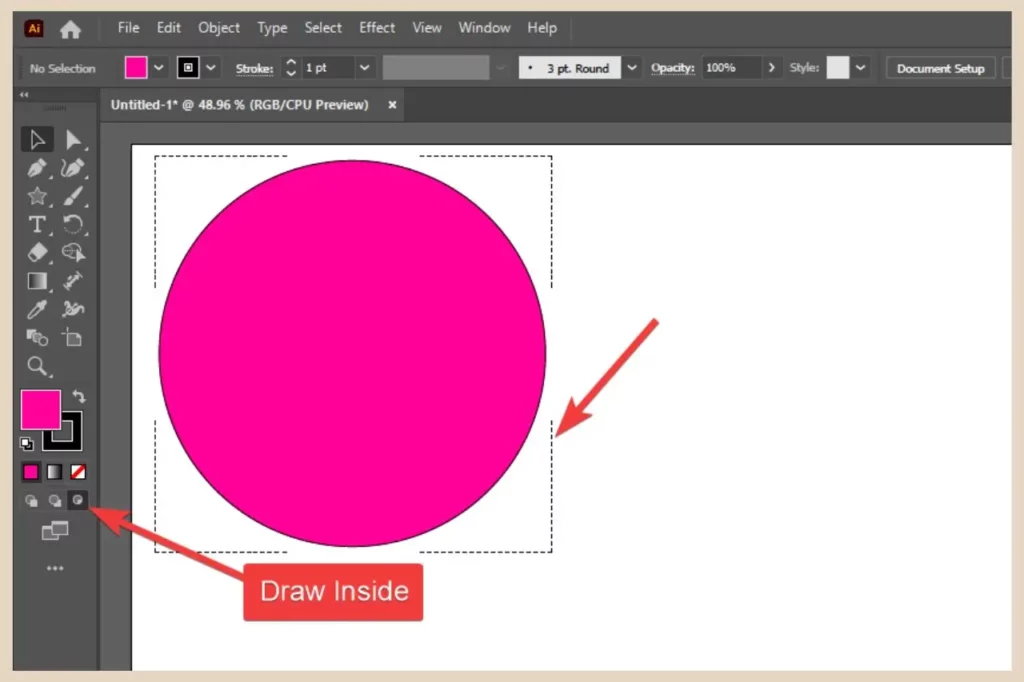
Once you’ve selected the Draw Inside mode, you’ll notice a broken line square around your selected object.
Adding Objects In Draw Inside Mode
From this point forward until you switch drawing modes, anything you add to the artboard will only be visible if it’s inside or partially inside the selected object almost like a clipping mask.
Everything else that extends past the edge of the selected object will be hidden. So add your new elements to the selected object and once you’re happy, click the Draw Normal icon (which is to the left of the Draw Behind icon) to return to normal mode and you should have something similar to the screenshot below.
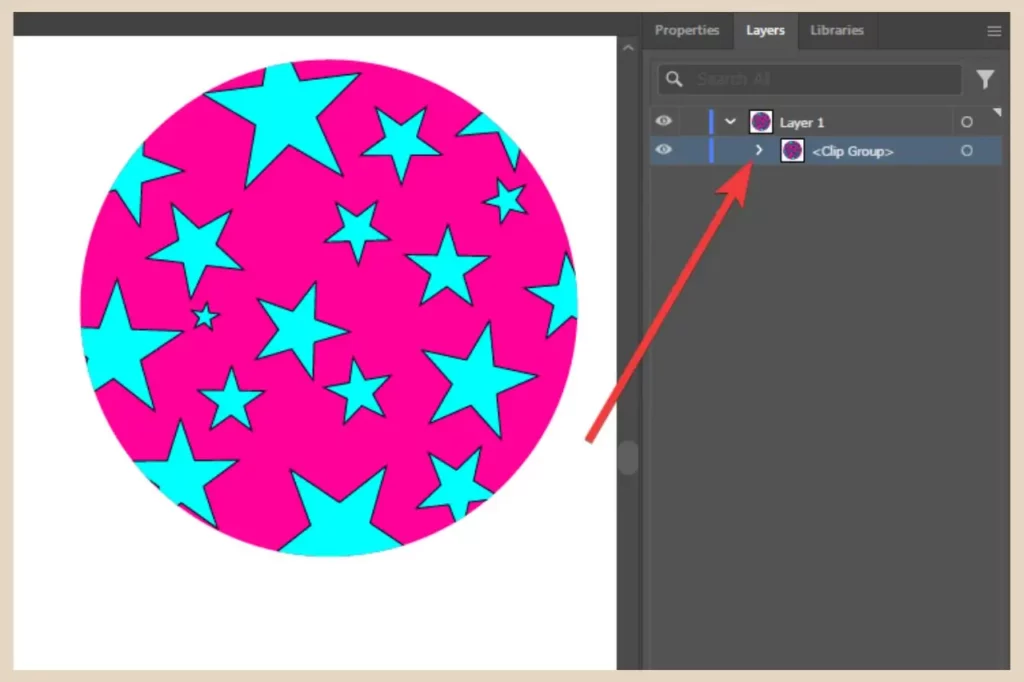
Your selected object and all the new objects you’ve added inside of it will now appear as a layer called <Clip Group> in the layers panel which you can rename to your own liking by double clicking on the layer name text and typing in your own.
Editing Objects Within The Clip Group
If you want to edit the new objects inside the main one, click the arrow on the left of the layer name to open it up and reveal all the objects within it.
From here, you can simply click on the Target icons which are the small circles on the right-hand side of each object in the layers panel to select them (a small coloured icon will appear to the right of the target icon when it’s selected as well as a border around the object selected).

Once you have an object selected, you’ll now be able to make edits to it, ie, resize, rotate, move or delete it.
Alternatively, if you’d like to add more objects as well as edit the existing ones, you can use the selection tool to double-click on any of the inside objects to put the whole clip group into isolation mode.
Editing Objects In Isolation Mode
Once in isolation mode (which will be indicated by the appearance of the isolation mode bar), you’ll now be able to single-click to select each of the objects to edit them as you please.
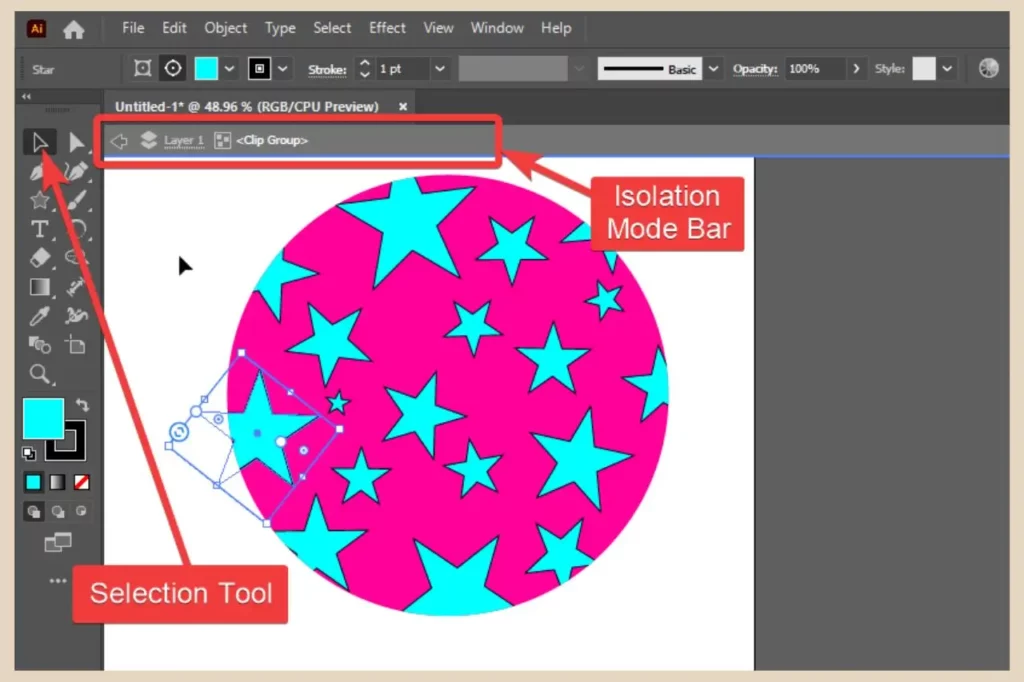
You’ll also be able to add more objects to the inside of the main object without having to go back into Draw Inside mode. If you want to select the entire object (ie, to resize the whole thing), just click on the border of the main object to select everything.
To exit isolation mode, simply double-click anywhere away from your design to return to normal mode. By the way, because all these objects are grouped together, if you resize the main object, all the other objects inside of it will also resize with it so your design will remain intact.
If you’re trying to select the main object in normal mode (not isolation mode), just make sure that you single-click on either one of the inside objects or on the border of the main object to select the entire thing as clicking anywhere else will no longer work.
Let’s Get Drawing
And that’s all there is to it. Drawing modes are a simple and effective way to speed up your workflow when adding new additions or to get more creative with your designs.
So have a little fun and try playing around with them to see what you can create. And as always, if you get stuck or need help, please feel free to leave a comment below and I’ll be more than happy to help out.
Happy Drawing!

Helpful Guides to Read Next
These beginner-friendly guides will help you keep building your blog step by step.
- How to Create Professional Blog Graphics with Adobe Illustrator
- How to Use Clipping Masks for Better Illustrator Designs
- How to Create Professional Text Effects in Illustrator
- How to Create Smooth Professional Gradients in Illustrator
- How to Use Illustrator’s Advanced Drawing Modes to Draw Behind or Inside Objects

Jessie
Founder, nomorerush.com
Hi, I’m Jessie — founder of No More Rush. I help beginners build profitable, beginner-friendly blogs without the overwhelm or unrealistic expectations you see online. Everything here is built around simple, structured steps so you always know what to do next.