Today I want to show you how to create your own custom workspace in Adobe Illustrator because let’s face it, opening and closing panels every five minutes is hardly the most efficient way to optimise your workflow.
Plus, if you’re anything like me and you tend to use numerous panels as you’re creating your designs in Adobe Illustrator then you’ll end up with a very busy and messy screen in your Illustrator editor.
So, let’s run through this quick tutorial on how to set up your most frequently used panels so that you can access them all with a single mouse click by saving them as a custom workspace.
How To Create Your Own Custom Workspace In Adobe Illustrator
You may have noticed that by default, Illustrator will usually open up with a basic workspace already selected (unless you’ve previously selected a different one) and that’s the Essentials workspace which is set up with the Properties, Layers and Library panels.
However, most of us will frequently use many other panels while creating our designs such as the Colour panel, Gradient panel, Pathfinder panel, Character/Paragraph panel and so on and so forth.
So, it makes sense to create our own custom workspaces where the panels we use the most are already open and ready to go.
advertisement
In case you’re new to panels, every panel can be found in the Window menu and clicking on one will open it up on your screen so let’s get started by adding a few panels.
How To Show The Control Panel/Options Bar
Let’s start with one of the most important panels in Illustrator and that’s the Control panel/Options bar. Anyone who’s used Adobe Illustrator for a while will know that in the old days, the Control panel/Options bar used to be present by default at the top of the screen directly below the menus.
This, however, is no longer the case and you now have to select it to display it which, to be honest, I strongly suggest you do because it’s an extremely useful panel that changes to reflect whatever you have selected.
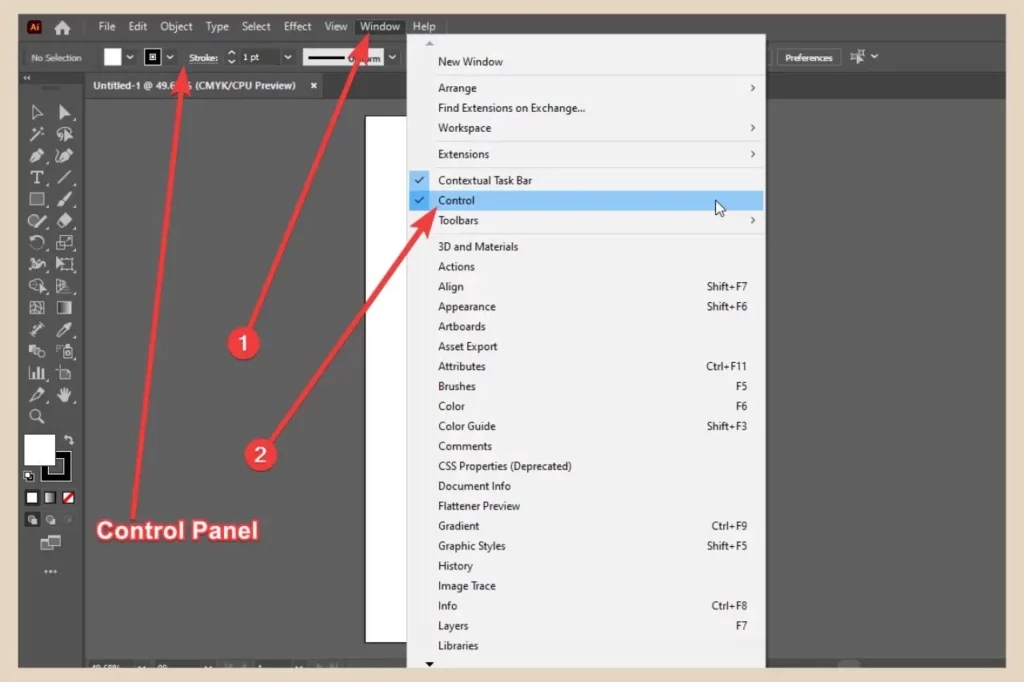
So, much like any other panel in Illustrator, to show the Control panel on your workspace, click on the Window menu and click Control from the list of panels available. This will immediately add the Control panel to your workspace just below your menus.
Adding Other Panels To Your Workspace And Docking Them
Unlike the Control panel that has a specific home on your workspace as soon as you add it, all other panels will just open up as small windows on your screen but they can be docked with the main panel area on the right if you want to keep your workspace tidier.
All you need to do to dock a panel is to click and drag it across to the main panel area and release it once you see the blue outline surrounding the area.
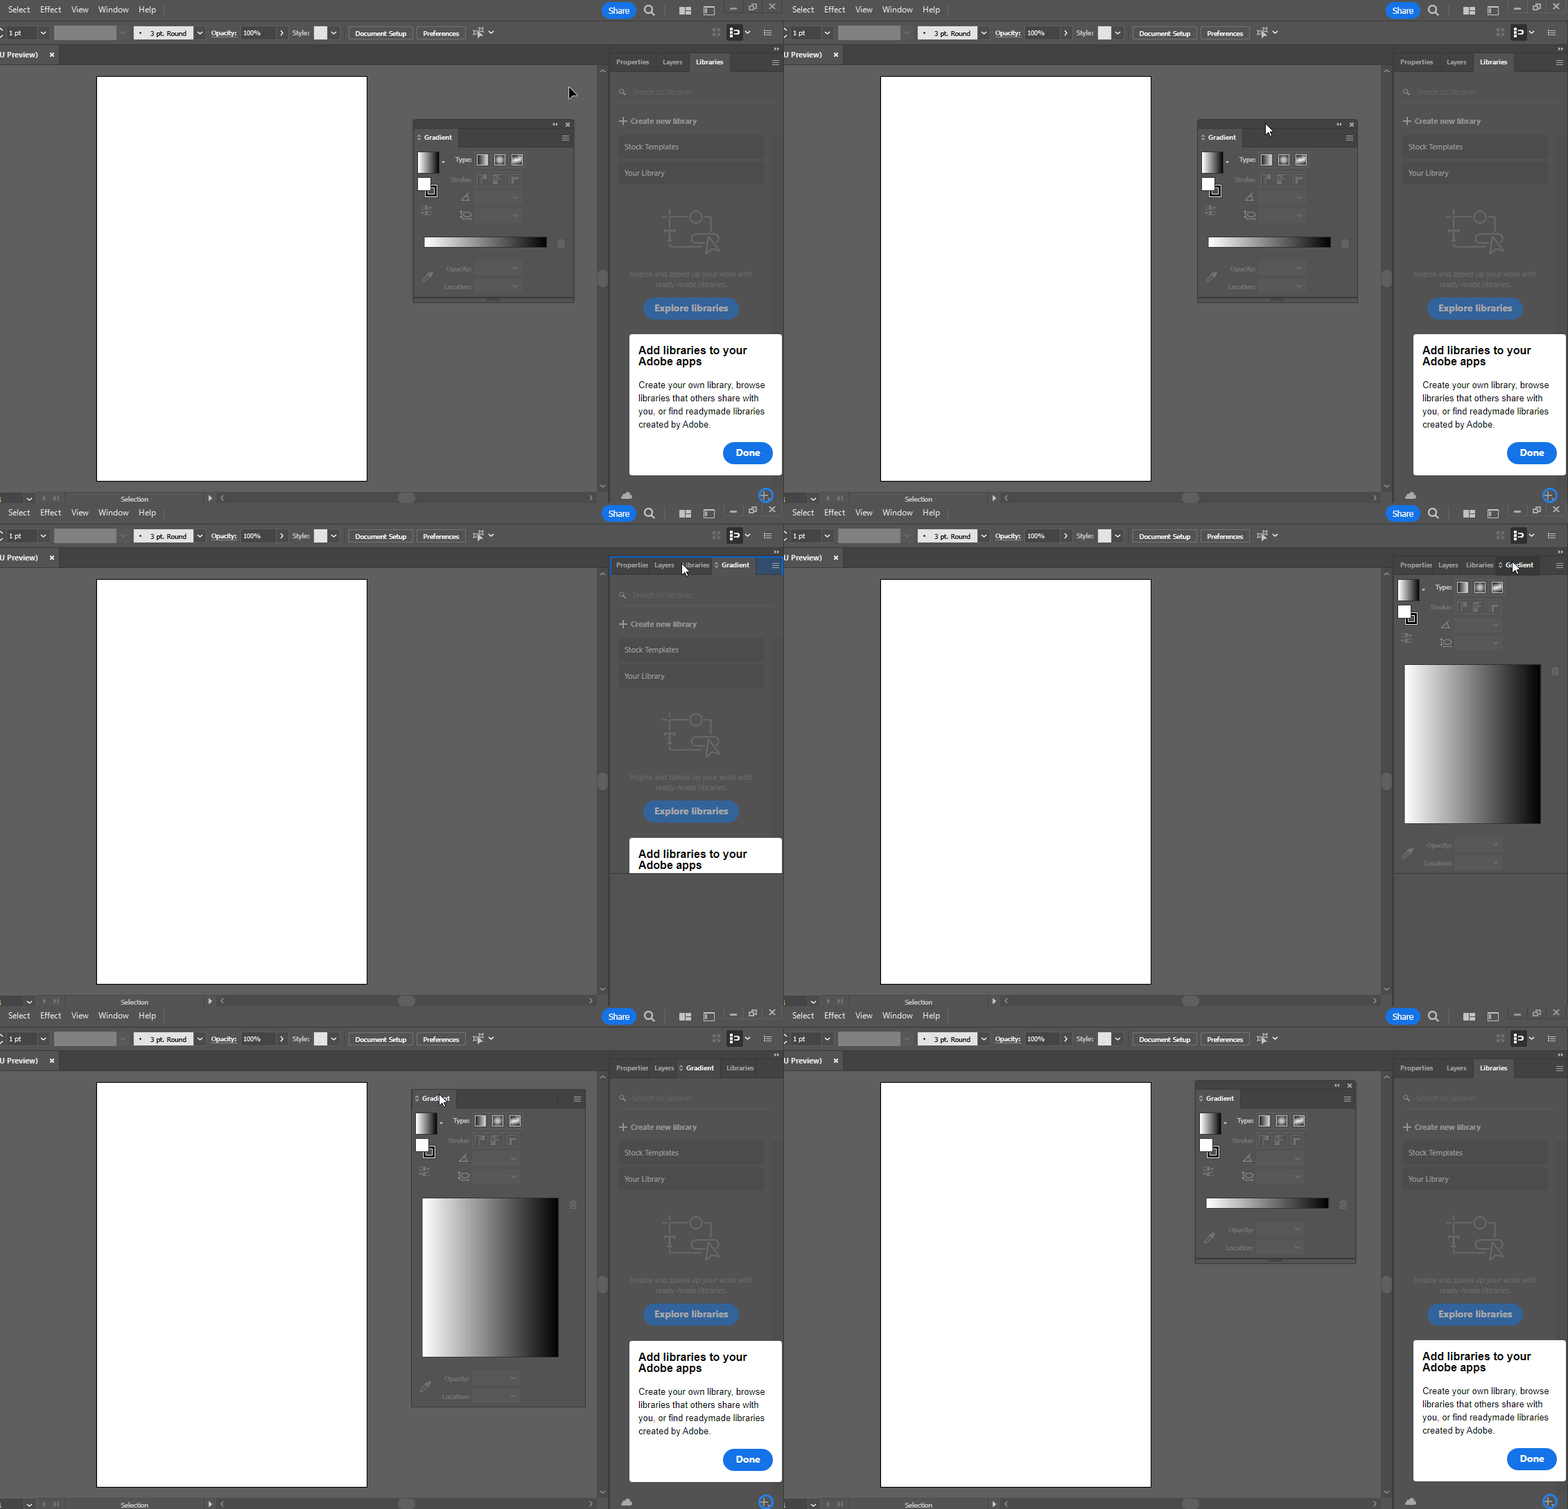
You can actually play around with this a little because you’ll notice different sections of the panel area surrounded by this blue outline depending on where you hover.
For example, when you see the whole area surrounding the panel outlined in blue, this will usually add the panel as another tab across the top just like the screenshot below.
However, if you see a single blue line going down the left or right of the panel area, this will add the panel as a new column to whichever side is outlined.
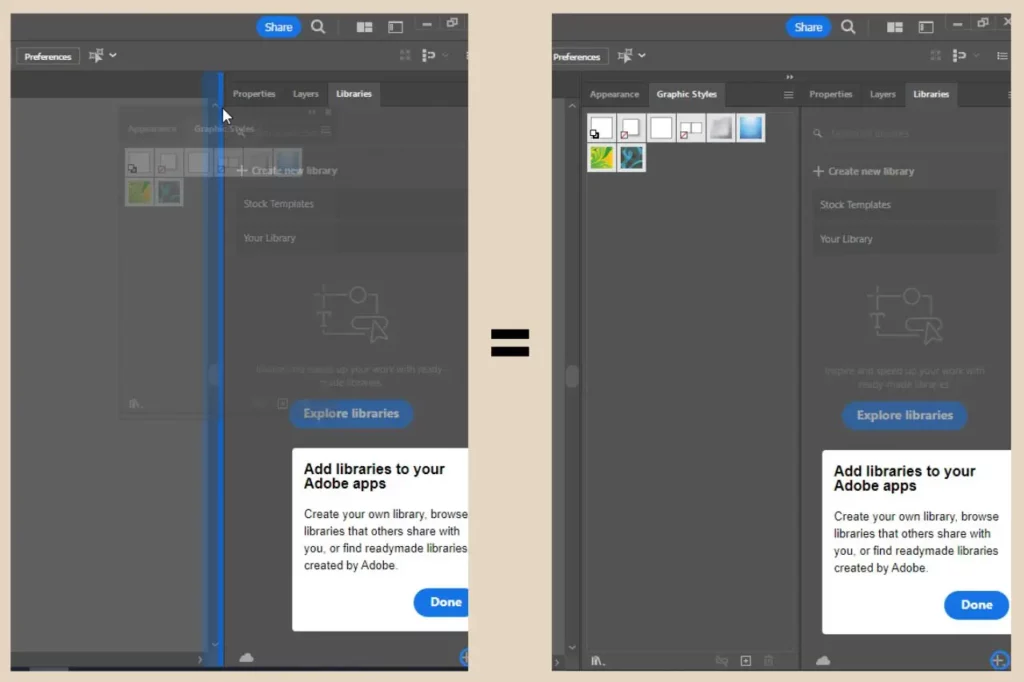
The same applies if you see a single blue line across the top or bottom of the panel area which will add it as a new row above or beneath the existing panels just like the screenshot below.
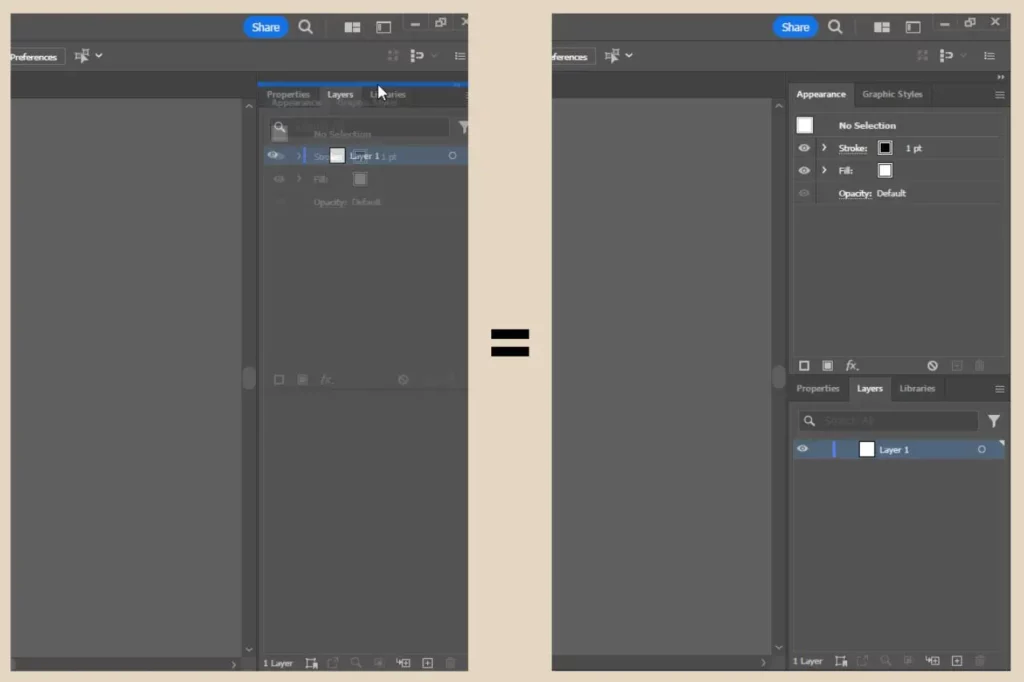
There are several ways that you can organise your panels when you dock them so go to your Window menu to open all the panels you use frequently and then dock them in whichever way suits you best. And if you make a mistake, simply click and drag the panel out by its tab to remove it.
Expanding/Collapsing Your Panels
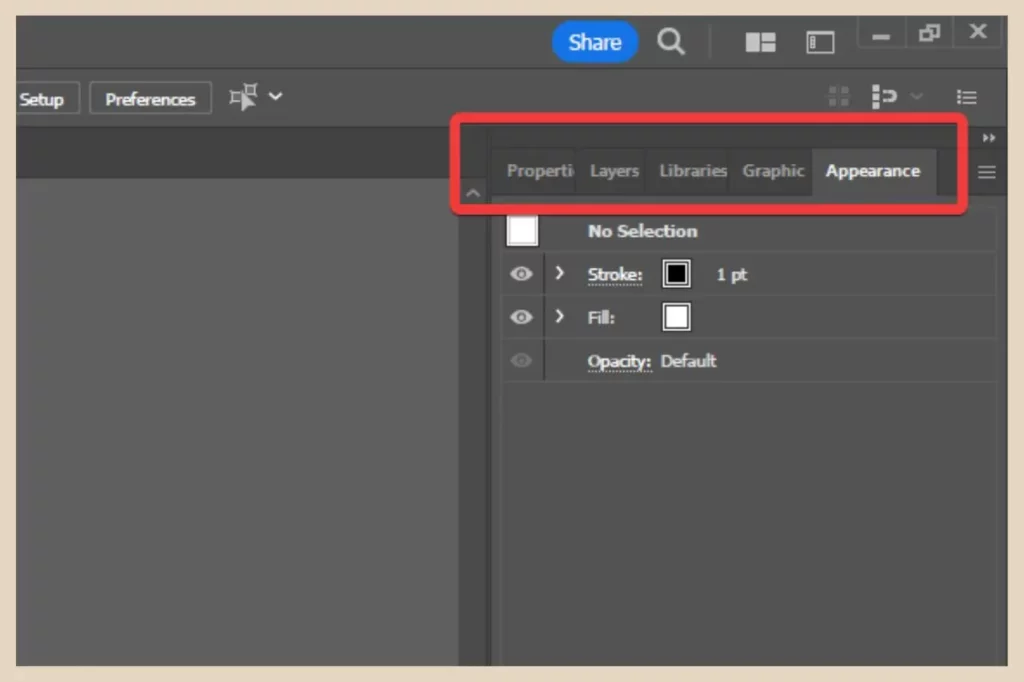
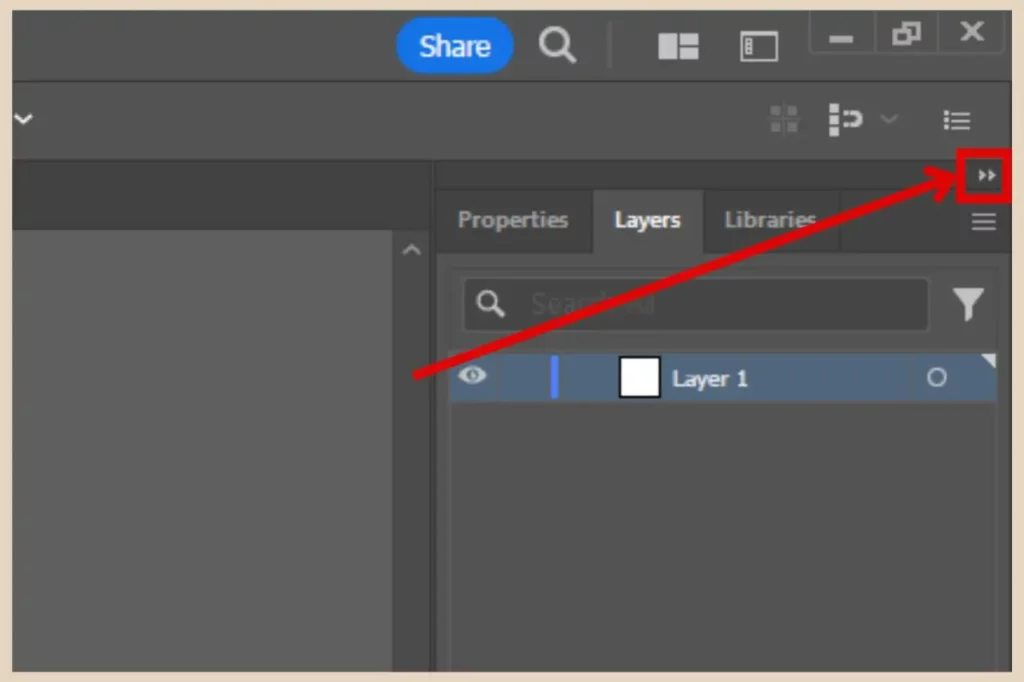
If you want your workspace to look even tidier, you can click the Expand/Collapse arrows on the top right of the panel area which will collapse the area into a neater view and give you more screen area for your designs.
You can then click on an individual panel when you want to use it to show just that panel and then click it again to collapse it when you’re finished.
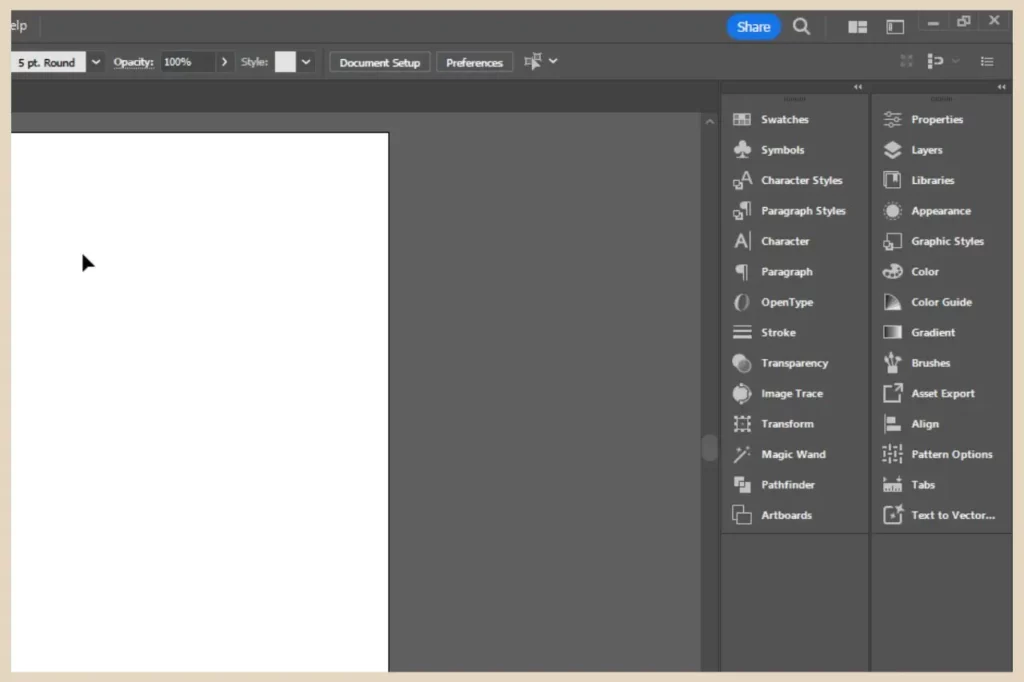
As you can see in the screenshot above, it looks much tidier and it’s much easier to find the panel you want to use when it’s collapsed, particularly if you have a lot of different panels docked to the panel area.
I’ve added a ridiculous amount of panels to the panel area in this instance but only because I wanted to show you why sometimes you may need to add some panels as a new column when you’ve gone panel nuts like I have in the above example.
Saving Your New Workspace As A Custom Workspace
Once you’re happy with the set-up of all your panels, it’s now time to save it as a custom workspace. To do that, simply click on the Window menu and then hover your cursor over Workspace to display another side menu.
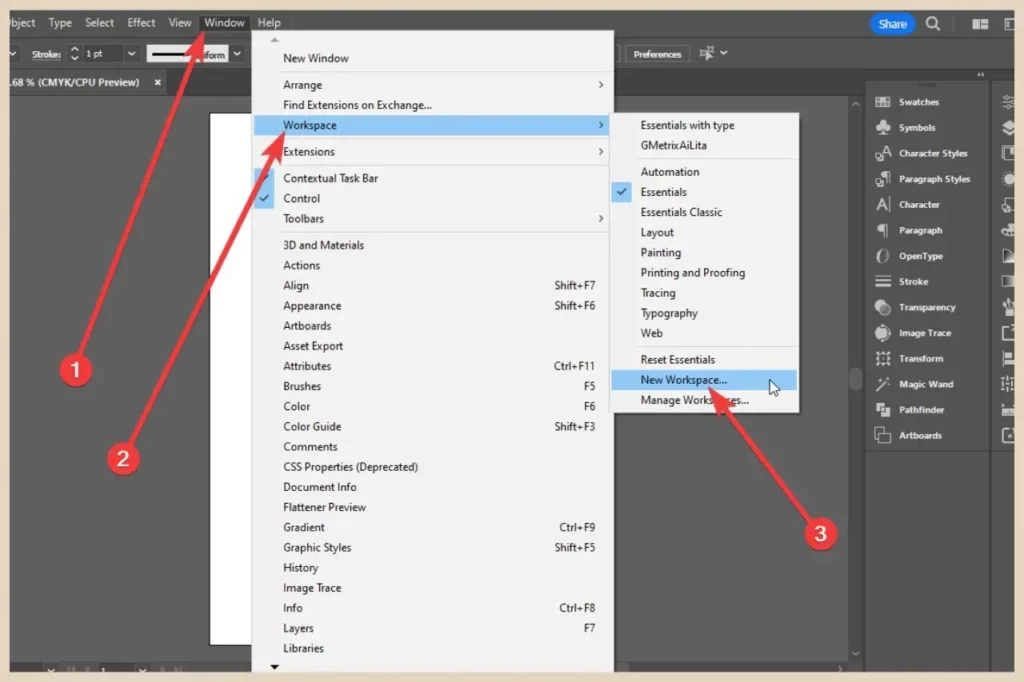
From here, click on New Workspace which will bring up a small window where you can now name your new workspace.
Once you’ve typed in an appropriate name, you can then click the OK button to save your new workspace.
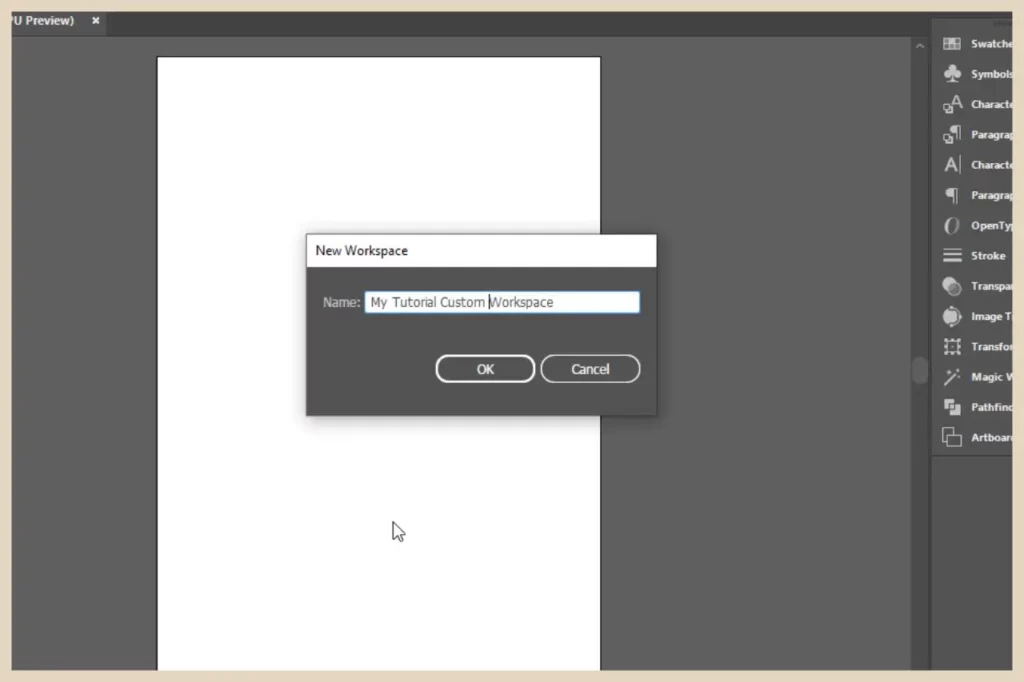
As Adobe keeps the same workspace selected from your previous sessions, this new custom workspace will now become your default one every time you open up the Illustrator app unless, of course, you change it to a different one before closing down the app.
By the way, you can also customise your toolbar and this will also be saved as part of your custom workspace if you really feel like customising your entire work screen.
Accessing, Resetting And Managing Your Workspaces
To access your custom workspace in the future (if you ever switch back to a different one), simply click the Window menu and hover over Workspace where you’ll now find your custom workspace listed amongst all the other preset workspaces.
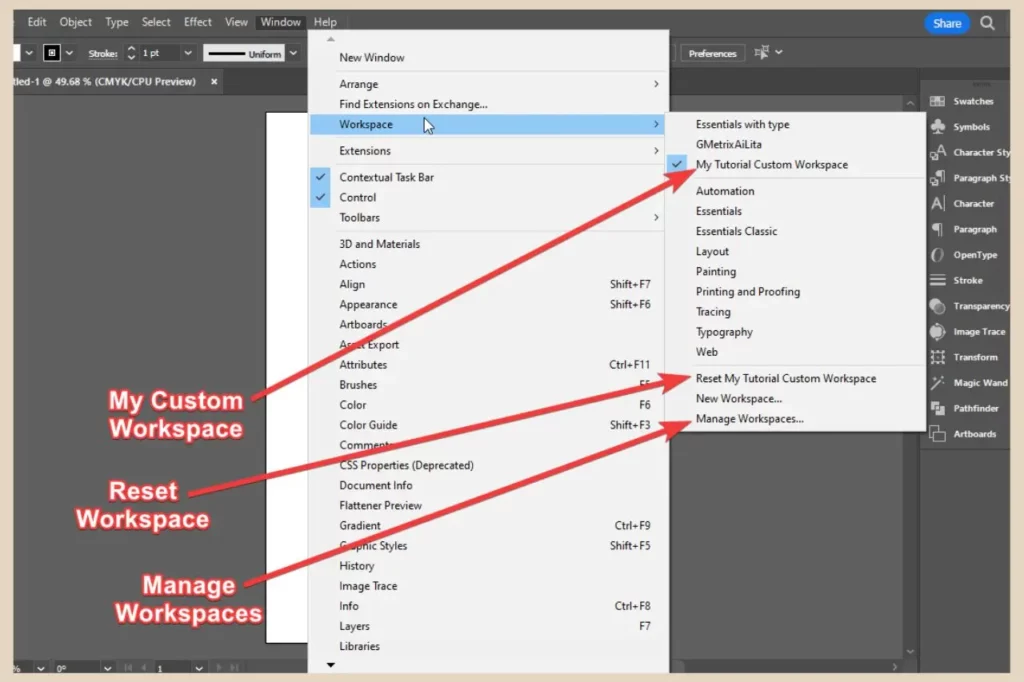
If you ever want to reset a workspace, just click the Reset option in the workspace menu or if you want to manage your workspaces, click the Manage Workspaces option which will allow you to delete a custom workspace or add a new one.
Let’s Get Customising
And there you have it, your own customised workspace that’s set up with all of your most frequently used panels and it’s ready for you to use whenever you need it.
If you have a tendency to use specific sets of panels for different types of designs then why not set up numerous custom workspaces for each one to help streamline your workflow?
And as always, if you feel like sharing any of your own stories or experiences creating custom workspaces, then please feel free to share them in the comment below.
Happy Workspace Customising!

You May Also Like
- What to Look for in a Blogging Platform – Beginner’s Guide
- Best Blogging Platforms for Beginners – Free & Paid
- Free Blogging Platforms Explained – Pros, Cons & Best Picks

