Want to learn how to create reusable blocks in WordPress? If you’re a WordPress user looking to streamline your content creation process and improve website management, reusable blocks are the way to go.
Reusable blocks allow you to create custom content elements that can be used across different pages and posts, saving you time and effort in the long run.
In this step-by-step tutorial, I’ll walk you through the process of creating and managing reusable blocks in WordPress, harnessing the power of this incredible timesaving feature.
Understanding Reusable Blocks And Their Purpose
Before we dive into the practical steps, let’s understand what reusable blocks are and why they are so valuable. In essence, reusable blocks are custom content blocks that you can create and save for later use.
Unlike regular blocks, which are specific to the post or page you’re working on, reusable blocks can be utilized in multiple locations throughout your website, ensuring consistency and efficiency in your content creation workflow.
Reusable blocks are all about time-saving and increasing your productivity because you don’t want to spend 20 minutes creating a customised block only to have to repeat the whole process again the next time you want to use the same block style again.
Why And When You May Want To Create Reusable Blocks
There are several reasons why you may want to create reusable blocks. For example, if you’re creating buttons and customising them with a background colour.

Rather than repeating the process on another button block, you could simply make your customised button a reusable block to save you time in the future so that you can reuse your customised button again and again at the click of a button.
Reusable blocks can be blocks that are as simple or as complex as you can imagine. They can be a simple image or text block that you need to reuse regularly or they can be complex block designs that you’ve created, that you want to use repeatedly across your site.
As an example, I have several reusable blocks on this site. My signature at the bottom of all my posts for example is a simple image block that I’ve made into a reusable block so that I don’t have to keep searching for it in my media library whenever I want to use it.
I also have customised button blocks, customised column blocks, text blocks and even some affiliate banners that I’ve made into reusable blocks to save me time whenever I want to add them.
How To Create Reusable Blocks
To start creating reusable blocks, you’ll need to navigate to either a new post/page or edit an existing post/page.
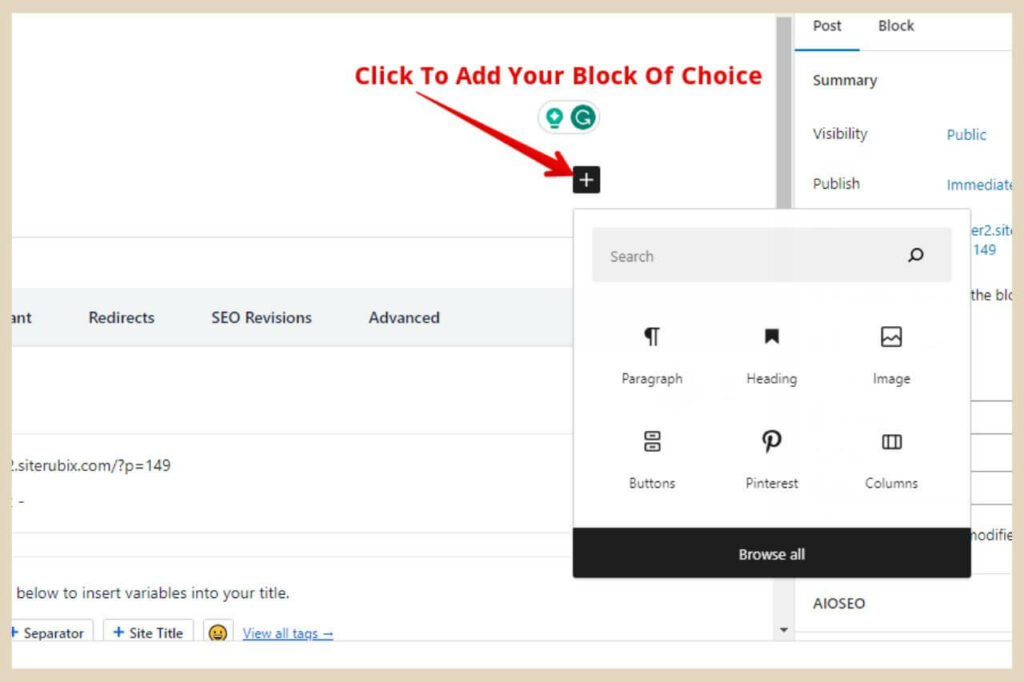
From here, choose a block that you’d like to make reusable, such as a button block or a columns block for example and use the + icon to insert it. For this tutorial, I’m going to use a button block.
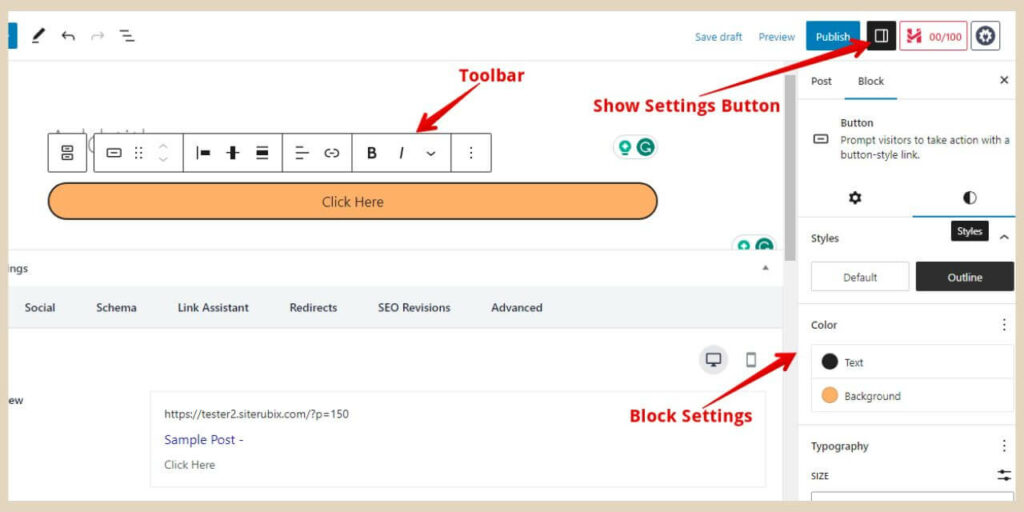
Once it’s inserted, add any content that you’d like to use and use the block’s small toolbar or the settings area on the right of the editor to make any changes/customisations to the block.
After adding the contents and design elements, click on the three dots in the block’s toolbar and a new small menu will appear.
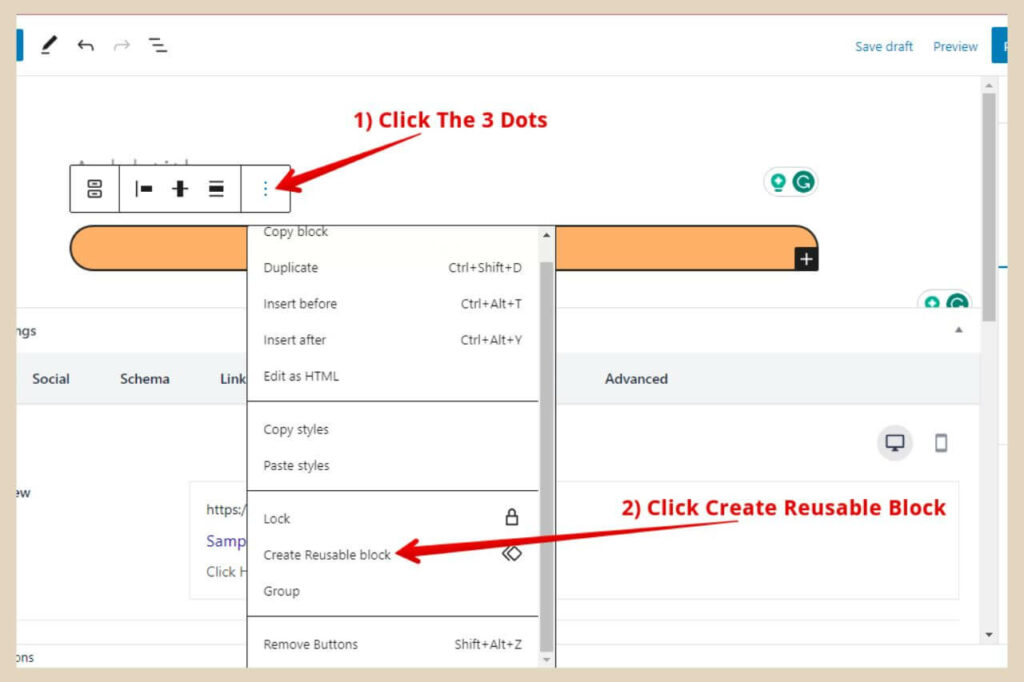
Select “Create Reusable Block” from the menu options and a small window will appear prompting you to give your reusable block a name.
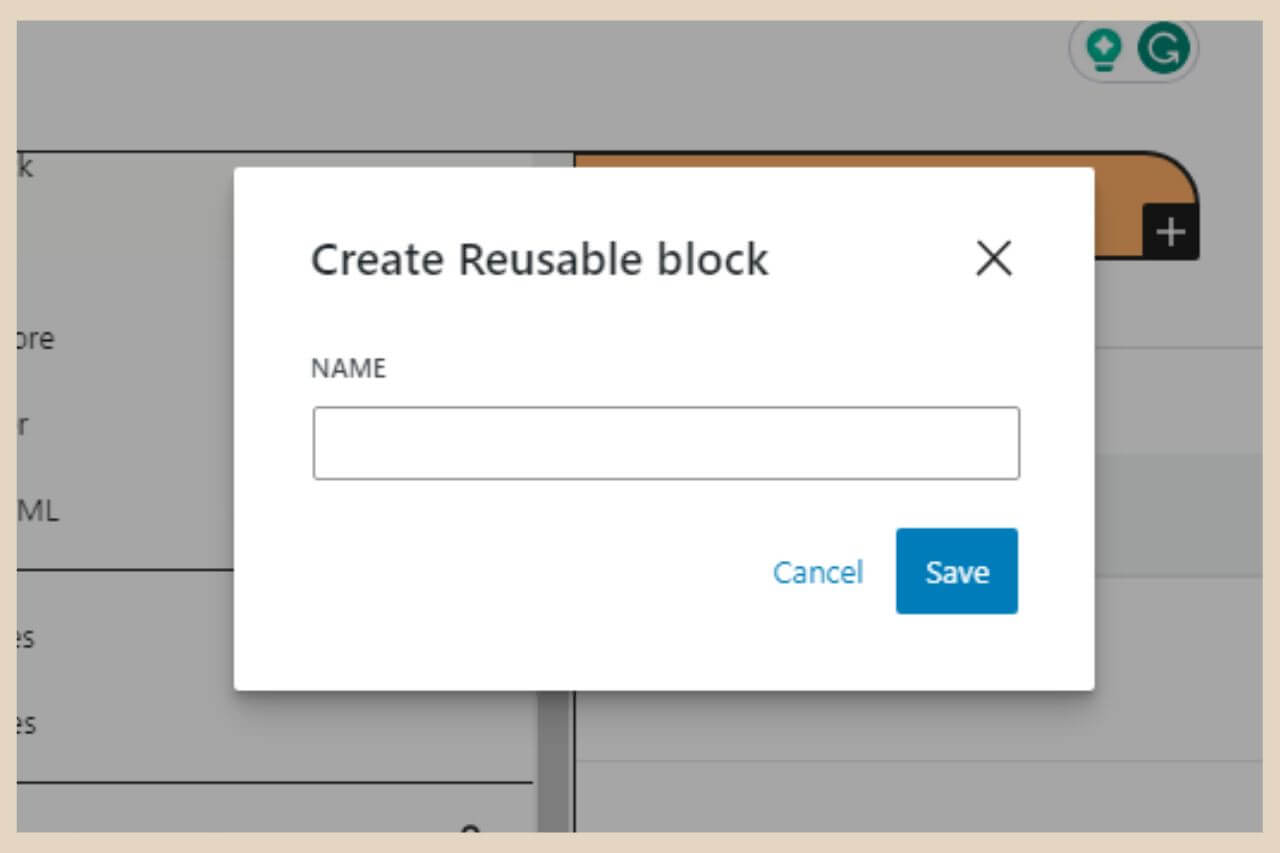
Give your reusable block a descriptive and memorable name and click the Save button to finish and that’s all there is to it. Congratulations! You’ve just created your first reusable block.
Using Your Reusable Blocks
To use your reusable blocks, you can use one of two ways to find them. The first way is to just simply click the + icon to add a new block.
You can then type the block’s name into the search box and when it appears, you can click on it to insert it into your post.
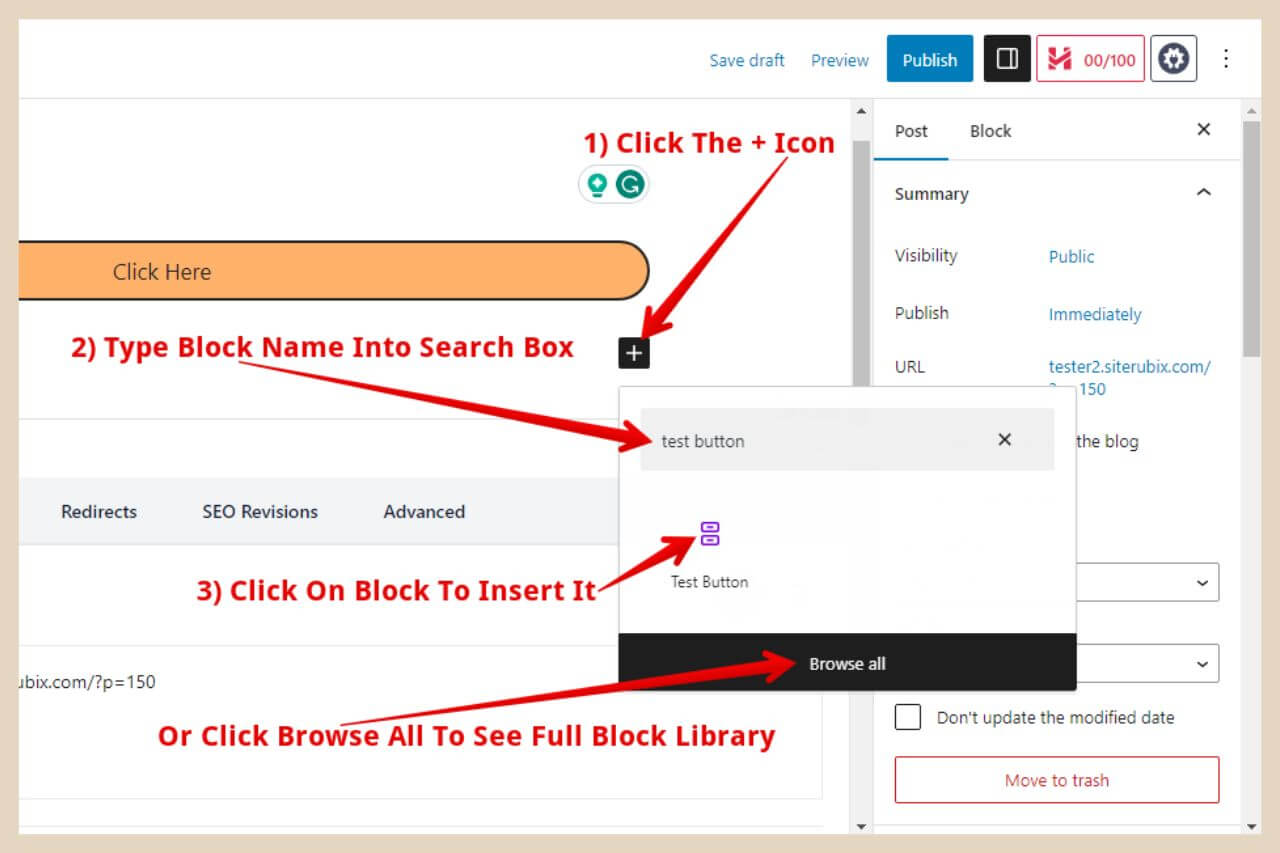
The second way is by clicking the + icon on the top left of the editor which will open up the blocks library (clicking the Browse All button at the bottom of the small add block window will take you to the same area).
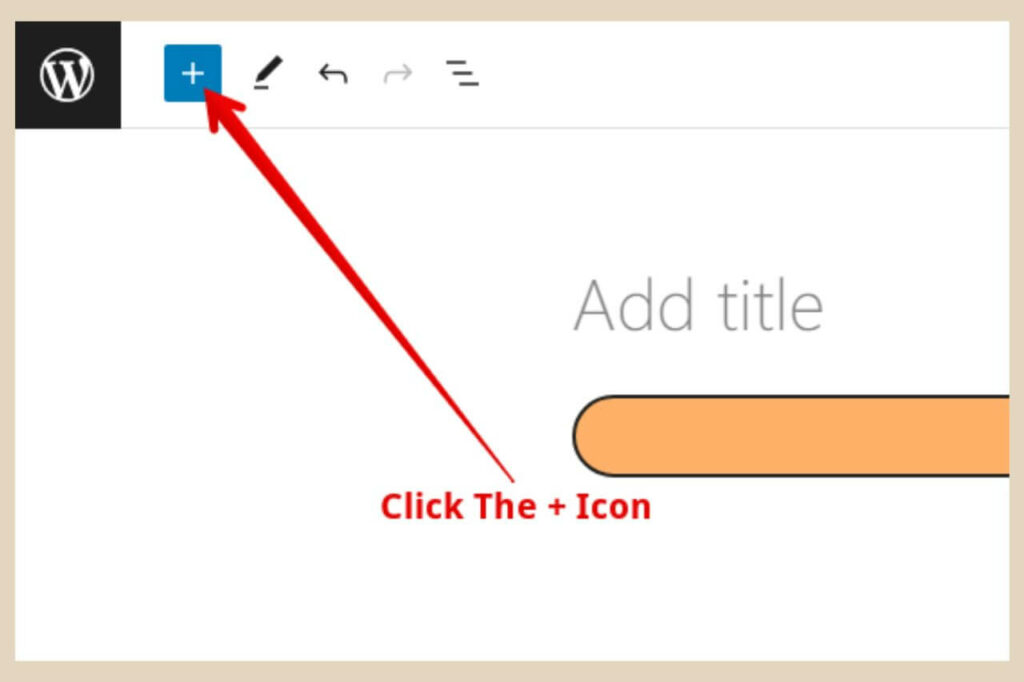
You can now either use the search box here at the top to find your block or you can click on the Reusable tab on the right underneath the search box to open up the reusable blocks area.
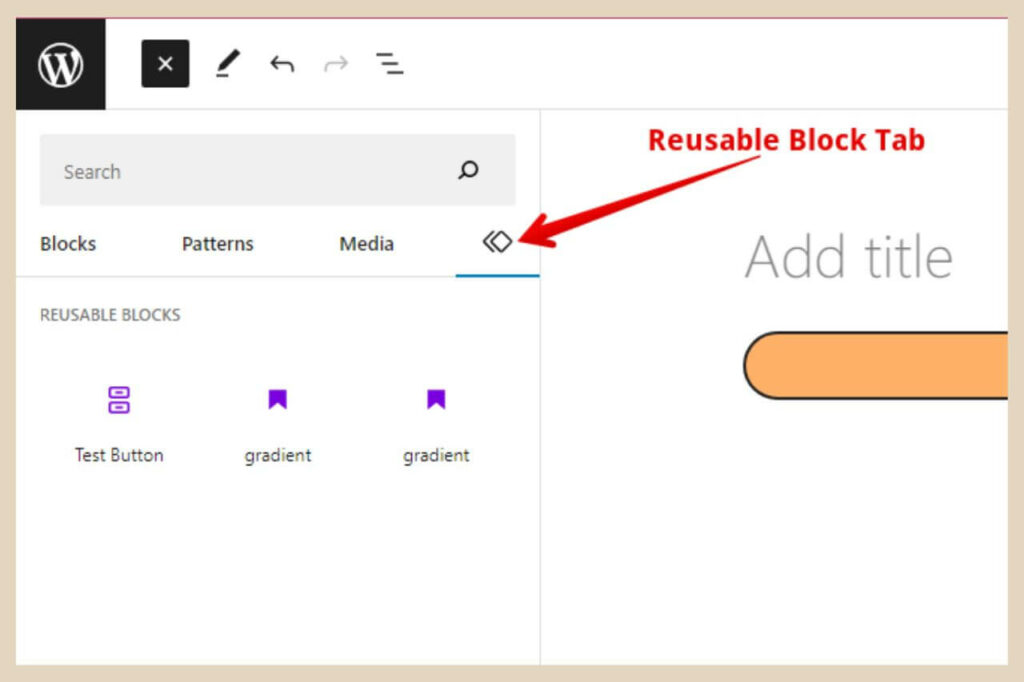
Here, you will find all the reusable blocks you’ve created and you can simply click on the one you need to insert it into your post.
Customising Your Reusable Blocks
Once you’ve created a reusable block, you can easily customise it as needed using the same techniques that you would use to customise any regular block.
Whenever you make any changes to a reusable block, all instances of it across your site will reflect the changes.
This feature allows you to maintain consistency in your design without the need for manual adjustments in multiple places.
However, if you want to add different aspects to it that will vary from post to post, for example, an affiliate link or text relating to the individual post, then you’ll need to convert the block into a regular block first before you make those changes.
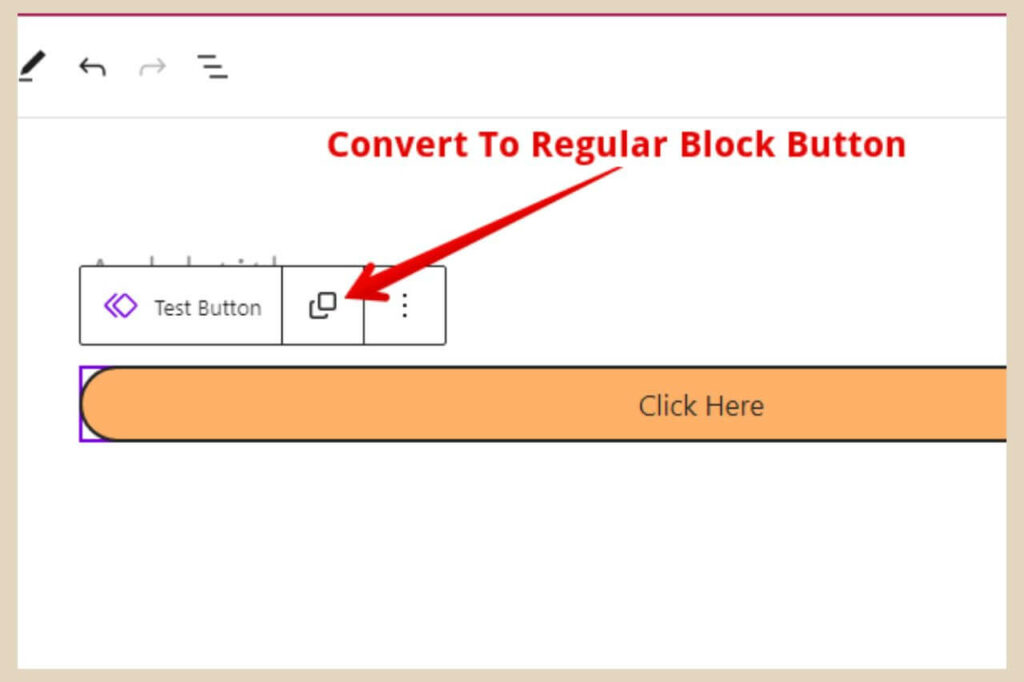
To do that, click the Convert To Regular Block button on the block’s small toolbar and the block will be converted back into a regular block.
Your customisations will still be there but you can now make additional changes to the block that will not affect the original reusable block or any of its other instances across your site.
Managing Your Reusable Blocks Library
As you create more reusable blocks, managing your library becomes essential. To view and manage your reusable blocks, head back to the reusable blocks library by using the + icon on the top left of the editor and the Reusable tab as before.
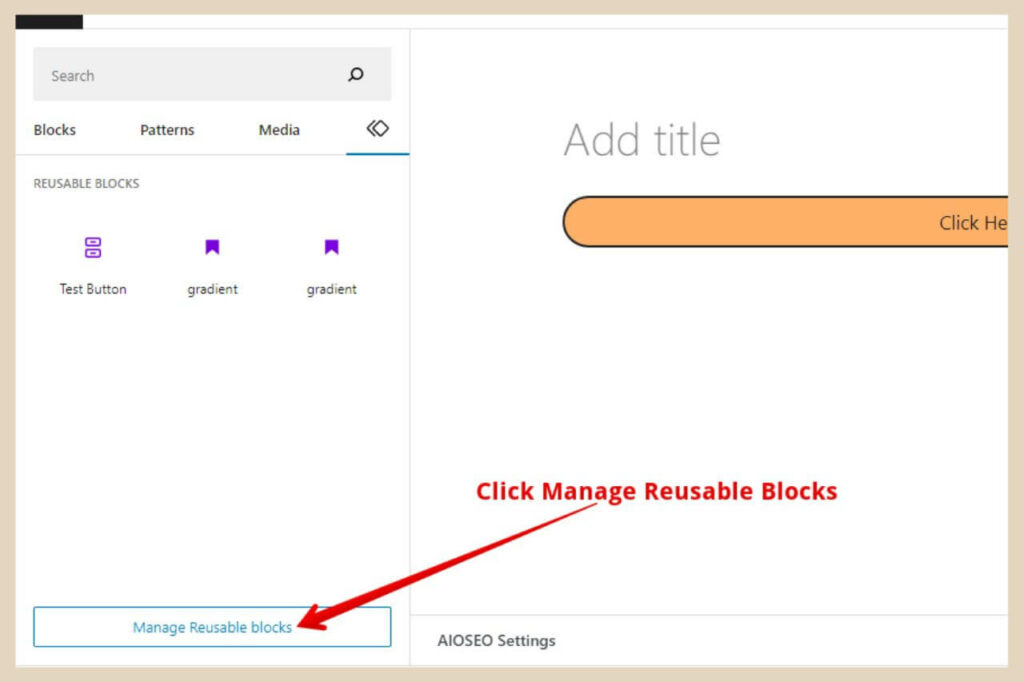
At the bottom of the reusable blocks library, click the Manage Reusable Blocks button. This will take you to the Reusable Blocks page which looks pretty much identical to your post lists/page lists page.
From here, you’ll be able to make a few changes including, deleting the block, editing the block or importing/exporting the block.
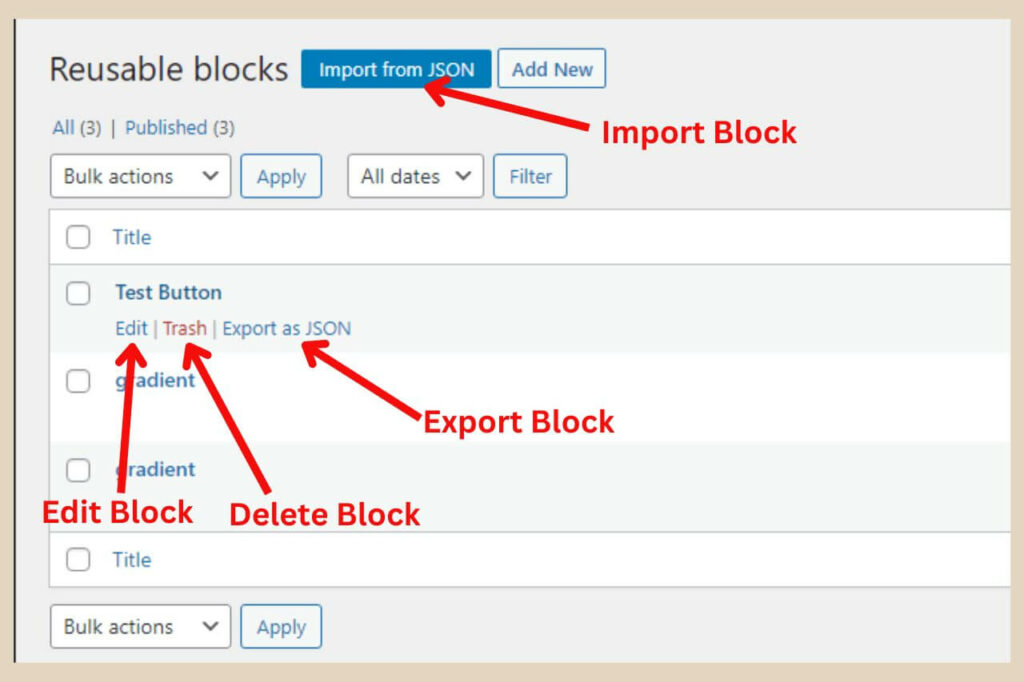
Simply hover over the reusable block you’d like to edit and some options will appear directly beneath it.
If you want to edit the block using the edit button, this will open up the block in what will look like the post/page editor.
Here, you can make any changes you wish to the block as you would in a page or post, and then to finish, you simply click the Update button.

advertisement
Your changes will be saved and reflected across all instances of the block throughout your site (except those you’ve converted, that is).
Importing/Exporting Your Reusable Blocks
If you have more than one website, you can actually import and export your reusable blocks between your sites.
To export a reusable block, click the Export As JSON button underneath the block you want to export. This block will now be downloaded directly to your computer.
To import a block, simply click on the Import As JSON button at the top of the Reusable Blocks page.
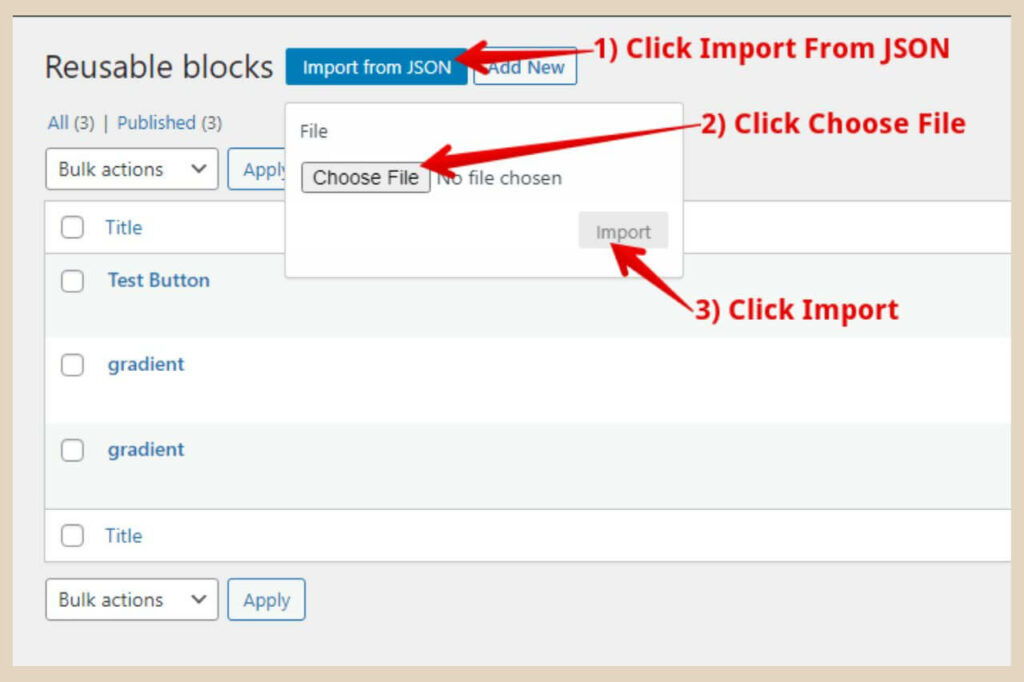
Next, click the Choose File button on the small window that appears to browse your computer for your exported block.
Once you select it, you’ll be brought back to the small window where you’ll need to click the import button to finish.
Your new imported block will now be listed will all your other reusable blocks so you’ll be free to use it as and when you please.
Let’s Create Some Reusable Blocks
Creating reusable blocks in WordPress opens up a world of possibilities for enhancing your content creation workflow.
By leveraging this powerful feature, you can achieve consistency and efficiency in managing your website’s content.
So, why not give it a go and try creating your very own reusable blocks and experience the convenience they bring to your WordPress journey?
I hope you’ve found this tutorial helpful but as always, if you need more help then please feel free to let me know in the comments below and I’ll be more than happy to help you out.
Happy Reusable Block Creating!

You May Also Like
- How To Display Recent Posts With Thumbnails In WordPress
- How To Add An Affiliate Disclosure To Your Posts
- What Is Wealthy Affiliate – Everything You Need To Know

