Do you want to know how to write blog posts with ChatGPT? Well, in this walkthrough, that’s exactly what we’re about to do.
ChatGPT has become a seriously valuable tool for a lot of different businesses and that includes us bloggers too.
It can be used to help us with almost every aspect of our blogging chores and it can skyrocket our productivity and content creation through the roof.
So let’s get to know our new digital best friend (if it’s not already, it soon will be!) a little better and get it to write an entire blog post draft for us.
Are you ready to have your blogging world rocked? Well too late because it’s about to be!
How To Write Blog Posts With ChatGPT
If you’ve been playing around with ChatGPT for a while then you’ll already know just how valuable and time-saving this little chatbot is.
From brainstorming content ideas to creating entire blog post drafts, there’s not much that this digital companion can’t do.
It can even help you with your social media posts from your Tweets to your entire Pinterest pin creation. So without further ado, let’s go through the process of creating entire blog posts.
As I was using the cat niche in my previous brainstorming with ChatGPT post, I might as well stick with it again here with this one. So, head over to ChatGPT and let’s get this walkthrough going.
Creating Blog Post Titles
I’ll assume that you’ve already been using ChatGPT for brainstorming your content ideas so let’s now look at how to turn these ideas into entire blog posts.
One of the first things that you can start with before diving into the full post creation is coming up with catchy titles for your new blog post and ChatGPT is actually really good at this.
Simply type the blog post idea into the “Send a message” box at the bottom of the screen using a prompt like the one below to get some title ideas from your chatty friend.
Can you suggest 10 catchy blog post titles for the “Name of blog post idea” blog post idea?
In this particular instance, I’ve gone with a blog post idea that ChatGPT previously suggested whilst brainstorming called “How to introduce a new cat to my existing cats” and here’s a screenshot of the title suggestions it came back with.
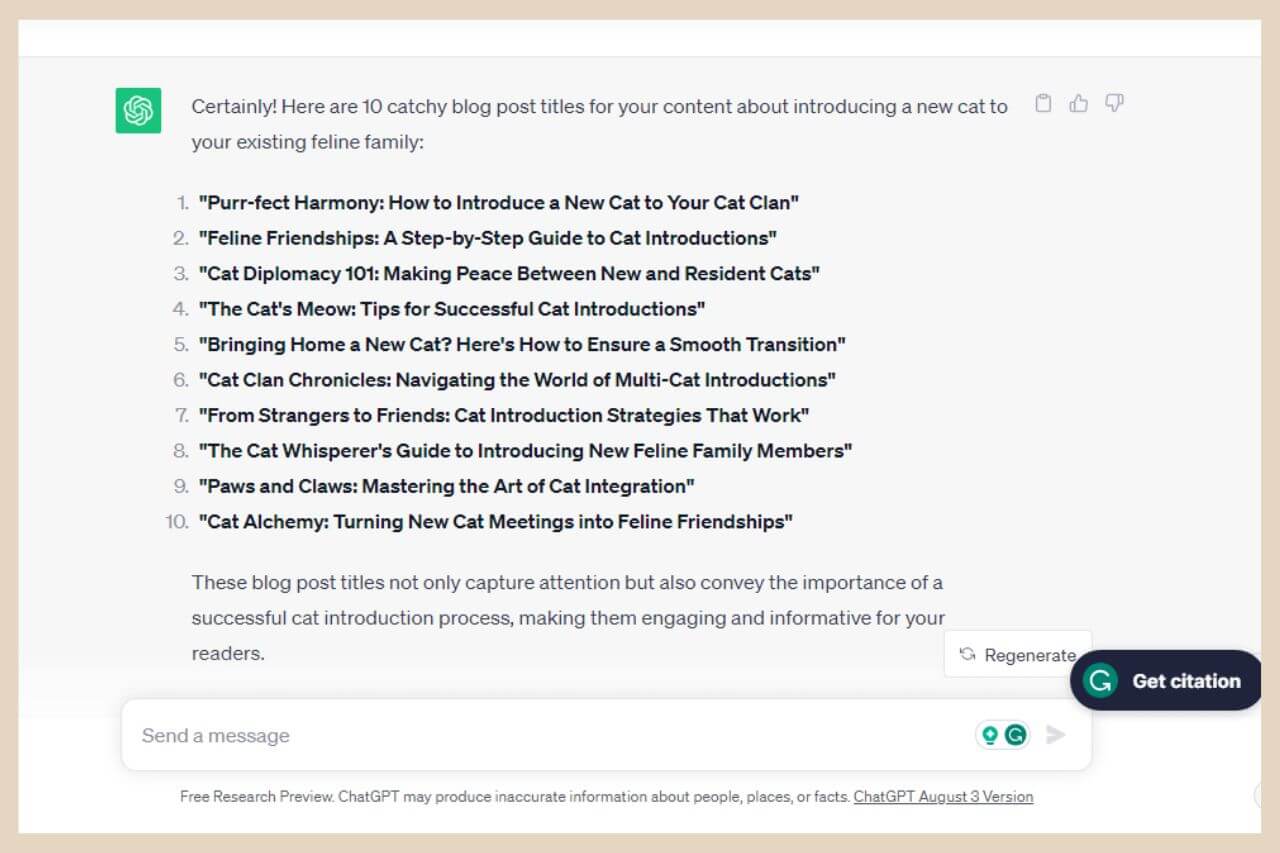
Now, you probably have a targeted keyword that you’d like to include in the title so you can simply add “including the keyword [targeted keyword]” to the prompt above.
Chatty will generate some title ideas but it’s a bit hit and miss with using the keyword provided in all of them.
However, it will get pretty close so you can always take the title ideas and fit your keyword into it if ChatGPT doesn’t quite get it right. It still gives pretty catchy title ideas regardless.
So, for this walkthrough, I’ve decided to go for the first title it suggested which is “Purr-fect Harmony: How to Introduce a New Cat to Your Cat Clan” and from here, the next step is to create a blog post outline.
Creating A Blog Post Outline
When it comes to blog post outlines, ChatGPT will always include an introduction and a conclusion then depending on the topic, you can expect to see several heading sections in between.
I’ve had some outlines with as little as 5 heading sections and I’ve had others that have had more than 10 so if you’re not happy with the amount of heading sections ChatGPT outputs, you can always add “aim for x headings” to the end of the prompt.
So, to create a blog post outline, simply use a prompt like the one below (adding “aim for x headings” to the end if you want a specific amount).
Can you create a blog post outline for “Name of blog post idea”?
In this particular case, Chatty came back with 9 heading sections so when you include the intro and the conclusion, that’s 11 sections in total, which I’m more than happy with.
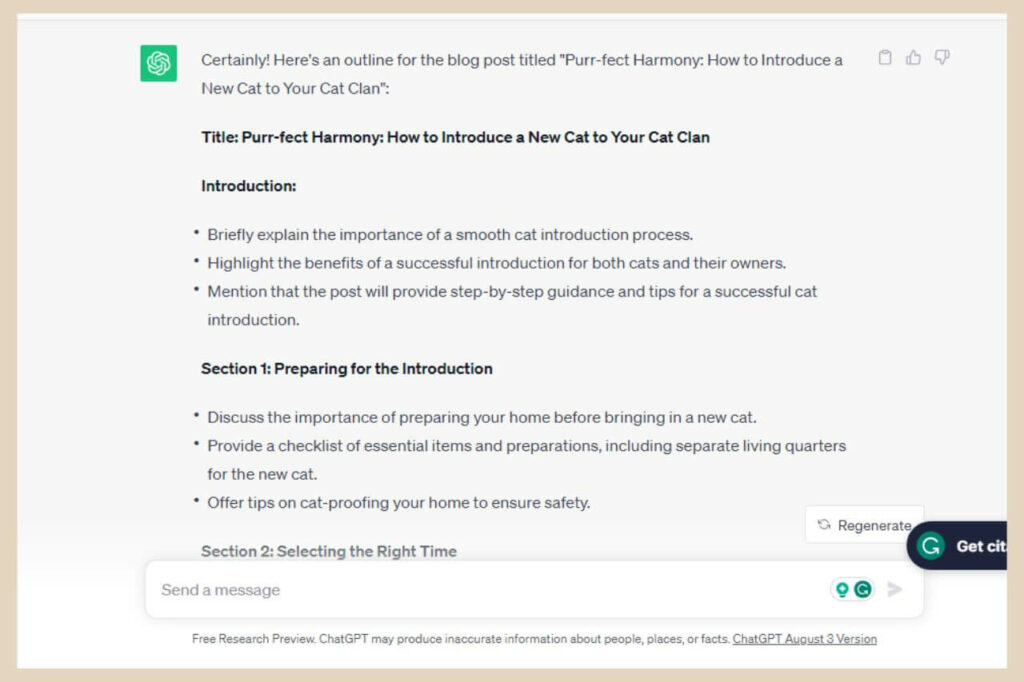
So now that we have an outline for our post, let’s get ChatGPT to help us write this thing and I’m emphasising the word help here which I’ll explain in a moment.
Creating An Entire Blog Post
First things first, ChatGPT isn’t good with long-form content so if you ask it to write the entire post in one go, you’ll be lucky if you get more than a 500-word draft from it.
So, the best way to tackle this is to ask Chatty to write each section one at a time but we can get pretty specific here with our prompts.
For example, you can ask it to aim for a certain number of words or a specific writing style if you want to. You can also ask it to include keywords or even particular points that you’d like it to include in each section.
Now, here’s where things can get a little interesting particularly depending on the writing style you’d like ChatGPT to use.

I always go for casual but old Chatty can sometimes turn into quite the quirky and sassy so-and-so.
To be honest, Chatty can be pretty sassy and quirky regardless of what style you ask it to write with but if you go with casual or even worse, humorous, Chatty will run with it so prepare yourself ?.
Sometimes it’s very hard to believe that this stuff was actually created by an AI chatbot.
In fact, let’s have some fun with this next part and see what ChatGPT does with each of the different styles so let’s start with the very first section.
Start With The Introduction
We’ll do this in the order that ChatGPT has outlined so we’ll start with the introduction.
Feel free to change the writing style and word count to your own preference (and add anything else you want to include at the end) but for the sake of this walkthrough, I’m going to start with a casual writing style using the following prompt.
Can you write the introduction and aim for 200 words keeping the style of writing casual?
Now on this particular occasion, Chatty kept its sassiness down to a minimum as you can see from the screenshot below but this is very human-like nonetheless.
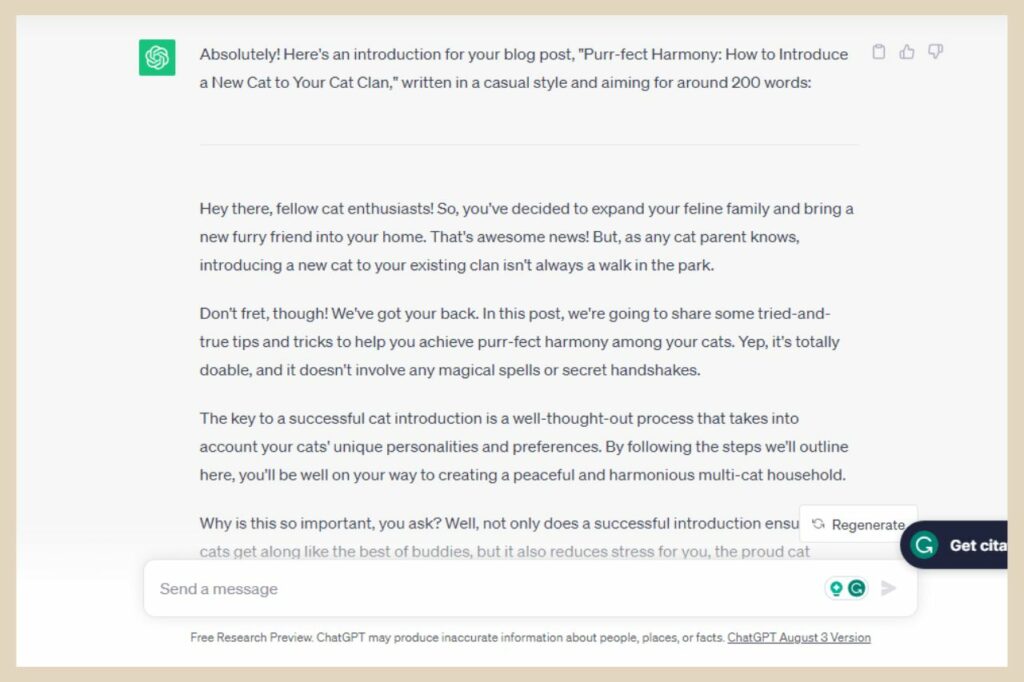
Now, on the other hand, when I changed the writing style from casual to humorous, Chatty started dropping one-liners like they were going out of fashion.
Changing The Writing Style For Different Results
As you can see in the below screenshot, some of them are a little lame and corny but still, you’ve got to love a trier, right?
And Chatty really is a true trier and quite often it will come back with some pretty amusing content.
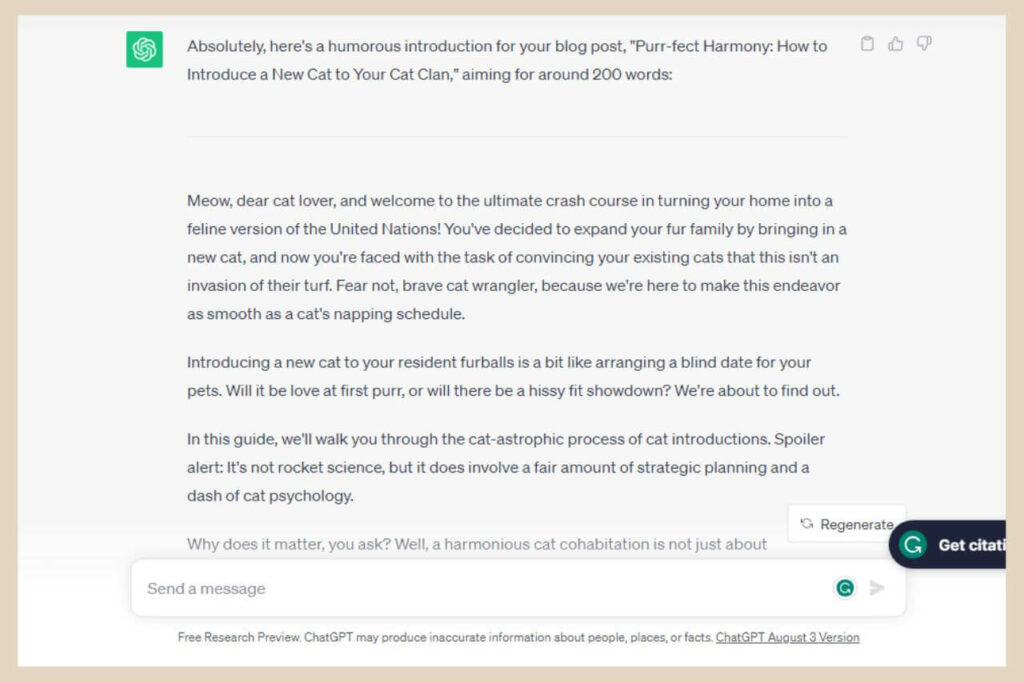
To be honest, I’m kind of enjoying what it’s putting out here with the humorous style but obviously, this isn’t going to work very well if you’re writing a very serious blog post.
However, you can play around with different writing styles to see which one resonates with you the most or which one is closer to your own writing style.
You can essentially make it as silly or as serious as you please. Heck, you can even mix it up a little and ask for a combination.
However, don’t go too mad with too many in the one prompt otherwise, you’ll confuse the poor thing and you’ll end up with a very weird blog post draft that looks like it doesn’t know what mood it’s in!
Rinse And Repeat With Each Of The Other Sections
Once you’ve decided what writing style you like (if you’ve used one which you don’t have to), you can then move on to the next section with a prompt like this.
Can you write the next section “Name of next section” and aim for 200 words keeping the style of writing “Writing style choice”?
The next section after the intro in my case was “Preparing for the Introduction” and I decided to keep the style of writing humorous and this is what Chatty came back with.
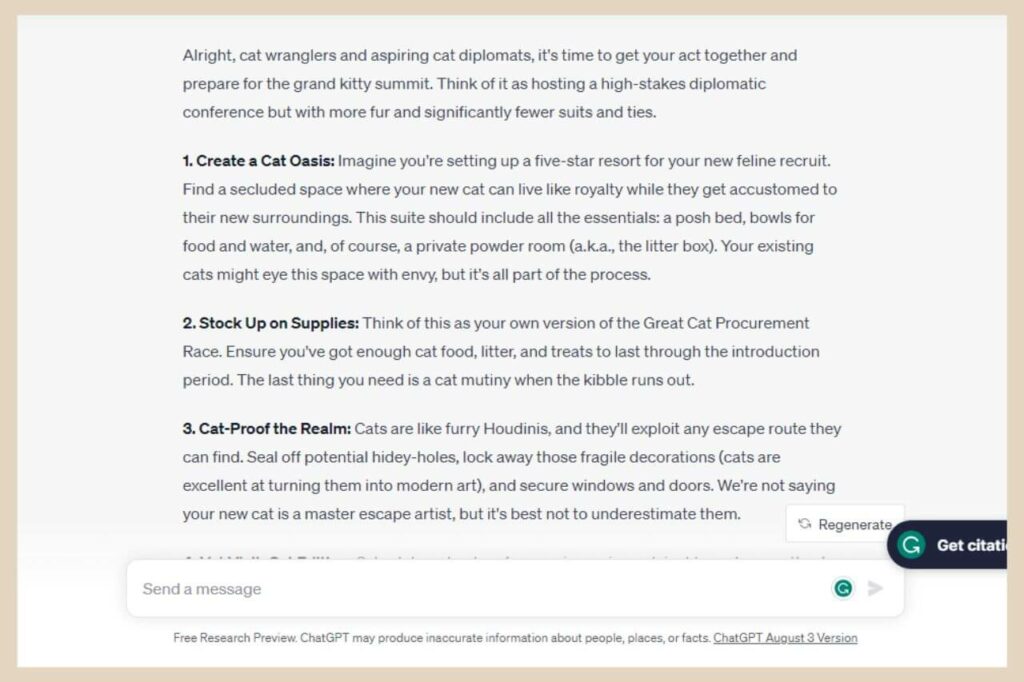
It did a pretty good job with the humour in this section so kudos Chatty, kudos. At this point, you can now repeat the same prompt with each individual section all the way down to the conclusion.
Copy Or Regenate The Responses
On the top right-hand side of each response ChatGPT outputs, you’ll see a copy button so you can copy each response individually and paste it into a Google Doc or whatever writing tool you’re using.
You can also rate the responses using the thumbs-up or thumbs-down buttons which are next to the copy button.
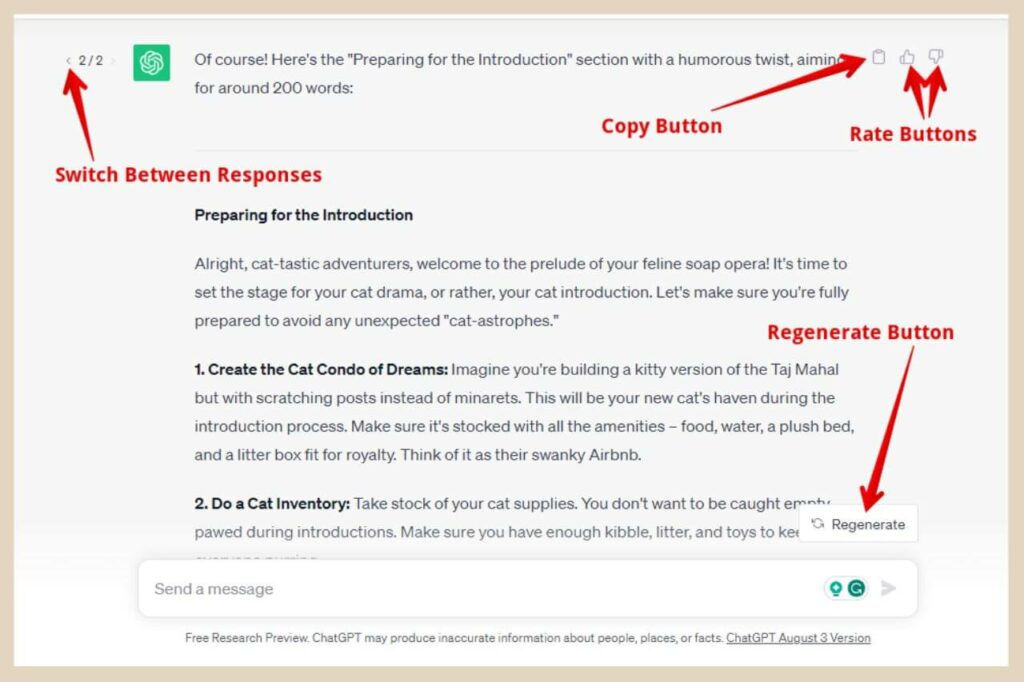
You can also click the Regenate button if you want ChatGPT to respond again to the same prompt with a different output.
When you do that, you’ll now see a 2/2 (or numbers representing how many times you’ve clicked Regenate) on the top left-hand side of the prompt response with a small arrow next to it.
This represents the different versions of the responses and you can click the arrow to switch between them.
So, at this point, you should now have a full draft of a blog post so let’s see what that gives us with this particular example.
ChatGPT gave me 11 sections as an outline so that means that with the 200 words I requested with each prompt, that equates to a 2200-word draft blog post!
And it was generated in a matter of minutes! Now, that’s pretty epic if you ask me. But now it’s time to figure out what to do with this draft blog post because trust me, you’re going to want to make some changes to it.
Don’t Just Copy, Paste And Publish ChatGPT Content
Remember earlier on when I mentioned using ChatGPT to HELP write a post? Well, as tempting as it may be to just copy, paste and publish, this is definitely not the best idea and for several reasons.

Yes, Chatty may have produced what looks like awesome content but there are a few things you need to take into consideration first before you run with it unedited.
Firstly ChatGPT doesn’t always get its facts straight so you need to fact-check everything that it generates.
Secondly, although ChatGPT won’t intentionally copy content word for word or output the same exact response twice, you still need to be careful of plagiarism.
So to ensure that your content is completely unique, you can use the free Grammarly Plagiarism Checker to make sure that none of your AI content is considered copied.
Adding Your Own Human Voice
The third one and quite possibly the most important one is adding your own voice and human element to the content.
Even though ChatGPT can generate some pretty epic human-like content, it’s still not quite the same and it’s pretty noticeable to anyone who knows what AI-generated content looks like.
For starters, Chatty loves to repeat itself, A LOT and if you read through all the sections in one go, you’ll notice that pretty quickly.
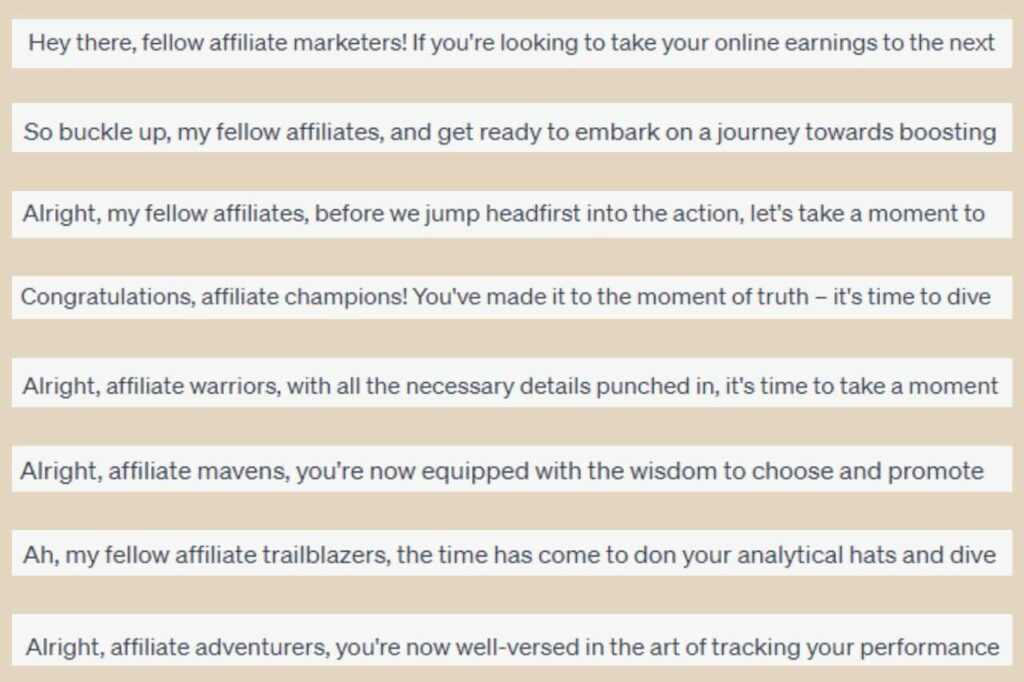
If you look at the screenshot above, you’ll notice that Chatty keep starting its sentences in a very similar fashion with “fellow affiliate”, “affiliate warriors”, “affiliate champions”, etc.
This was one blog post draft of around 2000 words and Chatty did this around 30 times throughout the draft which is roughly every 66 words so as you can imagine, it didn’t read very naturally.
It also quite often repeats entire points that were already covered in another section making the whole post look very stretched out and repeatative.
And it loves to make analogies for pretty much EVERYTHING. So you’ll find a lot of “it’s just like….” or “think of it as….” and it does that frequently throughout the content it generates.
As I said, anyone who’s been using ChatGPT for a while can spot its content pretty easily when it’s not edited.
It’s these little writing traits that make it quite recognisable once you start noticing them which makes it not so original and in the world of blogging, originality is king.
It also won’t sound like any of your other content which your readers may notice so it’s better to add your own unique flair to it to make it uniquely yours.
Chatty Has A Thing For Certain Words And Phrases
By the way, I think Chatty may have been a pirate or some kind of avid traveller in its past digital life because it sure is obsessed with treasure and treasure troves and going on journeys.

In fact, it may have even been a scuba diver because it loves “diving in”. Oh, and also, everything is your “trusted sidekick”.
To be honest, I’ve actually found myself now using the terms “sidekick” and “let’s dive in” without even realising it. Darn it Chatty, you’ve rubbed off on me.
But here’s the thing, It’s there to give you ideas and inspiration and help you improve your own writing so there’s nothing wrong with its style and quirkiness rubbing off on you.
You just need to make sure that you edit and customise it and add your own unique human voice, expertise and personal touch to it.
Once you’ve fact-checked, edited and tweaked the draft to your own liking, you can actually copy and paste it back into ChatGPT for one last final review.
Just asked Chatty for its feedback on you’re consistency, readability, flow, etc, then once you’ve made your final tweaks and adjustments, you’re good to go with your brand-new blog post.
Let’s Get Blog Post Writing With ChatGPT
And there you have it. An awesome tool that can make content creation faster and easier than ever before.
So whether you’re using it for brainstorming, content drafts or social post ideas, it’s highly likely that it’ll become a regular addition to your blogging AI toolbox.
In fact, it will become such a common and valuable tool in your blogging arsenal that you’ll wonder how you ever survived without it.
I hope you’ve enjoyed this walkthrough and as always, please feel free to share your own ChatGPT stories and thoughts in the comments below. I’d love to hear all about them.
Happy Blog Post Writing With Chatty!

You May Also Like
- How To Display Recent Posts With Thumbnails In WordPress
- How To Add An Affiliate Disclosure To Your Posts
- What Is Wealthy Affiliate – Everything You Need To Know


