So you want to learn how to start a blog for free, but you’re wondering if that’s really possible? Well, it absolutely is, and I’m going to show you exactly how to do it using free blogging platforms and free blogging tools.
Free blogging platforms are a great way to dip your toes into the blogging pond without the financial commitment. They make it easy to set up, write, and share your ideas online in just a few minutes, all without ever reaching into your pocket.
Are there limitations to going “free”? Yes, there are, and I’ll cover those in more detail later on, but if budget is an obstacle, then the free route is a great way to get you up and running as a blogger, especially if you’re just testing things out to see if it’s something you’ll actually enjoy.
In this guide, I’ll walk you through how to start your blog for free step by step, from choosing a platform to publishing your first post. You’ll also learn the limitations of free blogs and when it might make sense to upgrade if you want to grow or earn money.
So, let’s get started.
Step 1 – Choose Your Niche
Before you pick a platform or start designing anything, the very first step you’ll need to take is deciding what your blog will be about. This is called your niche.
Your niche is the main topic or theme you’ll focus on. It shouldn’t be too broad, but it doesn’t have to be overly narrow either. It should, however, give your blog a clear direction so you don’t end up writing about everything and nothing at the same time.
A focused niche helps you stay consistent with content ideas and attracts the right readers who are genuinely interested in your topic. It also helps you build authority over time by becoming “the blog” people turn to for that subject.
How to Pick a Beginner-Friendly Niche
Believe it or not, choosing a niche is often very difficult for beginner bloggers, and many get stuck right here for days or even weeks before having that eventual light bulb moment. But it doesn’t need to be difficult. Start by listing off your interests/hobbies and think about the topics you enjoy talking or learning about.
Next, think about your knowledge on the topic. You don’t need to be an expert, but having at least some experience helps. Even if you’re only one step ahead of your reader, that’s the step they’re looking for, and you can teach them.
Also, think about your audience and who would benefit from your writing. What type of information are they looking for, and what do they need help with?
You can start with a broad idea, but try to narrow it down to keep your blog more focused, e.g., instead of “food,” focus on “budget-friendly family recipes”. Here are a few examples of some popular beginner niches:
- Travel on a budget
- Simple recipes for beginners
- Fitness for beginners
- Budget skincare
- Gardening for beginners
- Budget fashion
Try not to overthink it too much. Pick one niche that excites you and start writing. You can always refine or pivot later as you grow. And if you need more help figuring out what niche to choose, check out my full post on how to choose a niche for a blog for more ideas.
Step 2 – Choose a Free Blogging Platform
Once you’ve picked your niche, it’s time to choose where your blog will live. This is your blogging platform and the service that lets you create, design, and publish your posts online.
There are several free options perfect for beginners, and below is a list of some of the most popular choices depending on what you want for your blog.
- WordPress.com – Beginner-friendly, widely used, and easy to upgrade later.
- Blogger (by Google) – Simple setup, good for hobby blogging.
- Wix (Free Plan) – Drag-and-drop design flexibility, great if you care about visuals.
- Medium – Best for writers who just want to publish without worrying about design.
- Weebly – Combines simple websites with basic blogging features.
All of these platforms have their own strengths and weaknesses, so consider the long-term goal of your blog and choose the best platform that lets you achieve it.
Things to Consider When Choosing a Platform
There are several things that you should look for when choosing a blogging platform, and one of the first things is ease of use. Do you want something quick and simple (like Blogger or Medium), or do you want more design freedom (like Wix)?
You’ll also need to consider your future goals. If you think you’ll eventually monetise your blog, WordPress.com is the smoothest path to upgrade. Design needs are another consideration. If looks matter more than advanced features, Wix is a fun place to start.
But don’t get stuck at this step. Pick a platform that feels comfortable and start creating. You can always switch or upgrade later as your blog grows.
Step 3 – Set Up Your Blog (Domain, Name & Design)
Now that you’ve chosen a platform, it’s time to actually set up your blog. This is where you’ll start making your blog look and feel like your own space online.
Even with free platforms, you’ll have a few key setup steps that you’ll need to complete before you can start publishing any content, but these are all fairly simple steps to get you up and running.
1. Pick a Blog Name
One of the first things you’ll need to do with your new blog is come up with a name for it. Your blog’s name should reflect your niche and be easy to remember, so try to keep it simple and clear.
Avoid overly long or complicated words, and try to make it catchy and brandable. You can even get a little playful with your blog name, so instead of something like GardeningTips.com, you could do something like DirtHappens.com or TheDirtReport.com (Ignore the caps here; domain names tend to be all lowercase. I’ve only written them this way to make them easier to read in this post).
If you’re really stuck, ChatGPT is awesome at coming up with catchy blog names (both of those ideas above were Chatty, not me). Just tell it your niche and ask it to come up with some ideas.
The best one it came up with for the gardening niche was TheSeedySide.com, which is super playful and fun (and highly memorable), although you may attract the wrong kind of visitors with that one, but you get the idea.
2. Get Your Domain (Free for Now)
Now that you have your blog name picked out, it’s time to officially make it your domain name. On free platforms, you’ll usually get a subdomain (like yourblog.wordpress.com).
While this isn’t as professional as a custom domain, it works perfectly fine when you’re just starting out. Later, you can upgrade to your own domain (like yourblog.com) when you’re ready to buy one.
3. Choose a Theme or Template
The next step is to choose a theme or template. Free blogging platforms come with lots of ready-made themes and templates that control your blog’s look and layout, so you should have plenty of free options to choose from.
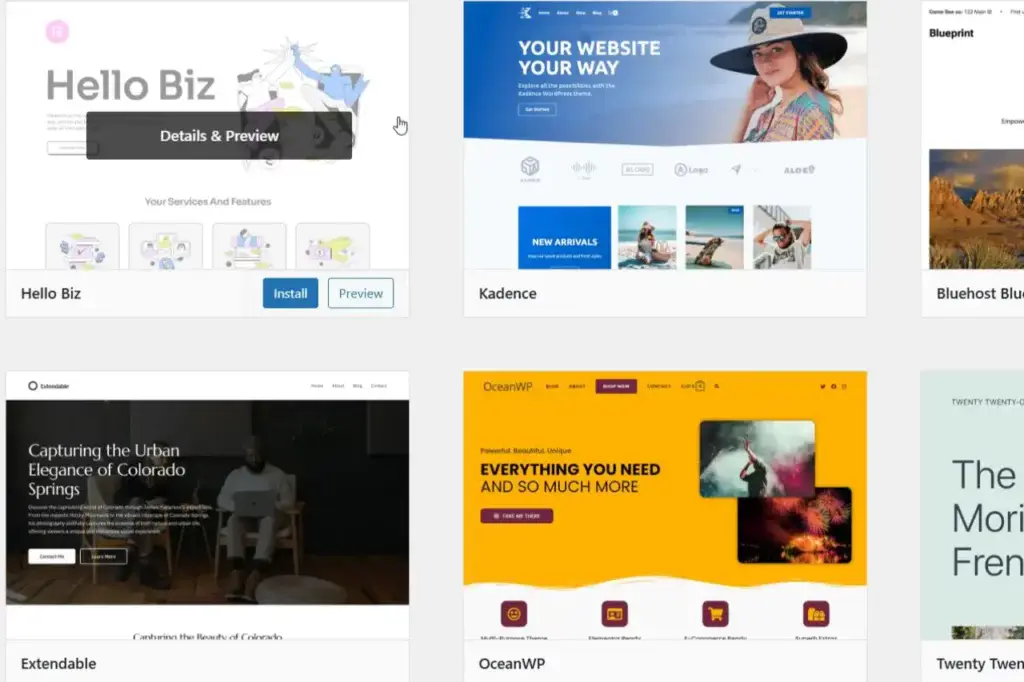
Start with a clean, simple design that’s easy to navigate and don’t stress too much about getting it perfect right away. You can always adjust and tweak things as you go.
4. Add Essential Pages
Even at the free stage, it’s a good idea to create a few essential blog pages to give your blog that professional look. These pages are usually legal pages or information pages about you and your blog. Here are some examples of pages you’ll need to consider:
- About Me page – To introduce yourself and your blog’s purpose.
- Contact page – To make it easy for readers to get in touch.
- Privacy Policy page – A legal page required on all websites that collect any kind of data (email addresses, cookies, etc.)
Don’t worry about spending weeks perfecting these, as they’re usually pretty standard pages and there are plenty of free templates available online that you can use. Focus instead on setting up quickly so you can start creating content. Your blog will evolve as you grow.
Step 4 – Write Your First Blog Post
Now comes the exciting part: writing your very first blog post! This is where your ideas, voice, and niche start to take shape. Even on a free blog, your content is what will attract readers and keep them coming back.
1. Pick a Beginner-Friendly Topic
For your very first post, choose something beginner-friendly and approachable. Something like a personal story or journey related to your niche works well here.
You could also write a “how-to” or “beginner’s guide style post to give your readers some value right away.
2. Keep It Simple and Readable
Try to keep your first blog post simple and easy to read by using short paragraphs and clear headings to break up text. Nobody wants to be greeted with a long wall of text when they land on a blog page.
You can also add bullet points or numbered lists for easy scanning, as well as including one or two images if the platform allows (Pexels.com, Unsplash.com or Pixabay.com are all great resources for free images).
3. Add a Call to Action (CTA)
Even on your first post, it’s a good idea to guide readers to take the next step by adding a call to action (CTA) at the end of your blog post. This could be something like a clickable link to follow your blog or social media.
You could also encourage your readers to leave a comment or share their thoughts. And if your platform supports it, you could encourage your readers to sign up for an email newsletter.
4. Hit Publish!
Once you’re happy, hit the publish button to get your first post online. Don’t worry too much about it being perfect. Your first post doesn’t need to be flawless. The main goal is to start publishing. You can always go back and tweak it once your writing skills improve.
Try to treat your first post as a learning experience. Focus on getting it online and experimenting with your writing style. The more you publish, the more confident you’ll become and the better your writing will get.
Step 5 – Share Your Blog With Others
Writing your first post is a huge milestone, but a blog without readers doesn’t go very far. Sharing your blog is just as important as creating content, even when you’re starting for free.
1. Share on Social Media
The first place you should consider sharing your content is on social media, so post your blog link on platforms like Facebook, X, Pinterest and LinkedIn.
Try to tailor your message for each platform to make it engaging and encourage friends and family to check it out and even share it if they’re willing.
2. Join Communities in Your Niche
Another way to share your blog is by joining communities in your niche. Places like Facebook groups, Reddit communities or online forums are a great way to get more eyes on your content.
Just make sure that you participate genuinely before sharing your blog link. It’s much better to build trust and relationships first, rather than just dropping links everywhere, which will make you look spammy and possibly get you banned from the community/platform.
3. Use Free Traffic Sources
There are also several free traffic sources that you can use to help share your blog. Platforms like Medium and WordPress.com have their own internal community, so blogs here can be easily discovered.
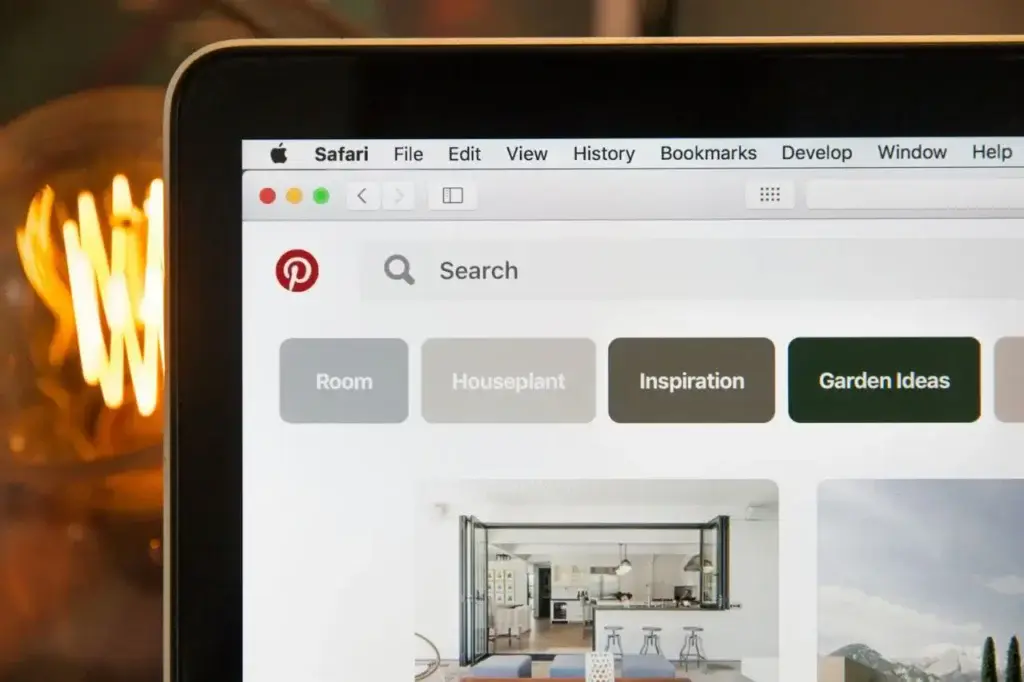
Pinterest is another great source of free traffic, and it’s a powerful one even for free blogs. Just create pins for your posts and keep consistent to grow your traffic.
Don’t worry if traffic is small at first. Consistency is key here, and sharing and promoting your blog regularly, even just a little each week, will help your audience grow over time.
What’s Missing With a Free Blog (Limitations)
Starting a blog for free is fantastic for beginners because it allows you to test the waters without spending a penny.
But it’s also important to understand the limitations of free blogging platforms, so you know what to expect and when you might want to upgrade.
Common Limitations of Free Blogs
There are a few common limitations when using free blogs, and although they may not be too much of an issue in the beginning, they can become very restricting if you want to grow your blog in the future.
1. Limited Customisation
The first limitation is customisation, which can vary greatly from one blogging platform to the next. And even though some platforms may let you customise more than others, it will still be limited in comparison to what you can do with a paid plan.
Free plans will usually restrict themes, templates, and design options, which means you might not be able to fully match your blog’s look to your niche or brand.
2. Subdomain Only
You’ll only get a subdomain, so instead of a professional domain like yourblog.com, you’ll get yourblog.wordpress.com or yourblog.blogspot.com.
This can look less polished and less professional if you want to attract a larger audience or monetise.
3. Restricted Monetisation
Monetisation may be restricted on a free blog, so ads, affiliate links, and selling products may be limited or even prohibited entirely.
4. Platform Branding & Ads
Some platforms may display their own ads or branding on your free blog. Unfortunately, you don’t earn revenue from these ads (the platform does), and it can distract readers from your content.
5. Storage and Feature Limits
Free blogs often cap storage for images and files. This can hinder how much content/imagery you can add to your blog, making it difficult to grow past a certain point.

There may also be restrictions on advanced features like plugins, email tools, or analytics, which may be either limited or completely unavailable.
6. You Don’t Fully Own Your Blog
With free blogs, you don’t fully own your blog. Your content is posted on someone else’s platform, and if the platform shuts down, changes rules, or suspends your account, you could lose everything. This, as you can imagine, isn’t ideal if your goal is to build a long-term business.
Free blogging is perfect for learning, experimenting, and testing ideas, but as your goals grow, these limitations may push you to upgrade to a paid or self-hosted platform.
When to Upgrade From Free to Paid
While free blogging platforms are perfect for beginners or hobbyists, there comes a point when upgrading makes sense, especially if you want to grow your blog, build a brand, or start earning money.
Signs You’re Ready to Upgrade
There are numerous signs that you’re ready to upgrade from a free blog, and it will become pretty apparent when that time comes.
Wanting your own domain name is one of the first signs, especially when you consider that a custom domain (like yourblog.com) looks far more professional and builds more trust with readers.
If you want to monetise your blog, then upgrading becomes a necessity because most free platforms will restrict or prohibit that ability, making it very difficult to earn any income from it.
Customisation is another big one. If you get to the point where you can no longer change things in the way that you want to, that’s when it might be time to consider upgrading.
Paid plans give you full control over your blog’s appearance and functionality, allowing you to tweak themes, add plugins, or design a totally unique layout.
If you want full ownership of your blog, then upgrading is a must. With a self-hosted blog, your content and website are fully yours, so you won’t have to worry about a platform shutting down or restricting your content.
So if and when you’re serious about growing your blog, ie, turning it into a side hustle or even a full online business, that’s the time to consider upgrading because a paid platform is usually necessary for scalability.
Benefits of Upgrading
There are several benefits to upgrading when you’re ready, and the list below is an example of just a few of the benefits you can expect to gain when you’re ready to take the plunge.
- Professional branding with a custom domain
- Freedom to monetise your blog
- Access to advanced features and plugins
- Greater control over SEO and marketing
- Scalable growth potential
And you don’t need to wait until you have a huge audience to upgrade. In fact, moving early can make your transition smoother and position your blog better for long-term success.
Let’s Get Blog Creating
Starting a blog for free is one of the easiest and most risk-free ways to test your ideas, practice writing, and explore your niche. Free platforms give beginners a chance to learn the ropes without spending a penny.
But it’s important to keep the bigger picture in mind. Free blogs come with several limitations, including restricted customisation, subdomains, limited monetisation, and less control over your content.
As your skills, confidence, and goals grow, upgrading to a paid or self-hosted platform can unlock new opportunities and help you take your blog to the next level.
So start free, focus on creating valuable content, and don’t be afraid to upgrade when you’re ready. By taking it step by step, you can build a blog that reflects your passion, attracts readers, and eventually grows into a blog you’re proud of and maybe even a profitable one.
Happy Blog Creating!

You May Also Like
- How to Start a Blog for Free – Beginners Guide

- What to Look for in a Blogging Platform – Beginner’s Guide
- Best Blogging Platforms for Beginners – Free & Paid