Last Updated: July 30, 2023
If you want to jazz up your designs on your website, then adding a gradient background colour to your blocks is one such way to do that. In this tutorial, I’ll show you how to add a gradient background to WordPress blocks.
I’ll also show you how to customise it to create your own unique gradient colour. All blocks in WordPress can be customised and many will allow you to add background colours to them.
You can add solid colours but more often than not, you can also add gradient colours too (several colours that blend and change into each other) and gradient colours can create some very awesome effects to your content.
How To Add A Gradient Background To WordPress Blocks
To add a gradient background colour, click on the block that you’d like to customise and then head to the settings area on the right of the page.
If you’re not seeing any settings here, click on the settings button to the right of the Publish/Update button to show them and make sure that Block is selected at the top.

From here, you’ll need to click the background button which will be in one of two areas depending on the block type you’re customising.
Where To Find The Background Colour Settings
If the block has no other settings then you should see the text and background colour settings straight away in the settings sections on the right of the page like the image above.
However, if the block has more options, you may need to click the half-coloured circle (the styles button) to see the colour settings area like the image below.
If you’re not seeing it in any of these areas, then you may have picked one of the very few blocks that don’t have colour-changing options (custom HTML block for example).
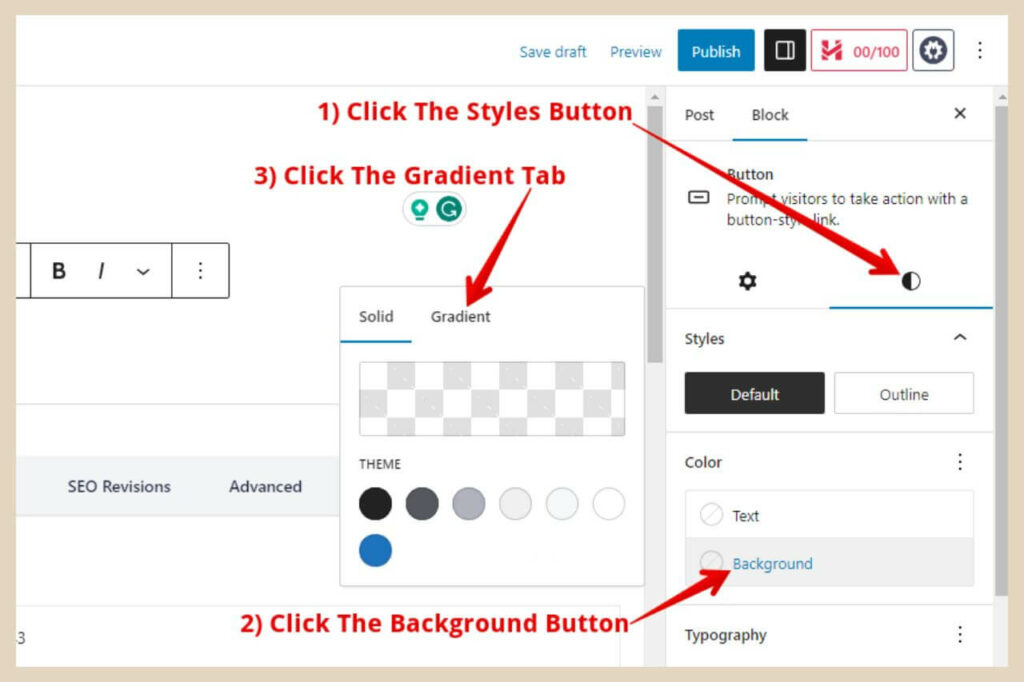
Once you’ve clicked the background button, a new small window will appear and you’ll have the option to select either a solid colour or a gradient colour using the tabs at the top of the window.
Using The Gradient Tab
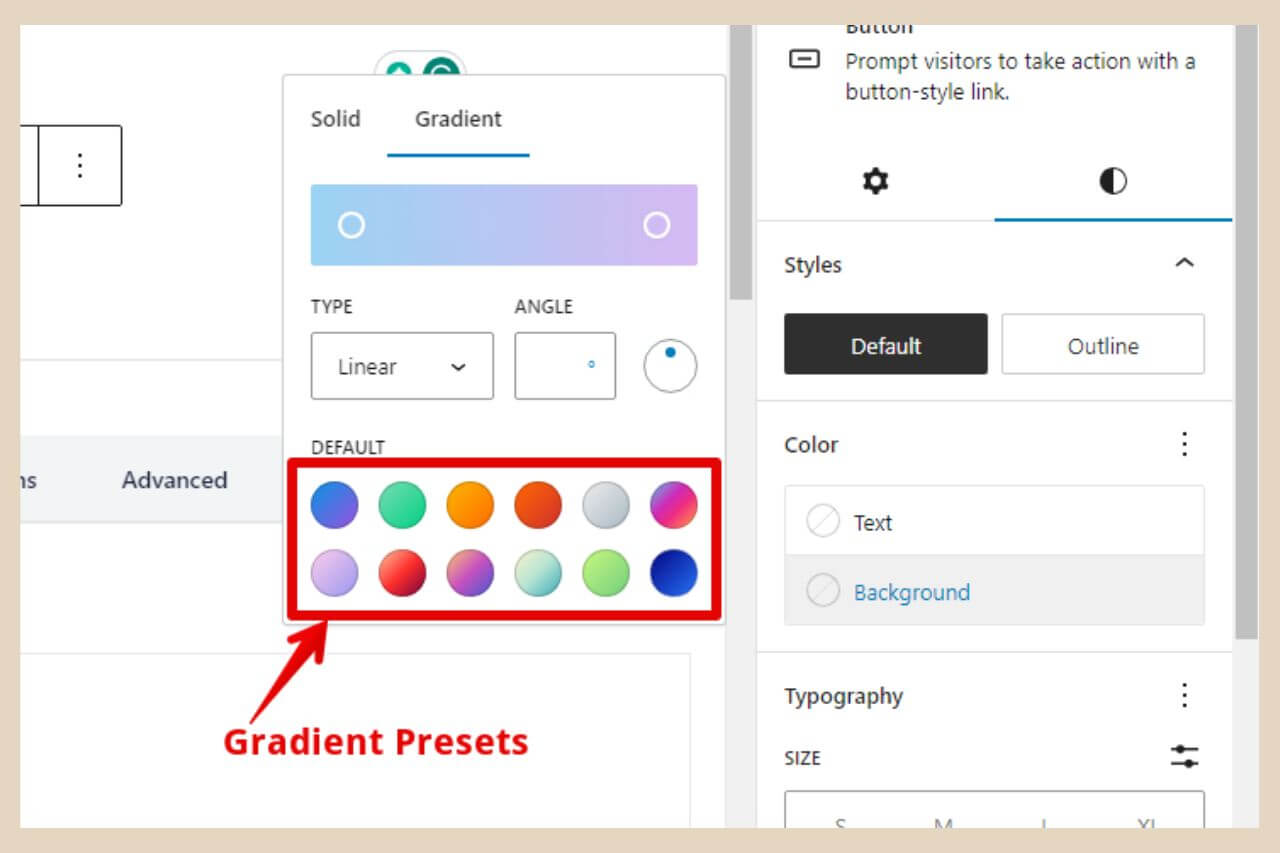
To use a gradient colour, simply click on the gradient tab and another new window will appear. From here, you’ll notice that there are a few preset gradients at the bottom of the window, and you can start by choosing one of these.
Whatever block you have selected will change to the gradient that you’ve chosen so you’ll be able to see the block background change as you make different selections.
These preset gradients, as they are, can give a very cool colour effect to your designs, but there’s a lot more that you can do with them to make them more unique.
Customising The Gradient Presets
These gradients are actually completely customisable and you can even create your own Gradient colour design by making a few changes.

advertisement
Once you’ve picked a preset gradient, it will appear in the colour box at the top of the window.
Some of these gradients will have two colours. Others will have three and there’s even one very colourful one that uses six colours.
You’ll notice in the colour box at the top of the window that there are a number of small white circles. The number of white circles will differ depending on how many colours are being used in the preset gradient.
Changing The Preset Colours
Each of these circles represents the colours within the preset and you can change all of these. To do that, simply click on any of the white circles and a new colour window will open.
From here, you can use the three different sliders to change the colour of that particular section of the preset.
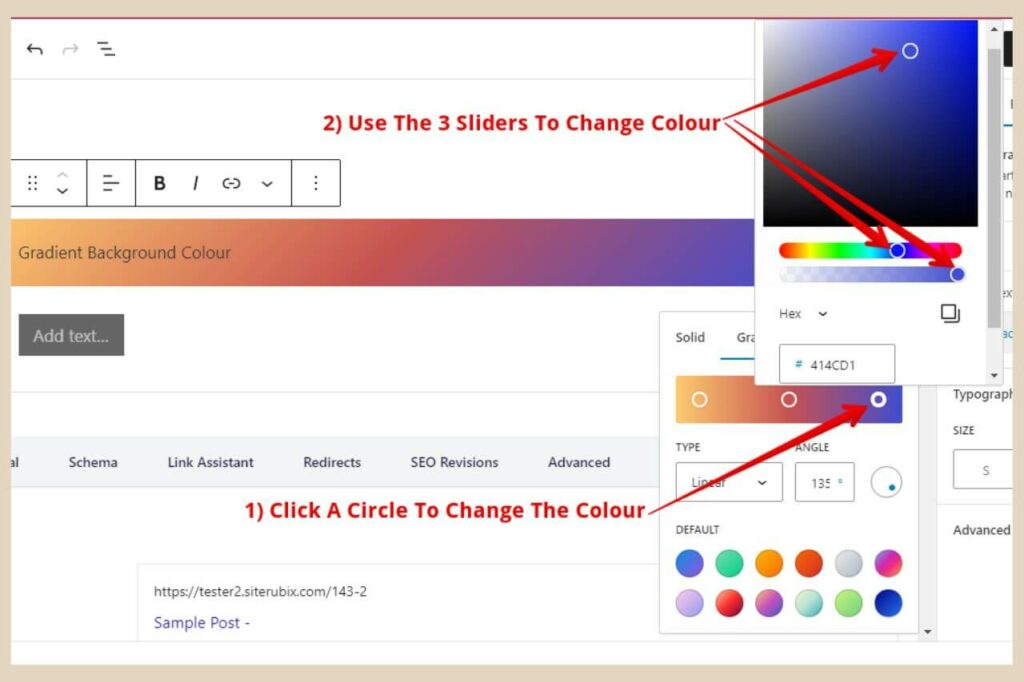
You can then repeat the process with each of the other circles to change all the colours in the preset to create your own unique gradient.
You can also move these circles closer to or further apart from each other by clicking and dragging them to change how much of that particular colour is present in the gradient and where the colour change occurs.
Reusing Your Gradient Design
If you want to use this same gradient design on other blocks, you can take note of the colour code for each of the new colours you select which will be in the box at the bottom of each colour window.
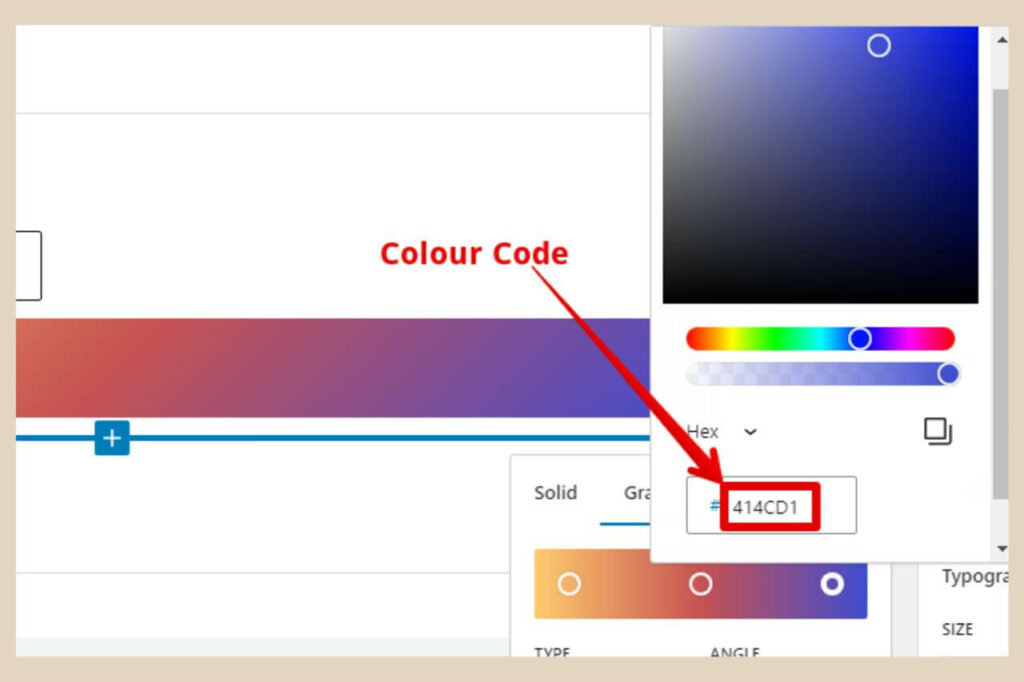
You can then pop these colour codes into the same boxes the next time you want to add a gradient background to another block to replicate the exact same gradient design.
If you’re using the gradient for the same type of block you can create a reusable block instead so that every aspect of your gradient design is saved and reusable whenever you want to use it.
Adding More Colours To The Gradient
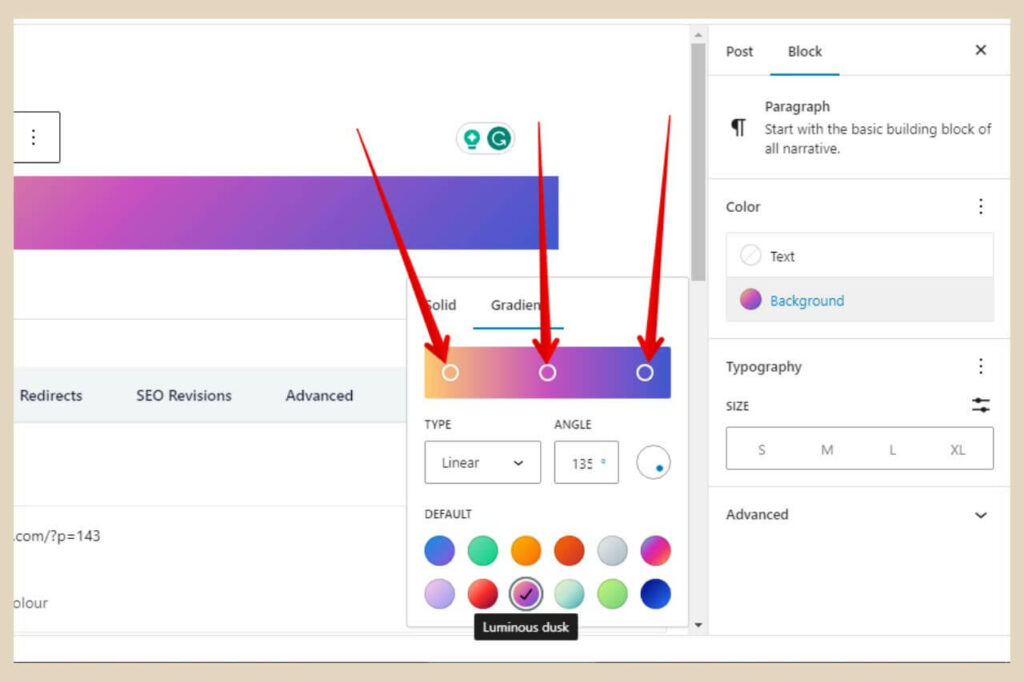
If you’d like to add more colours to the gradient, you can also do that too very easily. If you hover your cursor over the colour box at the top of the window, you’ll notice that a small plus icon appears and this lets you add more colours to the preset.
So you can simply click anywhere between the existing white circles to add more. When you do add a new circle to the colour box a new window will appear immediately to prompt you to select another colour.
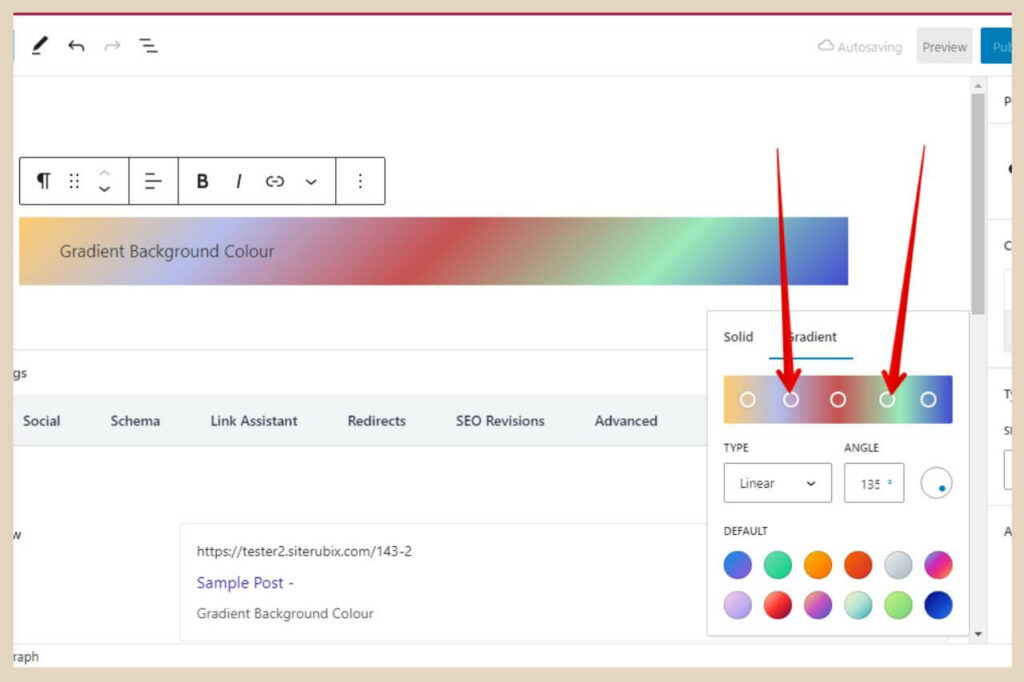
This colour will now also be added to the preset to change its gradient appearance and you can add as many as you like until you’re happy with the result.
In the above image, this was a three-colour preset but I’ve added two more colours to it and doing that has completely changed its look.
Customise Your Gradient Further
There are a couple of more things that you can do with these gradients and that’s changing the gradient type and the gradient angle.
If you use the dropdown arrow in the Type section just below the colour box, you can choose between a linear gradient or a radial gradient.
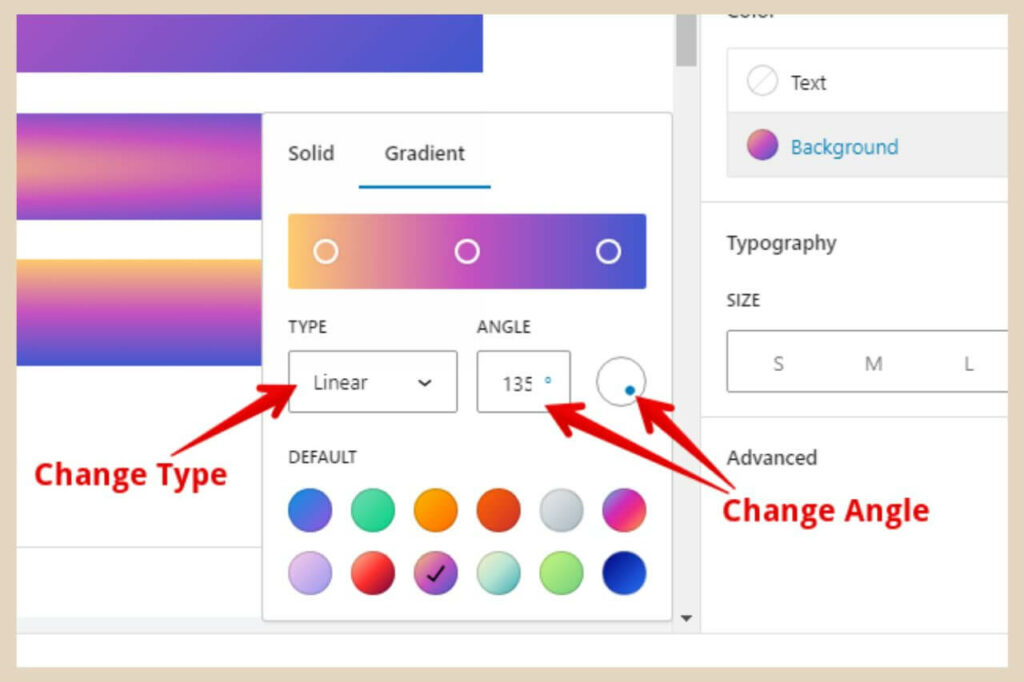
A linear gradient will change colour in a line so for example from left to right, top to bottom, top left corner to bottom right corner, etc and you can change the angle of how the colour changes.
A radial gradient on the other hand will change colour from the centre of the area moving outwards towards the edges.
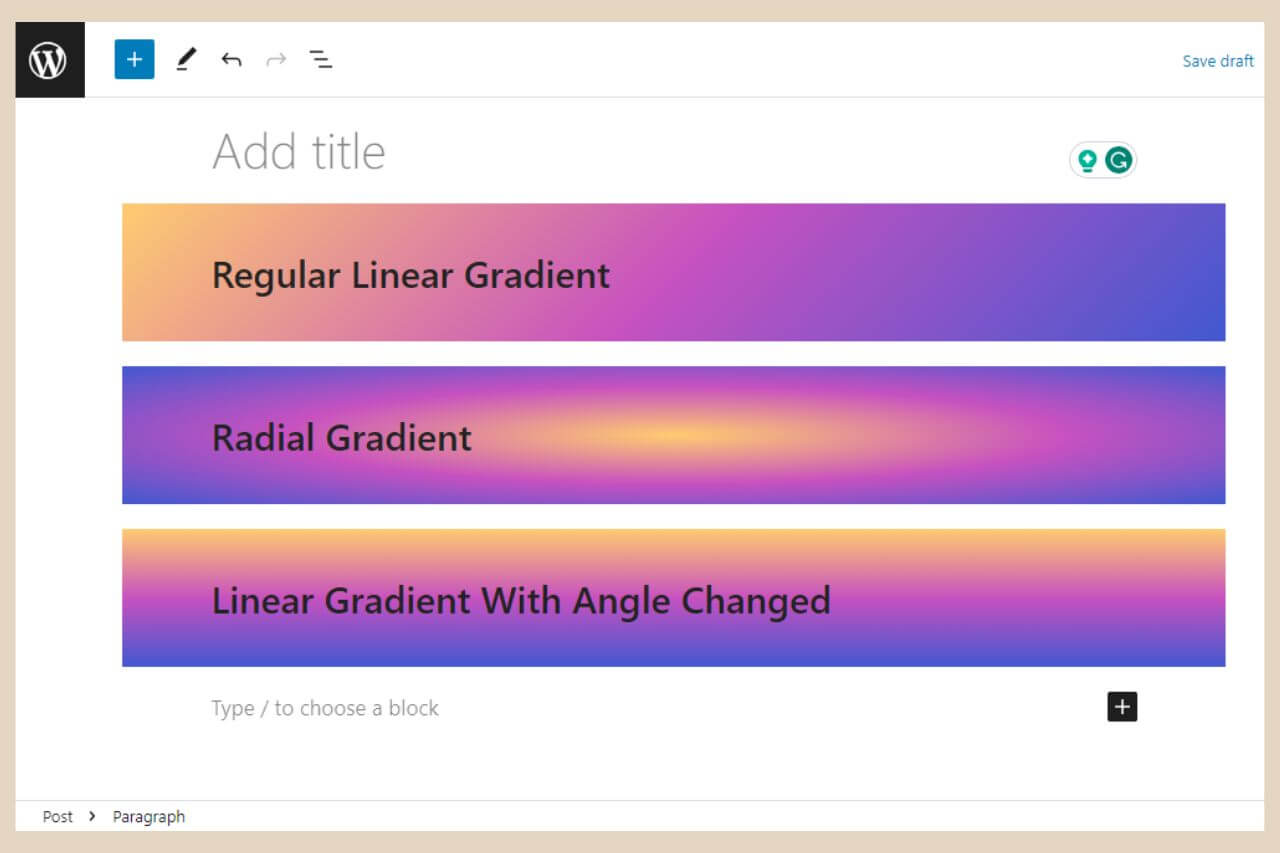
The image below is an example of a linear gradient, a radial gradient and another linear gradient which has had its direction changed and as you can see, they do create pretty different effects.
To change the angle of a linear gradient, you can either change the number in the Angle box or an even easier way to do it is to just click and drag the small blue circle within the larger white circle next to the Angle box and this will adjust the angle as you move it around.
Let’s Play With Some Gradients
Using gradients is really simple and you can completely customise them to your own liking to add some colour pizazz to your content.
So whether you’re creating columns or creating your own buttons, or maybe you’re just highlighting important sections of your post, these gradients can be used to make your post sections stand out even more.
Even if it’s just to add a splash of colour to an otherwise plain white colourless article, these gradients are well worth taking a look at.
As always, I hope you’ve found this tutorial helpful and if you do need any more help, please let me know in the comments below and I’ll be more than happy to help you out.
Happy Gradient Creating!

You May Also Like
- How To Display Recent Posts With Thumbnails In WordPress

- How To Add An Affiliate Disclosure To Your Posts

- What Is Wealthy Affiliate – Everything You Need To Know